In this example, we will discuss about Apache Maven “Hello World” Example. Before we start with this article, it is expected that we have a basic understanding of how software development works with Java. It would also be good if we have an exposure to software build and deployment process to understand the usage and the working of the Apache Maven better.
Maven is a Java tool, so we must have Java installed in order to proceed.
1. Introduction
Apache Maven is a software build tool just like Apache Ant but Maven has some advanced features which in addition to providing software build, support the developer at the whole process of a software project. A typical build tool generally helps with compilation of source code, running the test cases and packaging the result into JAR files. In additional to these typical build capabilities, Maven can also perform related activities, e.g., create web sites, upload build results and/or generate reports.
Maven also allows the developer to automate the process of the creation of the initial folder structure for the Java application, performing compilation, testing, packaging and deployment of the final product. It is implemented in Java which makes it platform-independent. This is the reason nowadays, Apache Maven is gaining more popularity than other build tools.
In this tutorial, we will see how to build a Maven project structure, both via command line and in eclipse. We will be using Java v 1.8 , Eclipse Oxygen and Apache Maven v 3.5.0. In order to better understand Maven, we will also cover few common terms that are popular while using it (core concepts of Maven).
2. Maven – Core Concepts
There are several key concepts to understand when we talk about Maven. Few of those are listed below:
Project Object Model (POM) – It is the fundamental unit of work with Maven. It is an XML file that contains information about the project and configuration details used by Maven to build the project. It contains default values for most projects. Instead of having build.xml or project.xml or maven.xml, we have pom.xml in a maven project, that contains all the goals that can be executed. When executing a goal or a task, Maven looks for POM in the current directory, gets the needed information and executes the goal/task.
Build phases and the build lifecycle – Maven is based around the central concept of a build lifecycle. What this means is that the process for building and distributing a particular artifact (project) is clearly defined.
For the person building a project, this means that it is only necessary to learn a small set of commands to build any Maven project, and the POM will ensure they get the results they desired.
A build lifecycle consists of the following phases:
- validate
- compile
- test
- package
- integration-test
- verify
- install
- deploy
Goal – A goal represents a specific task that is finer than a build phase and that contributes to the building and managing of a project.
Packaging – Setting the packaging assigns a set of default goals. Examples of valid packaging values include jar, war, ear, and pom.
Maven plug-in – A plug-in describes a set of goals that are tied to a specific packaging scheme or process.
Mojo – A specific task that is implemented inside a plug-in. For example, a Java class implementation for deploying to your preferred runtime environment.
Archetype – Archetypes are used as project templates for setting up new projects. These templates make it easy to enable standards within your organization by defining packaging goals, plug-in settings, and predefined dependencies to standard libraries.
Maven repositories – Repositories are used to store build artifacts and dependencies of varying types. For example, archetypes, plug-ins, and JAR files, among others. Local repositories are populated lazily as needed from remote repositories for build purposes.
Maven Central is an open repository provided by the company Sonatype. This repository hosts libraries which can be used in your build. By default, a Maven build uses Maven Central to search for required libraries.
3. Using Apache Maven
Maven projects can be created either via command line or via eclipse. In this example we will see both approaches.
3.1 Creating Maven project via command line
To create a maven project via command line, we need to install maven first. Please follow the steps below.
3.1.1 Installing Apache Maven
If we want to use Maven via command line, we need to install the Maven command line support. For a manual installation we can download Maven from the Maven Download page. Extract the downloaded distribution to a selected folder on your computer and add the M2_HOME environment variable pointing to this directory. Also create a MAVEN_HOME environment variable pointing to Maven installation directory. Now add Maven installation directory\bin to your path variable. Please refer screenshots below. Please make sure to have JAVA_HOME also set in the environment variable.


3.1.2 Validate Maven installation
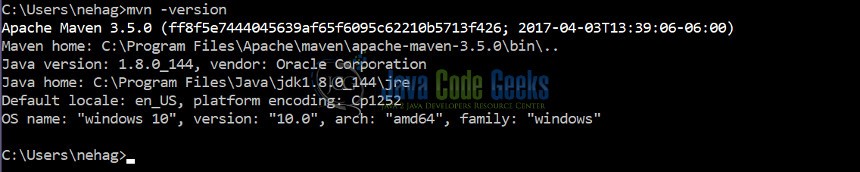
To validate that Maven is correctly installed and the environment variables are set properly, it is good to restart the computer once after setting the environment variables. Then open command prompt and type the below command to validate the installation. The below screenshot shows the Maven version if Maven is correctly installed and configured.
mvn -version
3.1.3 Creating project folder structure via Maven command line
We can use the following syntax of Maven template which when is executed via command line, will create the project structure by itself.
mvn archetype:generate -DgroupId=com.jcg.maven -DartifactId=MavenHelloWorldProject -DarchetypeArtifactId=maven-archetype-quickstart -DinteractiveMode=false
Notice the output in console as below:
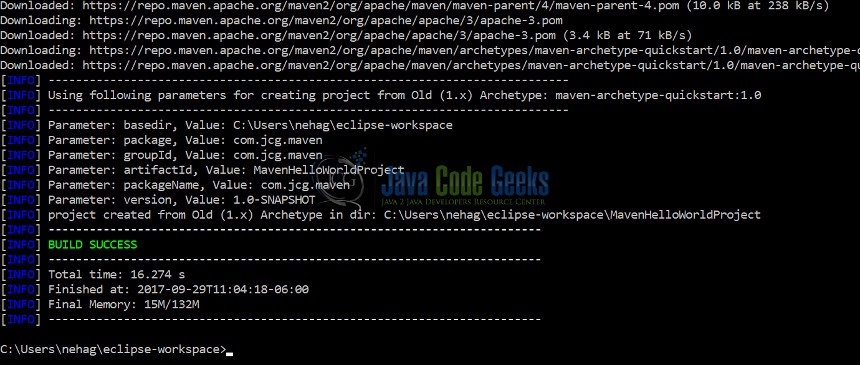
Goto the directory path to see the Maven project folders created.
3.1.4 Importing Maven project in Eclipse
We can also import our Maven project in eclipse to edit our files, write code, clean build and compile. To do so, Open eclipse workspace and import Maven project by,
Select File menu->Import->Maven->Existing Maven Projects->Next , Browse to the newly created project directory, click Finish.
From here on , we can use eclipse to manage our Maven project.
Check screenshot below,

So, two different directory structures are generated along with maven pom.xml. All of our source code of application should go in src/main/java & all unit-test code should go in src/test/java.
The default generated pom.xml looks like the one below:
<project xmlns="http://maven.apache.org/POM/4.0.0" xmlns:xsi="http://www.w3.org/2001/XMLSchema-instance"
  xsi:schemaLocation="http://maven.apache.org/POM/4.0.0 http://maven.apache.org/maven-v4_0_0.xsd">
  <modelVersion>4.0.0</modelVersion>
  <groupId>com.jcg.maven</groupId>
  <artifactId>MavenHelloWorldProject</artifactId>
  <packaging>jar</packaging>
  <version>1.0-SNAPSHOT</version>
  <name>MavenHelloWorldProject</name>
  <url>http://maven.apache.org</url>
  <dependencies>
     <dependency>
        <groupId>junit</groupId>
        <artifactId>junit</artifactId>
        <version>3.8.1</version>
        <scope>test</scope>
     </dependency>
 </dependencies>
</project>
If we look at the above pom.xml, the dependency section contains the libraries our project will rely upon. If we are building a particular framework project then the dependency jar files, go in this section.
3.1.5 Maven packaging
Now, we will use Maven to compile this project and output to a “jar” file. Refer to the pom.xml file, the packaging element defined should be the packaging output. Run the command as below in command line, at the path where we have our pom.xml for the project that is created. This command will compile, run the test classes and generate jar.
mvn clean install
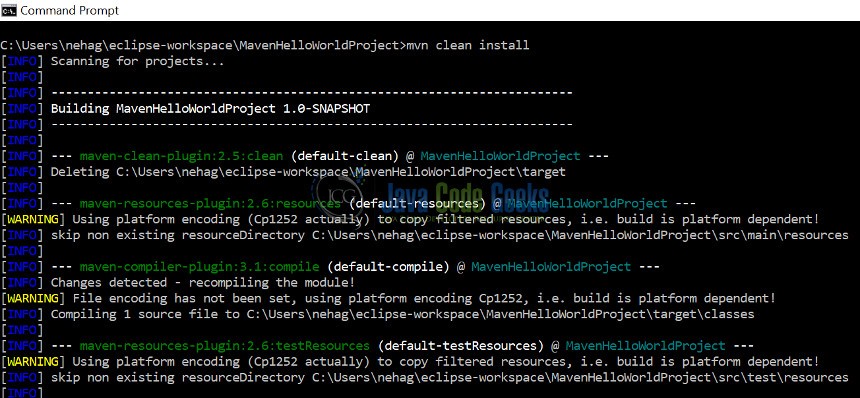
Check the project directory \target folder to see the jar file created. The naming would be as per the artifact id and version specified in the pom.xml.
3.2 Creating Maven project in Eclipse
A new Maven project can directly be created in eclipse using the steps below:
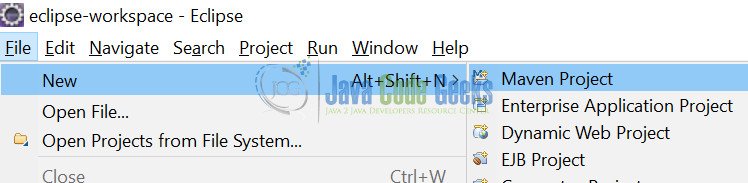
Step 1: Open Eclipse and click on File->New->Maven Project.
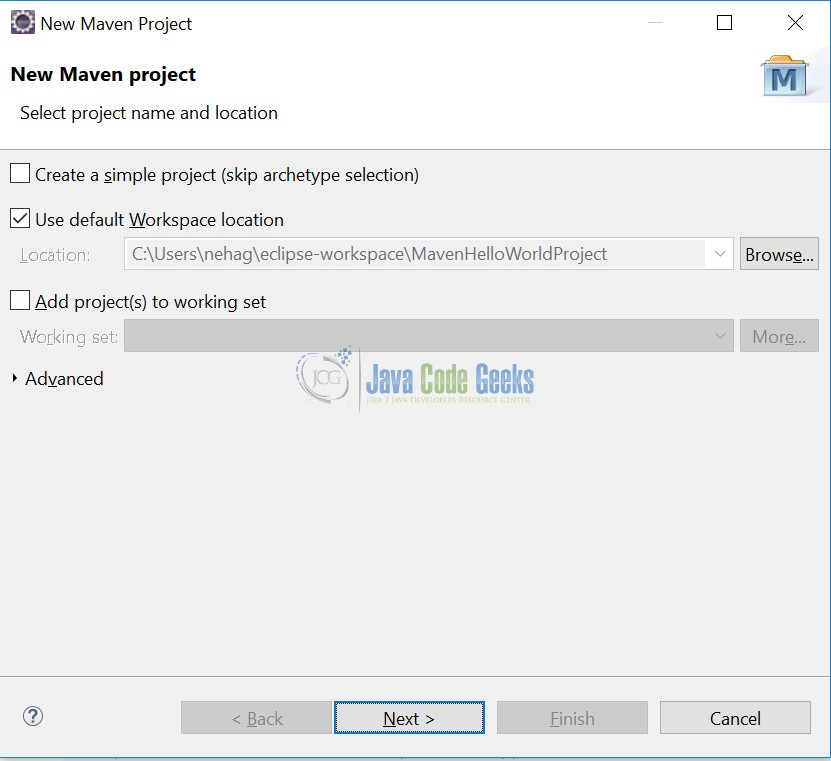
Step 2: Select workspace
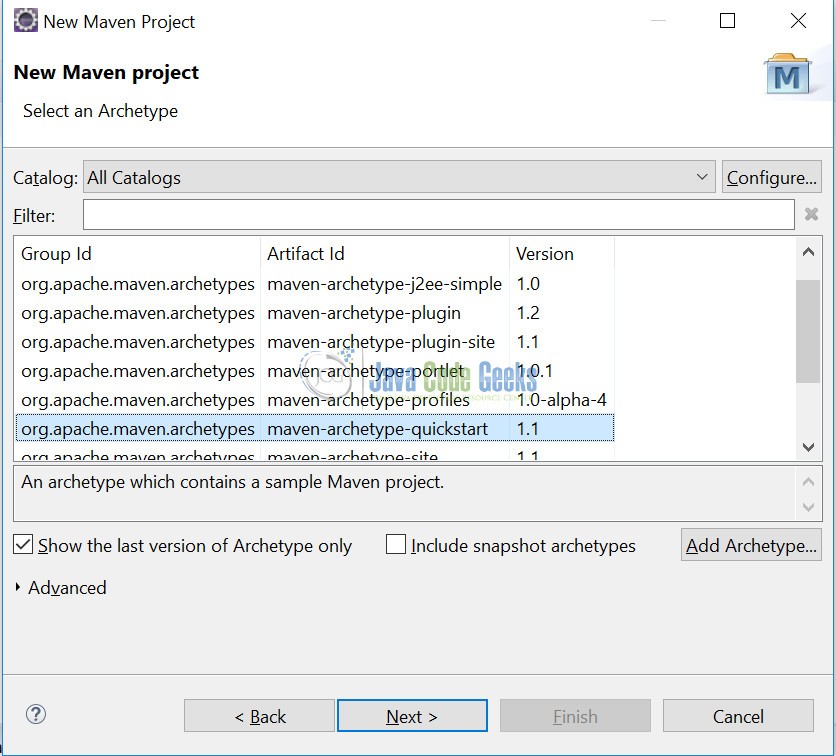
Step 3: Select archetype
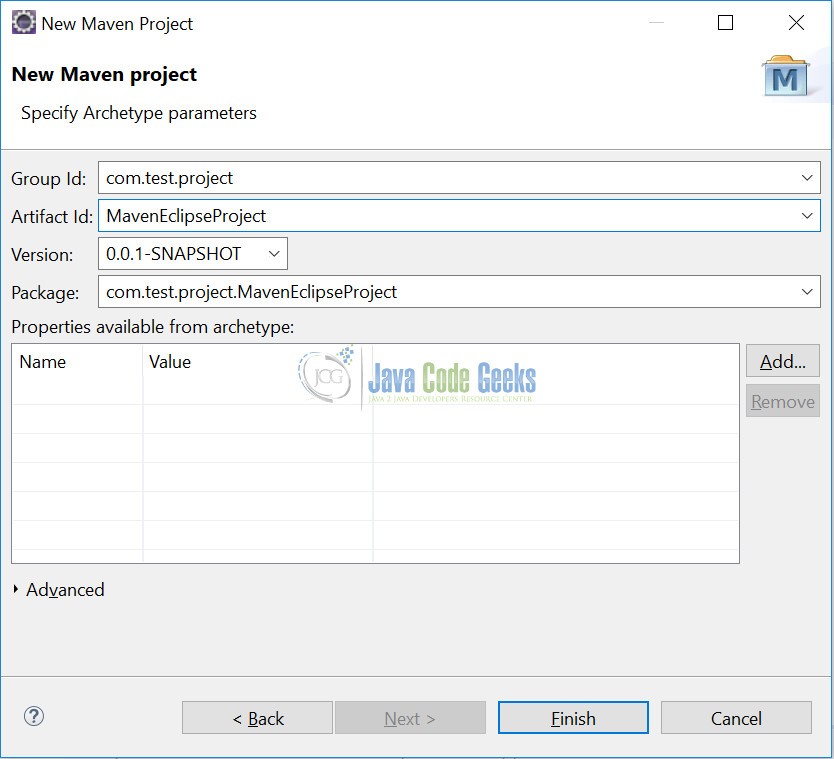
Step 4: Enter the Group id and Artifact Id
Enter group id and artifact id and click on Finish.
A new Maven project will be created with the directory structure as below

4. Conclusion
This is an example demonstrating Maven concepts, Maven installation, creating Maven project both via command line and in eclipse.
5. Download the Maven Eclipse project
You can download the full source code of the Maven project created directly in Eclipse here: MavenEclipseProject
You can download the full source code of the Maven project created in command line here: MavenHelloWorldProject
