In this example, we feature a comprehensive article on JAX-WS Hibernate. We will demonstrate how to create a SOAP-based web service that uses Hibernate to read data from a database.
1. Introduction
Java API for XML Web Services (JAX-WS) is a technology for developing SOAP-based web services and clients. The API includes annotations for defining web service endpoints, service implementation beans, and other related artifacts. JAX-WS uses Java API for XML Binding (JAXB) to bind Java objects to XML schemas that are used in building SOAP messages.
Java Persistence API, or JPA for short, is a specification used for mapping Java objects to database tables and for managing entities in a relational database. It provides annotations for object-relational mapping (ORM), and an entity manager for handling entities within a persistence context. Hibernate is a JPA provider that implements the interfaces defined in the JPA specification.
In this example, we will demonstrate how to create a JAX-WS web
service that uses Hibernate to retrieve data from a relational database.
1.1 Tools Used in this Example
- Eclipse IDE for Enterprise Java Developers Version: 2019-03 (4.11.0)
- Spring Tools 4 – for Spring Boot
- SoapUI 5.5.0
Spring Tools 4 for Spring Boot is a set of plugins for Eclipse that support building and running Spring Boot applications. You can add Spring Tools 4 to your existing Eclipse installation by going to the Eclipse Marketplace and searching for “Spring Tools 4”.
You can download SoapUI at https://www.soapui.org/downloads/soapui.html.
2. JAX-WS Hibernate Example
In this example, we will build is a simple web service that returns a list of events for the specified artist. The service has one method; getEventInfo. The method executes a transaction against a database to retrieve the list of events. We will create the web service using bottom-up web service development.
2.1 Create the Spring Boot Project
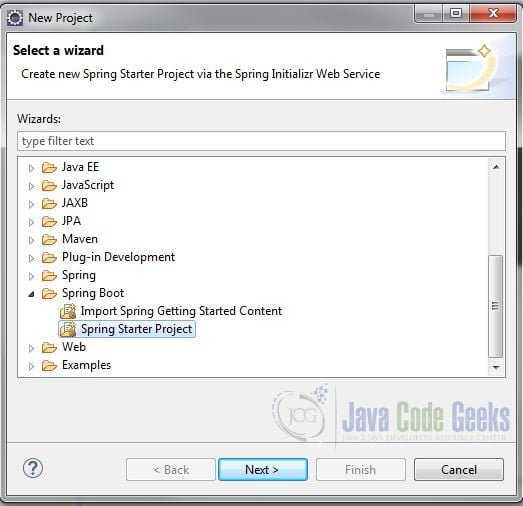
Let’s start by creating a Spring Boot project. In the New Project – Select a Wizard dialog box, expand Spring Boot and select Spring Starter Project. Click “Next”.
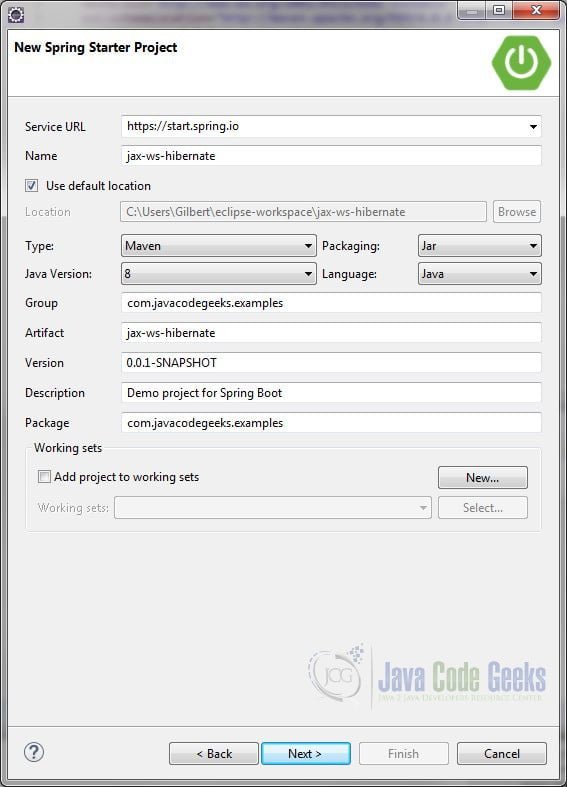
In the New Spring Starter Project dialog box, enter a name for the project. Also, enter the group, artifact and package information. Accept all the other default values. Click “Next”.
In the New Spring Starter Project Dependencies dialog box, select Spring Boot Version 2.1.6. Also, select the Spring Data JPA and H2 Database dependencies. Click “Finish”.
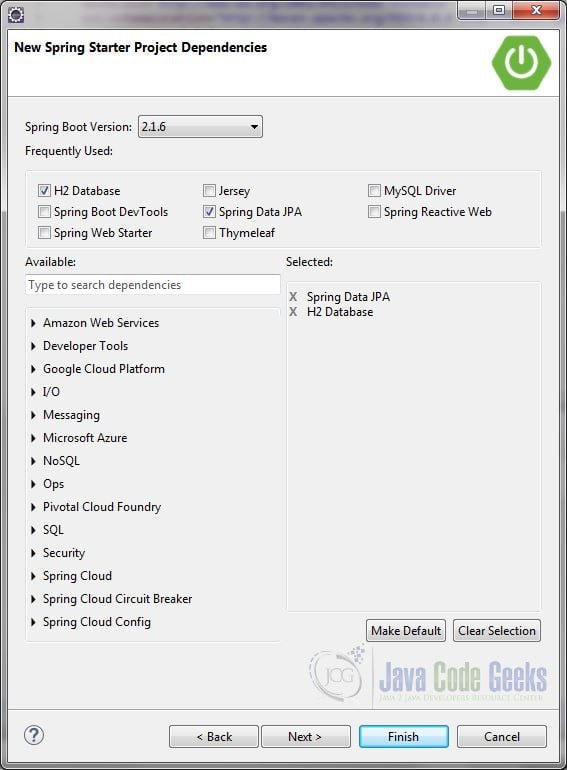
The JPA dependency will add Spring Data JPA and Hibernate capabilities to the project. We will be using an H2 embedded in-memory database.
2.2 Add JAX-WS Dependencies
We will use Apache CXF as our JAX-WS web service stack. Open the pom.xml file and add the cxf-spring-boot-starter-jaxws dependency just below the spring-boot-starter-data-jpa dependency:
pom.xml
<?xml version="1.0" encoding="UTF-8"?>
<project xmlns="http://maven.apache.org/POM/4.0.0"
	xmlns:xsi="http://www.w3.org/2001/XMLSchema-instance"
	xsi:schemaLocation="http://maven.apache.org/POM/4.0.0 http://maven.apache.org/xsd/maven-4.0.0.xsd">
	<modelVersion>4.0.0</modelVersion>
	<parent>
		<groupId>org.springframework.boot</groupId>
		<artifactId>spring-boot-starter-parent</artifactId>
		<version>2.1.6.RELEASE</version>
		<relativePath /> <!-- lookup parent from repository -->
	</parent>
	<groupId>com.javacodegeeks.examples</groupId>
	<artifactId>jax-ws-hibernate</artifactId>
	<version>0.0.1-SNAPSHOT</version>
	<name>jax-ws-hibernate</name>
	<description>Example project for Spring Boot</description>

	<properties>
		<java.version>1.8</java.version>
	</properties>

	<dependencies>
		<dependency>
			<groupId>org.springframework.boot</groupId>
			<artifactId>spring-boot-starter-data-jpa</artifactId>
		</dependency>

		<dependency>
			<groupId>org.apache.cxf</groupId>
			<artifactId>cxf-spring-boot-starter-jaxws</artifactId>
			<version>3.2.7</version>
		</dependency>


		<dependency>
			<groupId>com.h2database</groupId>
			<artifactId>h2</artifactId>
			<scope>runtime</scope>
		</dependency>
		<dependency>
			<groupId>org.springframework.boot</groupId>
			<artifactId>spring-boot-starter-test</artifactId>
			<scope>test</scope>
		</dependency>
	</dependencies>

	<build>
		<plugins>
			<plugin>
				<groupId>org.springframework.boot</groupId>
				<artifactId>spring-boot-maven-plugin</artifactId>
			</plugin>
		</plugins>
	</build>

</project>
2.3 Create the JPA Entity Model
There are two entities in the entity model; Artist and Event. The Artist entity has an id and a name property. The Event entity has an id, a venue, and a date property. The Artist entity has a one-to-many relationship with the Event entity, as illustrated in the Entity Relationship diagram below.
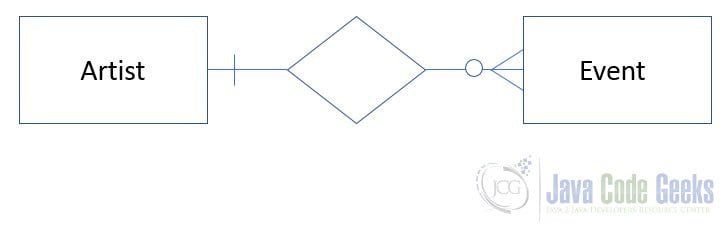
The diagram above shows that the Artist entity is associated to zero or more Event entities.
2.3.1 Create the Artist Entity Class
Create a package com.javacodegeeks.examples.entities and a class Artist with the following code:
Artist.java
package com.javacodegeeks.examples.entities;

import java.util.ArrayList;
import java.util.List;

import javax.persistence.CascadeType;
import javax.persistence.Column;
import javax.persistence.Entity;
import javax.persistence.GeneratedValue;
import javax.persistence.Id;
import javax.persistence.OneToMany;

@Entity
public class Artist {

	@Id
	@GeneratedValue
	private int id;

	@Column(unique = true, nullable = false)
	private String name;

	@OneToMany(mappedBy="artist",
			   cascade= {CascadeType.PERSIST, CascadeType.MERGE,
						 CascadeType.DETACH, CascadeType.REFRESH})
	private List<Event> events;

	public Artist() {}


	public Artist(String name) {
		this.name = name;
	}


	public int getId() {
		return id;
	}


	public void setId(int id) {
		this.id = id;
	}


	public String getName() {
		return name;
	}


	public void setName(String name) {
		this.name = name;
	}


	public List<Event> getEvents() {
		return events;
	}


	public void setEvents(List<Event> events) {
		this.events = events;
	}


	public void add(Event event) {

		if (events == null) {
			events = new ArrayList<>();
		}

		events.add(event);
	}
}
Note: You have will several errors at this point. They will be resolved in the next section of this example.
There are several JPA annotations used in the Artist class. These annotations define the mapping between the entity model object and the database table and its columns. (Note that these annotations are from the javax.persistence package.)
- @Entity – This class-level annotation informs the JPA provider (Hibernate in our example) that this Java class should be persisted to a database table.
- @Id – This field-level annotation designates the primary key of the entity and maps it to the primary key of the table.
- @GeneratedValue – This annotation specifies how the primary key ID will be generated. In our example, we chose GenerationType.AUTO, meaning that the JPA provider (Hibernate) will decide which strategy to employ based on the database dialect used. (The H2Dialect is used in this example.)
- @Column – This field-level annotation is used to assign specific attributes to a property. We are specifying that the name property must be unique and that it cannot be null.
- @OneToMany – This field-level annotation declares a one-to-many relationship between the Artist entity and Event entity. This annotation is placed on the
List<Event> eventsproperty since there can be many Event entities associated with this one Artist. The mappedBy attribute references the property on the “many” side of the relationship; the Event entity. (We will create the Event entity in the next section.) The cascade attribute identifies which entity lifecycle events (if any) should be propagated to the target of the association. For example, CascadeType.PERSIST states that any events in the list should be persisted into the persistence context when the Artist is persisted.
There are two constructors defined for the Artist class. The Artist(String name) constructor is used for convenience. Consequently, we must explicitly define a no-argument constructor Artist(), which is required by the JPA Entity Manager.
We also added a helper method add(Event event). The method will add the Artist to the Event entity when an event is added. This will set up the bi-directional link between Artist and Event.
At this point, you will see the following error: Event cannot be resolved to a type. Let’s fix that.
2.3.2 Create the Event Entity Class
Hover your cursor over Event and select Create Class ‘Event’. Click the “Finish” button in the New – Java Class dialog box and add the following code to the Event class:
Event.java
package com.javacodegeeks.examples.entities;

import javax.persistence.CascadeType;
import javax.persistence.Entity;
import javax.persistence.GeneratedValue;
import javax.persistence.Id;
import javax.persistence.JoinColumn;
import javax.persistence.ManyToOne;

@Entity
public class Event {

	@Id
	@GeneratedValue
	private int id;

	private String venue;

	private String date;

	@ManyToOne(cascade= {CascadeType.PERSIST, CascadeType.MERGE,
			 CascadeType.DETACH, CascadeType.REFRESH})
	@JoinColumn(name="artist_id")
	private Artist artist;

	public Event() {}

	public Event(String venue, String date, Artist artist) {
		this.venue = venue;
		this.date = date;
		this.artist = artist;
	}

	public int getId() {
		return id;
	}

	public void setId(int id) {
		this.id = id;
	}

	public String getVenue() {
		return venue;
	}

	public void setVenue(String venue) {
		this.venue = venue;
	}

	public String getDate() {
		return date;
	}

	public void setDate(String date) {
		this.date = date;
	}

	public Artist getArtist() {
		return artist;
	}

	public void setArtist(Artist artist) {
		this.artist = artist;
	}

}
The Event class is also decorated with the @Entity annotation. It has an id property for its primary key and two string properties for the venue name and the event date. It also has an Artist property.
The @ManyToOne field-level annotation specifies the relationship between the Event entity and the Artist entity. It is placed on the Artist artist property as there can be many Events to one Artist.
The @JoinColumn annotation specifies the column name in the Event table that will used to associate the Event to the Artist. (This will become the foreign key to the Artist table.)
2.4 Create the Data Loader Class
We can use Hibernate to create some sample data at startup. Create a package com.javacodegeeks.examples.bootstrap and class DataLoader that implements ApplicationListener<ContextRefreshedEvent> :
DataLoader.java
package com.javacodegeeks.examples.bootstrap;

import javax.persistence.EntityManager;
import javax.persistence.EntityManagerFactory;

import org.springframework.beans.factory.annotation.Autowired;
import org.springframework.context.ApplicationListener;
import org.springframework.context.event.ContextRefreshedEvent;
import org.springframework.stereotype.Component;

import com.javacodegeeks.examples.entities.Artist;
import com.javacodegeeks.examples.entities.Event;

@Component
public class DataLoader implements ApplicationListener<ContextRefreshedEvent> {

	@Autowired
	private EntityManagerFactory entityManagerFactory;

	@Override
	public void onApplicationEvent(ContextRefreshedEvent event) {
		EntityManager entityManager = entityManagerFactory.createEntityManager();

		entityManager.getTransaction().begin();

		Artist artist = new Artist("The Who");

		Event Event1 = new Event("Wembley Stadium", "July 6, 2019", artist);
		Event Event2 = new Event("Hollywood Bowl", "October 28, 2019", artist);

		artist.add(Event1);
		artist.add(Event2);

		entityManager.persist(artist);

		entityManager.getTransaction().commit();


		entityManager.getTransaction().begin();

		Artist artist2 = new Artist("The Rolling Stones");

		Event Event3 = new Event("Madison Square Garden", "September 12, 2019", artist2);
		Event Event4 = new Event("Dodger Stadium", "November 25, 2019", artist2);

		artist2.add(Event3);
		artist2.add(Event4);

		entityManager.persist(artist2);

		entityManager.getTransaction().commit();
	}

}
The EntityManagerFactory (used to create an EntityManager) is injected into the class using the @Autowired annotation. AnEntityManager is used to create and delete entity instances and to find entities by their primary keys. It can also be used create and run queries. If the EntityManager is managed by the application, (as is the case here), it is also used to manage the lifecycle of entity instances through transaction management.
The DataLoader class listens for the ContextRefreshedEvent that gets raised when the ApplicationContext is initialized or refreshed. It implements the onApplicationEvent method, which adds a couple of artists and their associated events to persistence context. Notice that the EntityManager is used to start and commit the transactions. Also notice that we only need to persist the Artist instance. The Event instances will be persisted automatically, thanks to CascadeType.PERSIST directive and our helper method.
The DataLoader class is decorated with @Component to register it in the application context.
2.5 Enable and Run the H2 Console
Spring Boot will automatically configure an H2 in-memory database if it finds the H2 related JAR files in the application’s classpath. It will use the following default values unless otherwise specified in the application.properties file.
spring.datasource.url=jdbc:h2:mem:testdb
spring.datasource.driverClassName=org.h2.Driver
spring.datasource.username=sa
spring.datasource.password=
spring.jpa.database-platform=org.hibernate.dialect.H2Dialect
H2 comes with GUI console that can be used to view tables or run SQL queries. To enable it, add the following entry in application.properties file.
application.properties
spring.h2.console.enabled=true
Start the application by right-clicking the project in Project Explorer and selecting Run As > Spring Boot App. You can access the H2 console at the following URL: http://localhost:8080/h2-console.
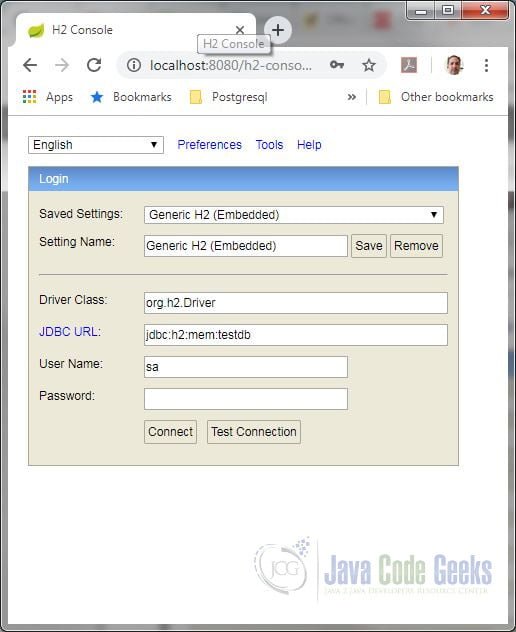
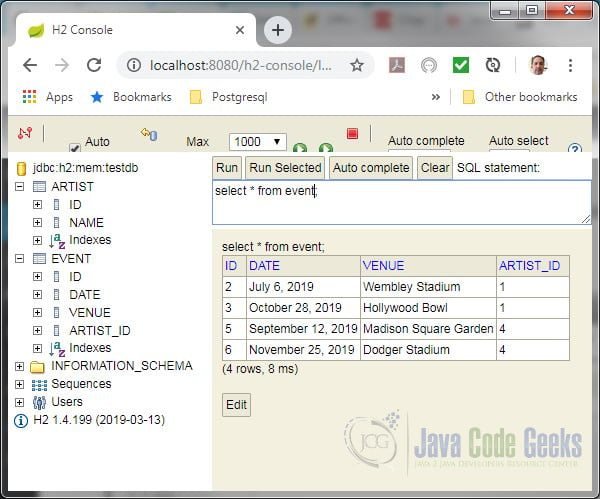
Ensure the JDBC URL is jdbc:h2:mem:testdb and click the Connect button. You will see that the tables were created with the expected columns. Run an SQL query to view the data that was created at startup.
2.6 Create the Data Transfer Objects
We will create two Data Transfer Objects to transfer the request and response payloads.
2.6.1 Create the Event Request
Create a package com.javacodegeeks.examples.dto and a class EventRequest with the following code:
EventRequest.java
package com.javacodegeeks.examples.dto;

import javax.xml.bind.annotation.XmlAccessType;
import javax.xml.bind.annotation.XmlAccessorType;
import javax.xml.bind.annotation.XmlElement;
import javax.xml.bind.annotation.XmlType;

@XmlType(name = "EventRequest")
@XmlAccessorType(XmlAccessType.FIELD)
public class EventRequest {

	@XmlElement(required = true)
	private String artistName;

	public String getArtistName() {
		return artistName;
	}

	public void setArtistName(String artistName) {
		this.artistName = artistName;
	}
}
@XmlType is a JAXB annotation that maps the EventRequest class to an XML schema type. The XML schema is used to generate the XML in the SOAP message. EventRequest will appear as a complex type in the WSDL file.
The EventRequest class defines a string property called artistName along with its associated setter and getter. The @XmlAccessorType(XmlAccessType.FIELD) annotation will cause all non-static and non transient fields in the class to be automatically bound to the XML schema. We apply the @XmlElement annotation to the artistName field so that we can set its attribute as required.
2.6.2 Create the Event Response
Create a class EventResponse in the com.javacodegeeks.examples.dto package with the following code:
EventResponse.java
package com.javacodegeeks.examples.dto;

import javax.xml.bind.annotation.XmlType;

import com.javacodegeeks.examples.entities.Artist;

@XmlType(name = "EventResponse")
public class EventResponse {

	private Artist artist;

	public Artist getArtist() {
		return artist;
	}

	public void setArtist(Artist artist) {
		this.artist = artist;
	}
}
The EventResponse class is also decorated with the @XmlType annotation. The class contains the Artist object that will be returned in the response payload. Note that the list of events will also be returned in the response as they are part of the Artist entity.
2.7 Update the Event Class
Since we have declared Artist as a property of the Event class, we need to make some changes to exclude it from the XML schema. If this is not corrected, we will get a marshalling error when the SOAP response is generated, due to a cycle in the object graph. (The Artist object has Event objects which in turn have Artist objects, you get the idea.) Open the Event class and add the highlighted code.
Event.java
package com.javacodegeeks.examples.entities;

import javax.persistence.CascadeType;
import javax.persistence.Entity;
import javax.persistence.GeneratedValue;
import javax.persistence.Id;
import javax.persistence.JoinColumn;
import javax.persistence.ManyToOne;
import javax.xml.bind.annotation.XmlAccessType;
import javax.xml.bind.annotation.XmlAccessorType;
import javax.xml.bind.annotation.XmlElement;

@XmlAccessorType(XmlAccessType.NONE)
@Entity
public class Event {

	@Id
	@GeneratedValue
	private int id;

	@XmlElement
	private String venue;

	@XmlElement
	private String date;

	@ManyToOne(cascade= {CascadeType.PERSIST, CascadeType.MERGE,
			 CascadeType.DETACH, CascadeType.REFRESH})
	@JoinColumn(name="artist_id")
	private Artist artist;

	public Event() {}

	public Event(String venue, String date, Artist artist) {
		this.venue = venue;
		this.date = date;
		this.artist = artist;
	}

	public int getId() {
		return id;
	}

	public void setId(int id) {
		this.id = id;
	}

	public String getVenue() {
		return venue;
	}

	public void setVenue(String venue) {
		this.venue = venue;
	}

	public String getDate() {
		return date;
	}

	public void setDate(String date) {
		this.date = date;
	}

	public Artist getArtist() {
		return artist;
	}

	public void setArtist(Artist artist) {
		this.artist = artist;
	}

}
The @XmlAccessorType(XmlAccessType.NONE) annotation blocks the properties of the class from being bound to the XML schema unless they are explicitly mapped. We apply the @XmlElement annotation to the venue and date properties to explicitly map them to the schema.
2.8 Create the Service Endpoint Interface
Create a package com.javacodegeeks.examples.service and an interface EventService with the following code:
EventService.java
package com.javacodegeeks.examples.service;

import javax.jws.WebService;

import com.javacodegeeks.examples.dto.EventRequest;
import com.javacodegeeks.examples.dto.EventResponse;

@WebService(name = "EventService")
public interface EventService {

	public EventResponse getEventInfo(@XmlElement(required=true) EventRequest request);
}
The @WebService annotation marks this interface as a service endpoint interface. The name attribute is optional. All public methods defined in the interface will be exposed to the client as operations, although you can use the @WebMethod annotation to specify attributes, such as specifying the operation’s name in the WSDL file. The interface defines one method, getEventInfo, that accepts EventRequest as a parameter and returns an EventResponse. We set EventRequest as a required element of thegetEventInfo complex type (in the XML schema) with the @XmlElement(required=true) annotation.
2.9 Create the Service Endpoint Implementation
Create a class EventServiceImpl that implements the EventService interface in the com.javacodegeeks.examples.service package with the following code:
EventServiceImpl.java
package com.javacodegeeks.examples.service;

import javax.persistence.EntityManager;
import javax.persistence.EntityManagerFactory;
import javax.persistence.Query;

import org.springframework.stereotype.Service;

import com.javacodegeeks.examples.dto.EventRequest;
import com.javacodegeeks.examples.dto.EventResponse;
import com.javacodegeeks.examples.entities.Artist;

@Service
public class EventServiceImpl implements EventService {

	private EntityManagerFactory entityManagerFactory;

	public EventServiceImpl(EntityManagerFactory entityManagerFactory) {
		this.entityManagerFactory = entityManagerFactory;
	}

	@Override
	public EventResponse getEventInfo(EventRequest request) {
		String name = request.getArtistName();

		EntityManager entityManager = entityManagerFactory.createEntityManager();

		entityManager.getTransaction().begin();
		Query query = entityManager.createQuery("select a from Artist a where a.name = :name");
		query.setParameter("name", name);
		Artist artist = (Artist) query.getSingleResult();
		entityManager.getTransaction().commit();

		EventResponse response = new EventResponse();
		response.setArtist(artist);
		return response;
	}
}
The class is marked with the @Service annotation, which makes it eligible for component scanning. The EntityManagerFactory is introduced using constructor-based injection.
The getEventInfo method performs the following:
- Retrieves the artist’s name from the request payload. This value will bound to the named parameter in the query to retrieve the artist.
- Creates an
EntityManagerfrom theEntityManagerFactory. - Uses the
EntityManagerto start a transaction. - Creates a
Queryobject using JPQL (Java Persistence Query Language). - Sets the name parameter in the query.
- Executes the query, which returns a single result. (Remember that the artist name is unique.)
- Uses the
EntityManagerto commit the transaction. - Sets the Artist object in the response.
- Returns the response.
2.10 Configure the Application
Create a package com.javacodegeeks.examples.config and an class EventConfig with the following code:
EventConfig.java
package com.javacodegeeks.examples.config;

import javax.persistence.EntityManagerFactory;
import javax.xml.ws.Endpoint;

import org.apache.cxf.Bus;
import org.apache.cxf.jaxws.EndpointImpl;
import org.springframework.beans.factory.annotation.Autowired;
import org.springframework.context.annotation.Bean;
import org.springframework.context.annotation.Configuration;

import com.javacodegeeks.examples.service.EventServiceImpl;

@Configuration
public class EventConfig {

	@Autowired
	private Bus bus;

	@Autowired
	private EntityManagerFactory entityManagerFactory;

	@Bean
	public Endpoint endpoint() {
		Endpoint endpoint = new EndpointImpl(bus, new EventServiceImpl(entityManagerFactory));
		endpoint.publish("/eventservice");
		return endpoint;
	}
}
The @Configuration annotation indicates that this as a Spring configuration class. This permits us to declare @Bean methods. The org.apache.cxf.Bus and EntityManagerFactory are injected using the @Autowired annotation.
The class defines a method endpoint() that returns a javax.xml.ws.Endpoint. endpoint() is annotated with @Bean so that the endpoint will be instantiated, configured and returned by the Spring container.. The method creates an Endpoint using the EndpointImpl constructor provided by the CXF JAX-WS library and passes in the Bus and our service implementation as parameters. (Note that we are passing the EntityManagerFactory to the EventServiceImpl constructor). Finally, we publish the endpoint at “/eventservice” and return the Endpoint.
2.11 Start the Web Service
Right-click the project in Project Explorer and select Run As > Spring Boot App. Once the Spring Boot application has started, open a browser and enter the following URL: http://localhost:8080/services. You will see a link to the WSDL file on the “Available SOAP services” page.
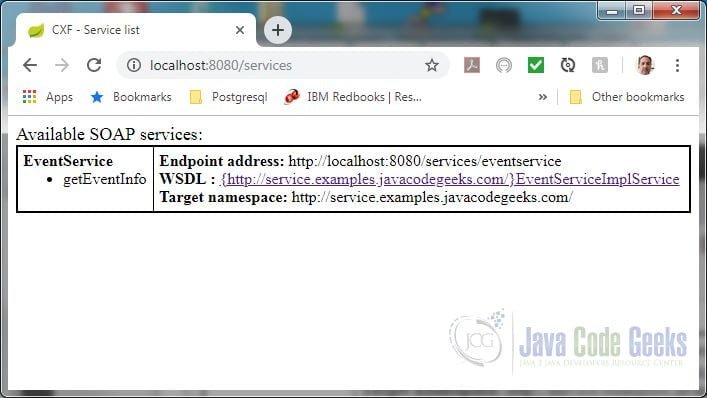
Click on the link to view the Event Service WSDL.
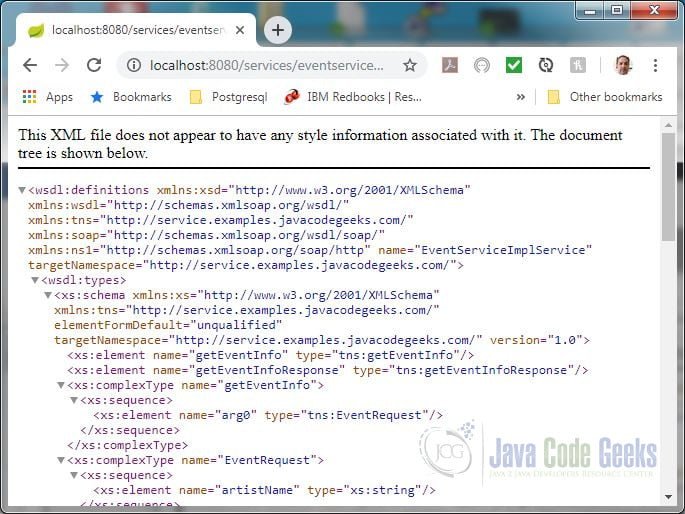
Copy the WSDL file’s URL. We will use it to configure the SOAP project in SoapUI.
2.12 Test the Web Service with SoapUI
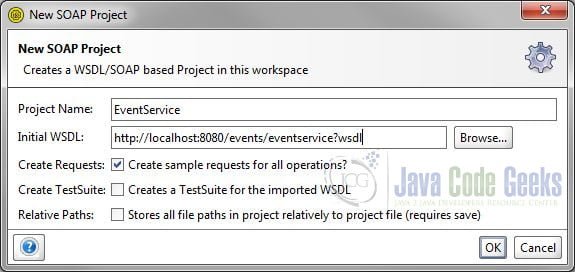
We’ll test our web service with SoapUI. Start SoapUI and dismiss the popup window “Endpoint Explorer”. Create a new SOAP project by selecting File > New SOAP Project.
Enter a name for your project and paste the WSDL file’s URL in the Initial WSDL text box, for example, http://localhost:8080/services/eventservice?wsdl. Make sure Create Requests is selected and click “OK”.
Expand EventServiceImplServiceSoapBinding and getEventInfo in the Navigator and double-click Request 1.
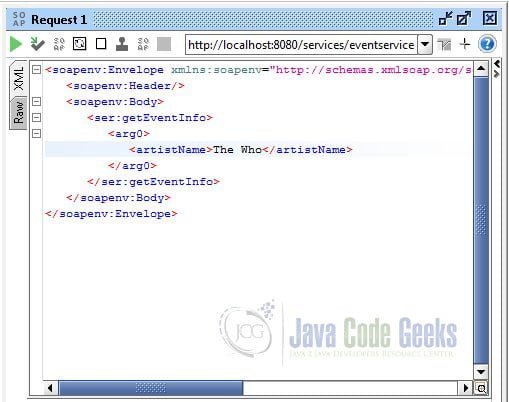
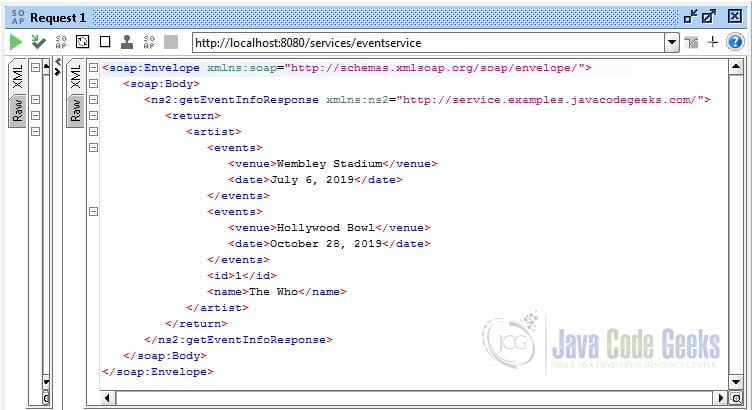
Enter “The Who” for “artistName” and click the green submit arrow on the upper-left corner of the Request 1 window. You will see a list of events for “The Who” in the response.
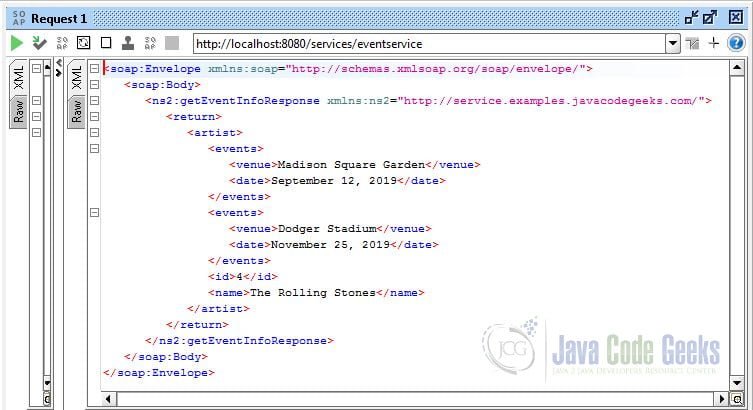
Now enter “The Rolling Stones” for “artistName” and click the green submit arrow on the upper-left corner of the Request 1 window. You will see a list of events for ” The Rolling Stones” in the response.
3. Summary
In this example, we demonstrated how to create a SOAP-based web service that uses Hibernate to read data from a database.
4. Download the Source Code
This was a JAX-WS Hibernate example.

Hello sir,
I’m learning about SOAP WS and I’m following your advice above.
The problem is: I want to add one new method with new request and new response.
So, 1st step, I create two new DTOs for new request and response.
Then, I define new method in the service interface and perform that method in service implementation.
But I cannot start the service, the endpoint cannot start
How can I fix that bug?
Thanks for your advice
Hello,
I am sorry to hear that you are having issues adding a new operation. Two questions:
1. Were you able to start the web service before your modifications?
2. Are you getting any error messages when you start the service after your changes?
Let me know.