In this example, we will show you how to implement an asynchronous SOAP web service and client using the AsyncHandler callback handler.
1. Introduction
There are two ways to invoke a web service, synchronously and asynchronously.
When invoking a web service synchronously, the client must wait for the response before resuming its work. When invoking a web service asynchronously, the client can work on other tasks while it waits for the response. When the service sends the response, the client will be notified and can, at that point, process the response.
The two approaches for working asynchronously with responses are “callback” and “polling”. In this example, we will demonstrate the callback approach using a callback handler.
1.1 Tools Used in this Example
- Eclipse Oxygen
- Maven 3.2.1
- Tomcat 8.5.4
For Maven support within Eclipse, install M2Eclipse. Please visit the M2Eclipse website for more information.
To setup a Tomcat server for use in Eclipse, see Tomcat in Eclipse: 6 popular how to questions.
2. JAX-WS AsyncHandler Example
In this example, we’ll develop a simple web service that updates a message both synchronously and asynchronously. This exercise uses “Java-first” or “bottom-up” web services development.
2.1 Create the Web Service Provider
2.1.1 Create the Web Service Project
Let’s begin by creating a simple Maven Project.
- Select New -> Other… Maven Project. Click “Next”.
- Select “Create a simple project (skip archetype selection)” and click “Next”.
- Enter a Group Id and Artifact Id. Select “war” for Packaging and enter a Name and Description if desired. Click “Finish”.
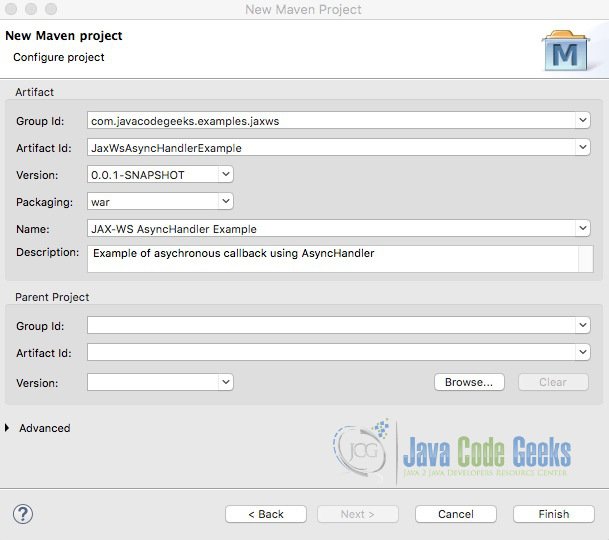
At this point, you will see the following error: web.xml is missing and<failOnMissingWebXml> is set to true, since we elected to package the application as a war file. To fix this, right-click on the project and select Java EE Tools -> Generate Deployment Descriptor Stub.
2.1.2 Update the POM File
Open the pom.xml and add the following Maven plugins just above the closing </project> tag:
pom.xml
<build>
  <pluginManagement>
    <plugins>
      <plugin>
      <groupId>org.apache.maven.plugins</groupId>
      <artifactId>maven-compiler-plugin</artifactId>
      <version>3.6.1</version>
      <configuration>
        <source>1.8</source>
        <target>1.8</target>
      </configuration>
    </plugin>
    <plugin>
      <groupId>org.apache.maven.plugins</groupId>
      <artifactId>maven-war-plugin</artifactId>
      <version>3.0.0</version>
      <configuration>
        <warSourceDirectory>src/main/webapp</warSourceDirectory>
        <webXml>src/main/webapp/WEB-INF/web.xml</webXml>
        <warName>JaxWsAsync</warName>
      </configuration>
      </plugin>
    </plugins>
  </pluginManagement>
</build>
Also, add the following dependencies below the closing </build> tag:
<dependencies>
  <dependency>
    <groupId>org.apache.cxf</groupId>
    <artifactId>cxf-rt-frontend-jaxws</artifactId>
    <version>3.1.11</version>
  </dependency>
  <dependency>
    <groupId>org.apache.cxf</groupId>
    <artifactId>cxf-rt-transports-http</artifactId>
    <version>3.1.11</version>
  </dependency>
  <dependency>
    <groupId>org.springframework</groupId>
    <artifactId>spring-core</artifactId>
    <version>4.3.8.RELEASE</version>
  </dependency>
  <dependency>
    <groupId>org.springframework</groupId>
    <artifactId>spring-web</artifactId>
   <version>4.3.8.RELEASE</version>
  </dependency>
</dependencies>
Save the changes and select: Maven->Update Project from the project context menu.
2.1.3 Create the Entity Class
Let’s create the entity class, TestMessage.
TestMessage.java
public class TestMessage {

	private String message;

	public String getMessage() {
		return message;
	}

	public void setMessage(String message) {
		this.message = message;
	}
}
2.1.4 Create the Service Endpoint Interface (SEI)
We’ll define two methods for updating the message of TestMessage:
- A synchronous method that takes one parameter, the request data.
- An asynchronous method that takes two parameters, the request data and a callback handler (AsyncHandler).
ChangeMessage.java
import java.util.concurrent.Future;

import javax.jws.WebService;
import javax.xml.ws.AsyncHandler;
import javax.xml.ws.ResponseWrapper;

@WebService
public interface ChangeMessage {

    @ResponseWrapper(localName = "changeMessageResponse", className = "com.javacodegeeks.examples.jaxws.service.TestMessage")
    public String changeMessage(String message);

    @ResponseWrapper(localName = "changeMessageResponse", className = "com.javacodegeeks.examples.jaxws.service.TestMessage")
    public Future changeMessageAsync(String message, AsyncHandler asyncHandler);
}
AsyncHandler is an interface. The AsyncHandler callback handler is provided by the caller and is responsible for handling the response. We’ll implement the AsyncHandler interface in the client code.
We suffix the asynchronous method’s name with “Async” as this is the naming convention. It returns a Future that represents the pending result of the task. The Future interface exposes methods to test for completion of a task and to retrieve the result of the task, as we will see in the client code.
2.1.5 Implement the Service Interface
Next, we’ll implement the SEI created in the previous step.
We’ll annotate the synchronous method with @UseAsyncMethod. This sounds counterintuitive but it is correct. If the client transport supports asynchronous request processing, the CXF runtime will invoke the asynchronous method. Otherwise, the service will invoke the synchronous method.
ChangeMessageImpl.java
import java.util.concurrent.Future;

import javax.jws.WebService;
import javax.xml.ws.AsyncHandler;

import org.apache.cxf.annotations.UseAsyncMethod;
import org.apache.cxf.jaxws.ServerAsyncResponse;

@WebService(endpointInterface = "com.javacodegeeks.examples.jaxws.service.ChangeMessage", serviceName = "ChangeMessage")
public class ChangeMessageImpl implements ChangeMessage {

	@Override
	@UseAsyncMethod
	public String changeMessage(String message) {
        System.out.println("Executing changeMessage synchronously\n");
        return "echo message: " + message;
	}

	@Override
	public Future<?> changeMessageAsync(final String message, final AsyncHandler<TestMessage> asyncHandler) {
        System.out.println("Executing changeMessageAsync asynchronously\n");
        final ServerAsyncResponse<TestMessage> asyncResponse = new ServerAsyncResponse<TestMessage>() ;
        new Thread() {
            public void run() {
                try {
                    Thread.sleep(10000);
                } catch (InterruptedException e) {
                    e.printStackTrace();
                }
                TestMessage payload = new TestMessage();
                payload.setMessage("message: " + message);
                asyncResponse.set(payload);
                System.out.println("Responding on another thread\n");
                asyncHandler.handleResponse(asyncResponse);
            }
        }.start();

        return asyncResponse;
	}

}
Let’s go over the asynchronous method.
First, we instantiate an org.apache.cxf.jaxws.ServerAsyncResponse<TestMessage> object. ServerAsyncResponse implements javax.xml.ws.Response and represents the SOAP response. Next, we create a new thread where we simulate a delay with Thread.sleep(). Inside the thread, we create a TestMessage object and set its message. Next, we set the payload of the SOAP response with TestMessage. We then set the response in the AsyncHandler that will handle said response with asyncHandler.handleResponse(asyncResponse). Finally, we return the ServerAsyncResponse.
Note: Since Response extends Future, we can return ServerAsyncResponse in the asynchronous method.
2.1.6 Create the Spring Configuration File
Create the cxf-servlet.xml file in the webapp/WEB-INF directory to set up the service endpoint.
cxf-servlet.xml
<?xml version="1.0" encoding="UTF-8"?>
<beans xmlns="http://www.springframework.org/schema/beans"
xmlns:xsi="http://www.w3.org/2001/XMLSchema-instance" xmlns:jaxws="http://cxf.apache.org/jaxws"
xmlns:cxf="http://cxf.apache.org/core"
xmlns:soap="http://cxf.apache.org/bindings/soap"
xsi:schemaLocation="http://cxf.apache.org/core http://cxf.apache.org/schemas/core.xsd http://www.springframework.org/schema/beans http://www.springframework.org/schema/beans/spring-beans.xsd http://cxf.apache.org/bindings/soap http://cxf.apache.org/schemas/configuration/soap.xsd http://cxf.apache.org/jaxws http://cxf.apache.org/schemas/jaxws.xsd">

  <jaxws:endpoint id="changeMessage" implementor="com.javacodegeeks.examples.jaxws.service.ChangeMessageImpl"
		address="/ChangeMessage" />
</beans>
2.1.7 Configure the CXF servlet in web.xml
The last step is to configure the CXFServlet in web.xml. We’ll map the servlet to handle all requests coming through /services/*.
web.xml
<?xml version="1.0" encoding="UTF-8"?>
<web-app xmlns:xsi="http://www.w3.org/2001/XMLSchema-instance" xmlns="http://xmlns.jcp.org/xml/ns/javaee" xsi:schemaLocation="http://xmlns.jcp.org/xml/ns/javaee http://xmlns.jcp.org/xml/ns/javaee/web-app_3_1.xsd" version="3.1">
 <display-name>JaxWsAsyncHandlerExample</display-name>
 <servlet>
   <servlet-name>cxfservlet</servlet-name>
   <servlet-class>org.apache.cxf.transport.servlet.CXFServlet</servlet-class>
   <load-on-startup>1</load-on-startup>
   <async-supported>true</async-supported>
 </servlet>
 <servlet-mapping>
   <servlet-name>cxfservlet</servlet-name>
   <url-pattern>/services/*</url-pattern>
 </servlet-mapping>
</web-app>
We include the <async-supported> tag and set its value to “true”. Notice that we also have to change the schema location and version to 3.1 to add support for the async-supported tag.
2.1.8 Start the ChangeMessage Service
Run maven clean to clear the target directory and maven install to create the war file. (Right-click the project and select Run as and you will see these options in the context menu.) The generated war file can be deployed to a Tomcat server by copying it to the webapps directory and starting the server.
Let’s test our web service from within Eclipse. Right-click the project and select Run As -> Run on Server. Select the Tomcat server and add our project to configure and click “Finish”. When the application starts, we will see a 404 error in the browser, since we do not have a welcome page specified in web.xml. Enter /services/ at the end of the URL and hit “Enter”. You will see a link to the WSDL file on the “Available SOAP services” page.
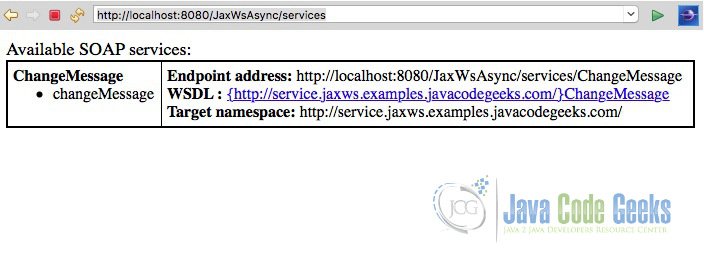
Click the link to see the WSDL file that was generated by the web services runtime.
Note: If you are using Eclipse’s internal browser, you may see a blank page. Copy the URL from the address bar and open the link in an external browser.
2.2 Create the Web Service Client
We will create a stand-alone Java client so we will first create a Java project for the client code.
2.2.1 Create the Client Project
Create a new Maven Project.
- Select New -> Other… Maven Project. Click “Next”.
- Select “Create a simple project (skip archetype selection)” and click “Next”.
- Enter a Group Id and Artifact Id. Select “jar” for Packaging and enter a Name and Description if desired. Click “Finish”.

2.2.2 Update the POM File
Open the pom.xml file and add the following Maven plugin just above the closing </project> tag:
pom.xml
<build>
 <pluginManagement>
   <plugins>
     <plugin>
       <groupId>org.apache.maven.plugins</groupId>
       <artifactId>maven-compiler-plugin</artifactId>
       <version>3.6.1</version>
       <configuration>
         <source>1.8</source>
         <target>1.8</target>
       </configuration>
     </plugin>
   </plugins>
 </pluginManagement>
</build>
Also, add the following dependencies below the closing </build> tag:
 <dependencies>
   <dependency>
     <groupId>org.apache.cxf</groupId>
     <artifactId>cxf-rt-frontend-jaxws</artifactId>
     <version>3.1.11</version>
   </dependency>
   <dependency>
     <groupId>org.apache.cxf</groupId>
     <artifactId>cxf-rt-transports-http</artifactId>
     <version>3.1.11</version>
   </dependency>
 </dependencies>
Save the changes and select Maven->Update Project… from the project context menu and click “OK”.
2.2.3 Create the Async Binding File
Create an asynchronous bindings file named async_binding.xml in the /src/main/resources folder. We will use this file when we generate the client code.
async_binding.xml
<bindings xmlns:xsd="http://www.w3.org/2001/XMLSchema"
 xmlns:wsdl="http://schemas.xmlsoap.org/wsdl/"
 xmlns="http://java.sun.com/xml/ns/jaxws">
 <bindings node="wsdl:definitions">
  <enableAsyncMapping>true</enableAsyncMapping>
 </bindings>
</bindings>
The bindings file includes the <enableAsyncMapping> flag to generate the asynchronous method in the client code.
2.2.4 Generate the Client Stubs
Next, we’ll generate the client code. Open a terminal window and change to the src/main/java directory of the client Java project, for example, /JaxWsAsyncHandlerClientExample/src/main/java.
Run the wsimport command (shown below) to generate the client code. (Replace <WSDL URL> with the one copied from your browser.)
Note: The web service must be running when you run the wsimport command.
wsimport -keep -p com.javacodegeeks.examples.jaxws.client -b ../resources/async_binding.xml <WSDL URL>
The -keep option saves the generated files. The -p option specifies the Java package we want to use for the files. The -b option specifies the location of our binding file. Running the wsimport command will generate the following files:
ChangeMessage.class
ChangeMessage.java
ChangeMessage_Service.class
ChangeMessage_Service.java
ChangeMessage_Type.class
ChangeMessage_Type.java
ObjectFactory.class
ObjectFactory.java
TestMessage.class
TestMessage.java
package-info.class
package-info.java
2.2.5 Implement the AsyncHandler Class
The next step is to implement our AsyncHandler. Since AsyncHandler is a generic interface, we’ll use TestMessage as the type parameter, which is what we expect to receive in the response.
OurAsyncHandler.java
import javax.xml.ws.AsyncHandler;
import javax.xml.ws.Response;

public class OurAsyncHandler implements AsyncHandler<TestMessage>{

	private TestMessage tMessage;

	@Override
	public void handleResponse(Response<TestMessage> response) {

		try {
			tMessage = response.get();
		} catch (Exception e) {
			e.printStackTrace();
		}
	}

	public String getResponse() {
		return tMessage.getMessage();
	}
}
The AsyncHandler interface defines one method, handleResponse(Response<T> response), which is called when the response is available. In our implementation of this method, we get the payload of the response by calling its get() method. We also add a method to retrieve the message of TestMessage.
2.2.6 Create the Client Application
Now, we’ll write a Java client to receive the message asynchronously. First, we create a web service client from the service endpoint. Then, we create an instance of OurAsyncHandler. Next, we call the asynchronous method that accepts the request data and asyncHandler as parameters. It returns a Future response that we check periodically for the arrival of the response using isDone(). Finally, we get the payload of the response.
Once the response returns, we’ll print out the TestMessage object’s message to the console and exit the program.
Notice that the main method declares that it throws InterruptedException. Since this application has not defined another thread to cause the interrupt, we won’t bother handling the exception.
MessageClient.java
import java.util.concurrent.Future;

public class MessageClient {

	public static void main(String[] args) throws InterruptedException {

		ChangeMessage_Service service = new ChangeMessage_Service();
		ChangeMessage port = service.getChangeMessageImplPort();

		OurAsyncHandler handler = new OurAsyncHandler();

		Future<?> response = port.changeMessageAsync("JCG rocks!", handler);
		while(!response.isDone()) {
			Thread.sleep(100);
		}

		String message = handler.getResponse();
		System.out.println("Service responded through callback with " + message);

		System.exit(0);
	}
}
2.2.7 Test the Asynchronous Service
Let’s test our web service. Right-click the Java client application and select Run As -> Java Application. You will notice a delay while our application checks for the response, since the service is sleeping for 10 seconds before returning the response. After this delay, you will see the message printed out on the console.
Service responded through callback with message: JCG rocks!
3. Conclusion
In this example, we showed how to implement an asynchronous SOAP web service and client using the AsyncHandler callback handler.
4. Download the Source Code
This was a JAX-WS AsyncHandler example.

very good article.
Thank you! I am glad you enjoyed it.