Hibernate annotations is the powerful way to provide the metadata for the Object and Relational Table mapping. All the metadata is clubbed into the POJO Java file along with the code which helps the user to understand the table structure and POJO simultaneously during the development.
In this tutorial, we will explain how to configure Hibernate annotations to define mapping without the use of XML file.
Table Of Contents
1. Introduction
Hibernate provides an easy way to configure a simple Java class that will represent an entity class in a database. With the use of JPA annotations, developers can map a Java class to a table and vice-versa, without having to use XML configuration.
But before we move on, let’s take a look and understand the Hibernate framework and Annotations.
1.1 What is Hibernate?
- Hibernate is the open source lightweight ORM (Object Relational Mapping) based framework to communicate with a database. ORM is a programming technique that maps the object to the data stored in the database.
- Hibernate framework makes the development of Java application to interact with the database in a simple manner.
- Hibernate handles mapping of Java classes to database tables (i.e. Java data types and SQL data types).
- Hibernate also provides data query and retrieval facilities.
- Hibernate is purely used for data persistence (i.e. to store/retrieve data from the database).
- Hibernate framework internally uses the JDBC API to interact with the database. It hides internal JDBC implementations from end users.
1.2 Hibernate Architecture
There are 4 layers in Hibernate architecture i.e. Java Application Layer, Hibernate Framework Layer, Backhand API Layer and Database Layer. Let’s understand the diagram of hibernate architecture:
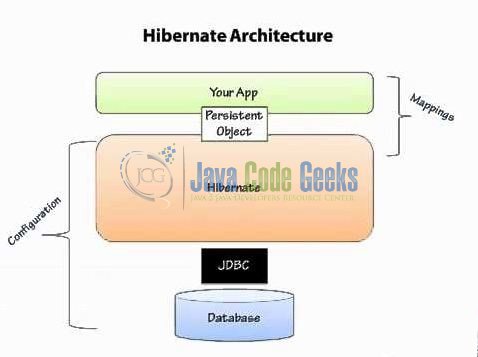
For creating the first Hibernate application, we must know the elements of Hibernate architecture. They are as follows:
| Element | Description |
|---|---|
| SessionFactory | The SessionFactory is a factory of session and client of Connection Provider. It holds second level cache (optional) of data. |
| Session | The session object provides an interface between the application and data stored in the database. It is a short-lived object and wraps the JDBC connection. It is a factory of Transaction, Query, and Criteria and holds a first-level cache (mandatory) of data. The Session interface provides methods to INSERT, UPDATE and DELETE the object. |
| Transaction | The transaction object specifies the atomic unit of work and is an optional parameter in Hibernate framework. |
| ConnectionProvider | It is a factory of JDBC connections and abstracts the application from Driver Manager or DataSource. It is an optional parameter in Hibernate framework. |
| TransactionFactory | It is a factory of Transaction and is again an optional parameter in Hibernate framework. |
1.3 Hibernate Benefits
There are many advantages of using the hibernate framework, for e.g.
- Takes care of mapping Java classes to database tables using XML files and without writing any line of code.
- Provides simple APIs for storing and retrieving Java objects directly to and from the database.
- Provides the facility to create the tables of the database automatically. So, there is no need to create tables in the database manually.
- If there is a change in a database or in any table then we only need to change the XML file properties.
- Minimizes database access with smart fetching strategies as Hibernate framework internally uses the cache technique.
- Provides simple querying of data.
1.4 Hibernate Annotations?
- Hibernate annotations is the newest way to define mappings without a use of an XML file.
- Developers use annotations to provide metadata configuration along with the Java code. Thus, making the code easy to understand.
- XML provides the ability to change the configuration without building the project. Thus, annotations are less powerful than XML configuration and should only be used for table and column mappings.
- Annotations are preconfigured with sensible default values, which reduce the amount of coding required. For e.g. Class name defaults to Table name and Field names defaults to column names.
1.5 Reference Guide on Hibernate Annotations
Hibernate Annotations are based on the JPA 2 specification. All the JPA annotations are defined in the javax.persistence.* package. The basic JPA annotations of Hibernate that can be used in an entity are the ones below:
| Annotation | Modifier | Description |
@Entity | Marks a class as a Hibernate Entity (Mapped class) | |
@Table | Name | Maps this class with a database table specified by name modifier. If a name is not supplied it maps the class with a table having the same name as the class. |
@Id | Marks this class field as a primary key column. | |
@GeneratedValue | Instructs database to generate a value for this field automatically. | |
@Column | Name | Maps this field with table column specified by name and uses the field name if name modifier is absent. |
@ManyToMany | Cascade | Marks this field as the owning side of the many-to-many relationship and cascade modifier specifies which operations should cascade to the inverse side of a relationship. |
mappedBy | This modifier holds the field which specifies the inverse side of the relationship. | |
@JoinTable | Name | For holding this many-to-many relationship, maps this field with an intermediary database join table specified by name modifier. |
| joinColumns | Identifies the owning side of columns which are necessary to identify a unique owning object. | |
| inverseJoinColumns | Identifies the inverse (target) side of columns which are necessary to identify a unique target object. | |
@JoinColumn | Name | Maps a join column specified by the name identifier to the relationship table specified by @JoinTable. |
1.6 Download and Install Hibernate
You can read this tutorial in order to download and install Hibernate in the Eclipse IDE.
1.7 Download and Install MySQL
You can watch this video in order to download and install the MySQL database on your windows operations system.
Below, we will make use of all the basic Hibernate annotations to CREATE, READ, UPDATE and DELETE rows from a database table. Now, open up the Eclipse IDE and let’s start building the application!
2. Hibernate Example Code Using Annotations
2.1 Tools Used
We are using Eclipse Kepler SR2, JDK 8, MySQL database and Maven (to download the MySQL connector jar and Hibernate libraries). Having said that, we have tested the code against JDK 1.7 and it works well.
2.2 Project Structure
Firstly, let’s review the final project structure, in case you are confused about where you should create the corresponding files or folder later!
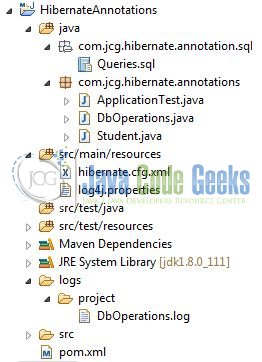
You may skip project creation and jump directly to the beginning of the example below.
2.3 Project Creation
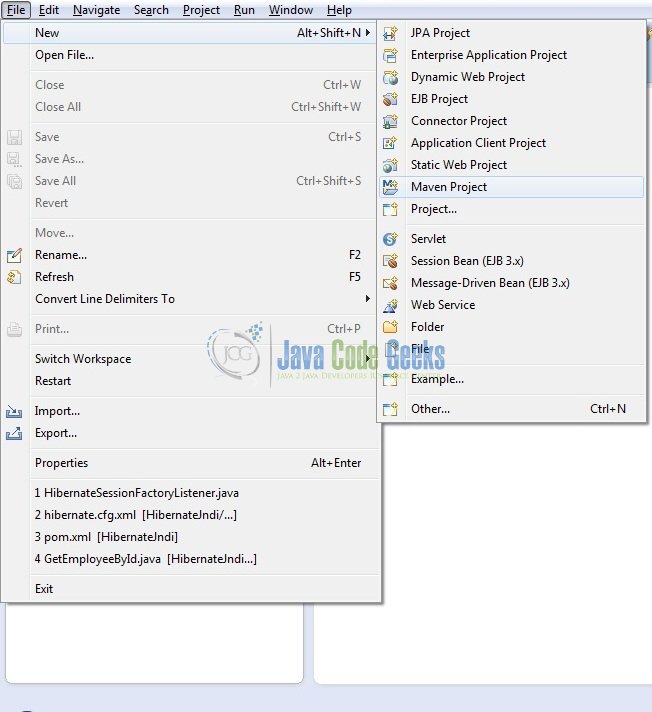
This section will demonstrate on how to create a Java Maven project with Eclipse. In Eclipse IDE, go to File -> New -> Maven Project
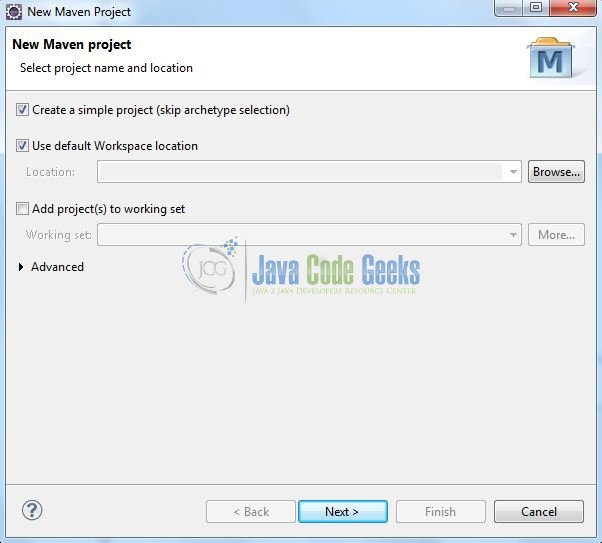
In the New Maven Project window, it will ask you to select project location. By default, ‘Use default workspace location‘ will be selected. Select the ‘Create a simple project (skip archetype selection)‘ checkbox and just click on Next button to proceed.
It will ask you to ‘Enter a group id for the artifact.’ We will input the details as shown in the below image. The version number will be by default 0.0.1-SNAPSHOT.
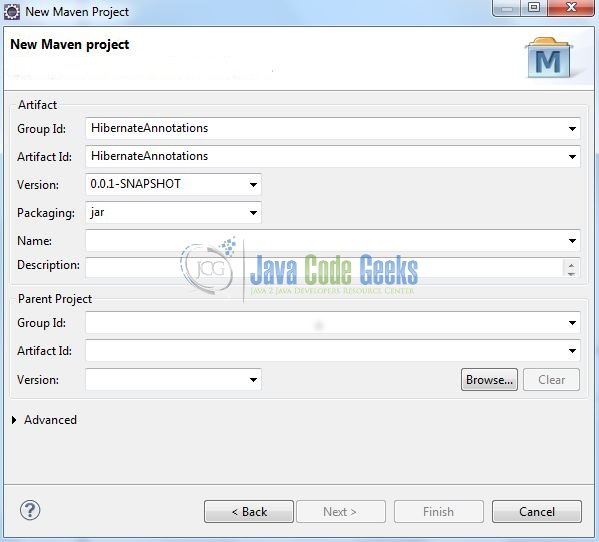
Click on Finish and now the creation of a maven project is completed. If you observe, it has downloaded the maven dependencies and a pom.xml file will be created. It will have the following code:
pom.xml
<project xmlns="http://maven.apache.org/POM/4.0.0" xmlns:xsi="http://www.w3.org/2001/XMLSchema-instance" xsi:schemaLocation="http://maven.apache.org/POM/4.0.0 http://maven.apache.org/xsd/maven-4.0.0.xsd">
	<modelVersion>4.0.0</modelVersion>
	<groupId>com.jcg.hibernate.annotation.example</groupId>
	<artifactId>HibernateAnnotations</artifactId>
	<version>0.0.1-SNAPSHOT</version>
	<packaging>jar</packaging>
	<build>
		<finalName>${project.artifactId}</finalName>
	</build>
</project>
We can start adding the dependencies which developers want like Hibernate, MySQL, Apache jars etc. Let’s start building the application!
3. Application Building
Below are the steps involved in developing this application:
3.1 Database & Table Creation
This tutorial uses a database called hibernateAnnotationsDb. The database is not included when you create the project in eclipse so you need to first create the database to follow this tutorial:
- Create a new database
hibernateAnnotationsDbas:
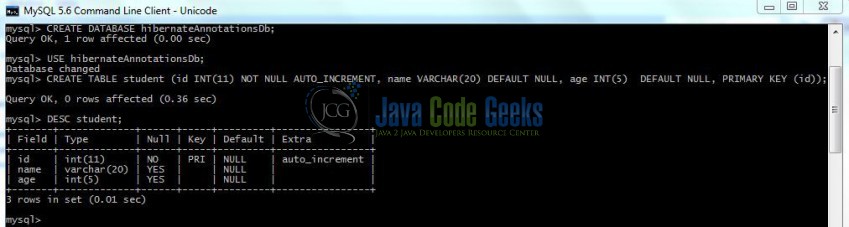
CREATE DATABASE hibernateAnnotationsDb;
- Use the created database
hibernateAnnotationsDbto create table as:
USE hibernateAnnotationsDb;
- Create the table
studentas shown below:
CREATE TABLE student (id INT(11) NOT NULL AUTO_INCREMENT, name VARCHAR(20) DEFAULT NULL, age INT(5) DEFAULT NULL, PRIMARY KEY (id));
If everything goes well, the table will be shown as below in the MySQL workbench:
3.2 Hibernate Maven Dependencies
In this example, we are using Hibernate latest version i.e. hibernate-core-4.3.6.Final and MySQL-connector-java dependency. The updated file will have the following code:
pom.xml
<project xmlns="http://maven.apache.org/POM/4.0.0" xmlns:xsi="http://www.w3.org/2001/XMLSchema-instance" xsi:schemaLocation="http://maven.apache.org/POM/4.0.0 http://maven.apache.org/xsd/maven-4.0.0.xsd">
	<modelVersion>4.0.0</modelVersion>
	<groupId>com.jcg.hibernate.annotation.example</groupId>
	<artifactId>HibernateAnnotations</artifactId>
	<version>0.0.1-SNAPSHOT</version>
	<packaging>jar</packaging>
	<dependencies>
		<dependency>
			<groupId>org.hibernate</groupId>
			<artifactId>hibernate-core</artifactId>
			<version>4.3.6.Final</version>
		</dependency>
		<dependency>
			<groupId>mysql</groupId>
			<artifactId>mysql-connector-java</artifactId>
			<version>5.1.21</version>
		</dependency>
		<dependency>
			<groupId>org.slf4j</groupId>
			<artifactId>slf4j-simple</artifactId>
			<version>1.7.5</version>
		</dependency>
		<dependency>
			<groupId>log4j</groupId>
			<artifactId>log4j</artifactId>
			<version>1.2.16</version>
		</dependency>
	</dependencies>
	<build>
		<finalName>${project.artifactId}</finalName>
	</build>
</project>
3.3 Java Class Creation
Let’s create the required java files. Right click on src/main/java folder New -> Package
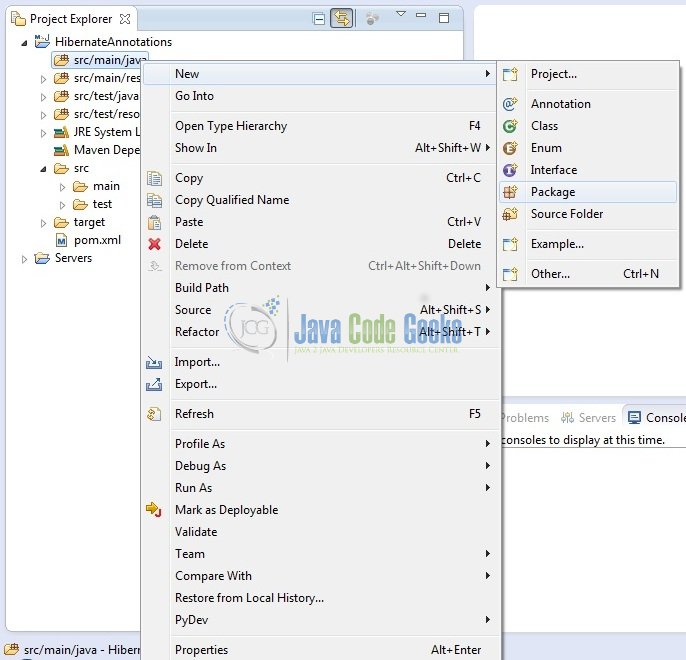
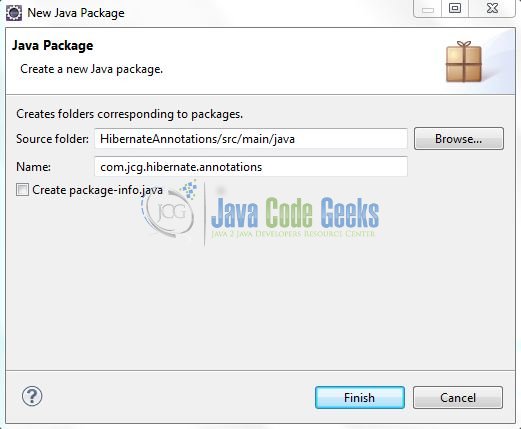
A new pop window will open where we will enter the package name as com.jcg.hibernate.annotations
Once the package is created in the application, we will need to create the required Model, Dao (configuring session factory listener & performing database operations) and Implementation class. Right click on the newly created package, New -> Class
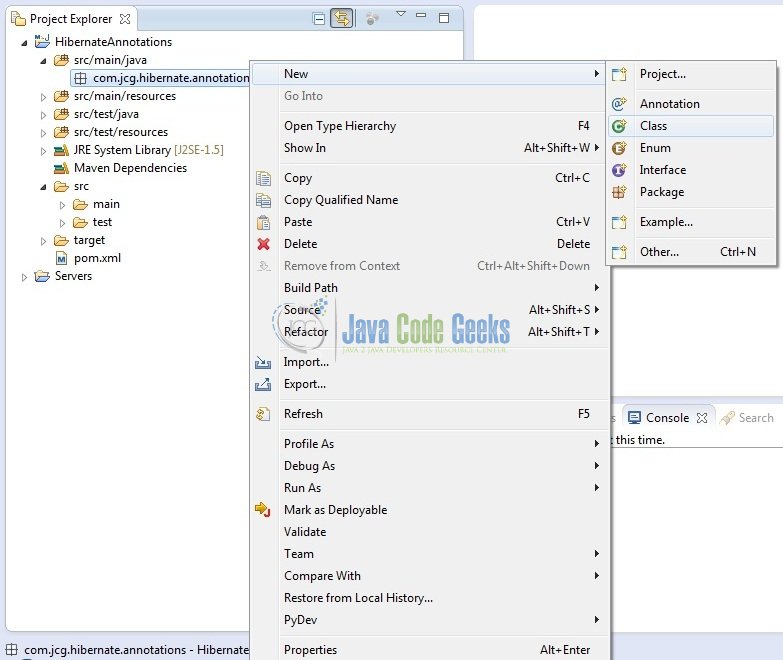
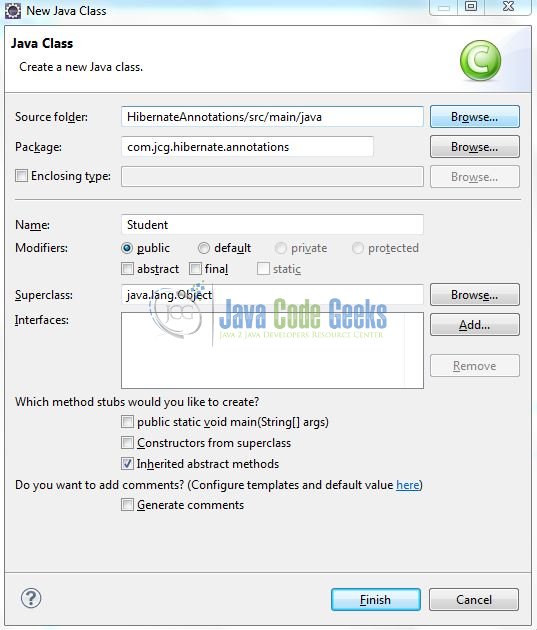
A new pop window will open and enter the file name as Student. The model class will be created inside the package: com.jcg.hibernate.annotations
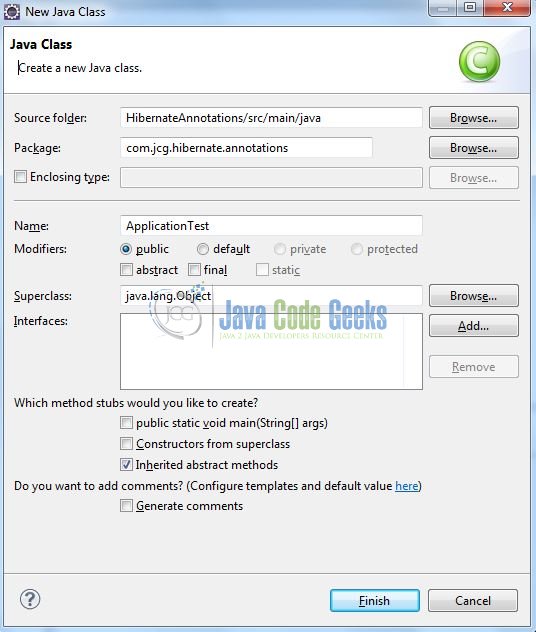
Repeat the step (i.e. Fig. 9) and enter the filename as ApplicationTest. The implementation class will be created inside the package: com.jcg.hibernate.annotations
Again, repeat the step listed in Fig. 9 and enter the file name as DbOperations. The servlet implementation class will be created inside the package: com.jcg.hibernate.annotations

3.3.1 Implementation of Model Class
In this class, we are using the annotations to map the objects with the defined student table. Add the following code to it:
Student.java
package com.jcg.hibernate.annotations;

import javax.persistence.Column;
import javax.persistence.Entity;
import javax.persistence.GeneratedValue;
import javax.persistence.GenerationType;
import javax.persistence.Id;
import javax.persistence.Table;
import javax.persistence.UniqueConstraint;

@Entity
@Table(name = "student", uniqueConstraints={@UniqueConstraint(columnNames={"id"})})
public class Student {

	@Id
	@GeneratedValue(strategy = GenerationType.IDENTITY)
	@Column(name = "id", length=11, nullable=false, unique=true)
	private Integer studentId;

	@Column(name = "name", length=20, nullable=true)
	private String studentName;

	@Column(name="age", length=5, nullable=true)
	private Integer studentAge;

	public Student() { }

	public Student(Integer studId, String studName, Integer studAge) {
		this.studentId = studId;
		this.studentName = studName;
		this.studentAge = studAge;
	}

	public Integer getStudentId() {
		return studentId;
	}

	public void setStudentId(Integer studentId) {
		this.studentId = studentId;
	}

	public String getStudentName() {
		return studentName;
	}

	public void setStudentName(String studentName) {
		this.studentName = studentName;
	}

	public Integer getStudentAge() {
		return studentAge;
	}

	public void setStudentAge(Integer studentAge) {
		this.studentAge = studentAge;
	}

	@Override
	public String toString() {
		return "Student= Id: " + this.studentId + ", Name: " + this.studentName + ", Age: " + this.studentAge;
	}
}
3.3.2 Implementation of Main Class
In this class, we will have the main() method to execute the application. Add the following code to it:

ApplicationTest.java
package com.jcg.hibernate.annotations;

import java.util.List;

import org.apache.log4j.Logger;

public class ApplicationTest {

	public final static Logger logger = Logger.getLogger(ApplicationTest.class);

	public static void main(String[] args) {

		Student studentObj1 = new Student(1, "JavaCodeGeek", 20);
		Student studentObj2 = new Student(2, "Harry Potter", 10);
		Student studentObj3 = new Student(3, "Lucifer", 5);

		logger.info("\n=======CREATE RECORDS=======");
		DbOperations.createRecord(studentObj1);
		DbOperations.createRecord(studentObj2);
		DbOperations.createRecord(studentObj3);

		logger.info("\n=======READ RECORDS=======");
		ListviewStudent = DbOperations.displayRecords();
		for(Student student : viewStudent) {
			logger.info(student.toString());
		}

		logger.info("\n=======UPDATE RECORDS=======");
		studentObj1.setStudentAge(25);
		studentObj1.setStudentName("Java Code Geek");
		DbOperations.updateRecord(studentObj1);
		logger.info("\n=======READ RECORDS AFTER UPDATION=======");
		List updateStudent = DbOperations.displayRecords();
		for(Student student : updateStudent) {
			logger.info(student.toString());
		}

		logger.info("\n=======DELETE RECORD=======");
		DbOperations.deleteRecord(studentObj2.getStudentId());
		logger.info("\n=======READ RECORDS AFTER DELETION=======");
		List deleteStudentRecord = DbOperations.displayRecords();
		for(Student student : deleteStudentRecord) {
			logger.info(student.toString());
		}

		logger.info("\n=======DELETE ALL RECORDS=======");
		DbOperations.deleteAllRecords();
		logger.info("\n=======READ RECORDS AFTER ALL RECORDS DELETION=======");
		List deleteAll = DbOperations.displayRecords();
		for(Student student : deleteAll) {
			logger.info(student.toString());
		}
		System.exit(0);
	}
}
3.3.3 Implementation of DAO Class
This class helps in creating the SessionFactory from the Hibernate configuration file and interacts with the database to perform the Create, Update, Read, and Delete operations. Add the following code to it:
DbOperations.java
package com.jcg.hibernate.annotations;

import java.util.List;

import org.hibernate.Query;
import org.hibernate.Session;
import org.hibernate.SessionFactory;
import org.hibernate.Transaction;
import org.hibernate.boot.registry.StandardServiceRegistryBuilder;
import org.hibernate.cfg.Configuration;
import org.hibernate.service.ServiceRegistry;
import org.apache.log4j.Logger;

public class DbOperations {

	public final static Logger logger = Logger.getLogger(DbOperations.class);

	// Method Used To Create The Hibernate's SessionFactory Object
	public static SessionFactory getSessionFactory() {
		// Creating Configuration Instance & Passing Hibernate Configuration File
		Configuration configObj = new Configuration();
		configObj.configure("hibernate.cfg.xml");

		// Since Hibernate Version 4.x, Service Registry Is Being Used
		ServiceRegistry serviceRegistryObj = new StandardServiceRegistryBuilder().applySettings(configObj.getProperties()).build();

		// Creating Hibernate Session Factory Instance
		SessionFactory factoryObj = configObj.buildSessionFactory(serviceRegistryObj);
		return factoryObj;
	}

	// Method 1: This Method Used To Create A New Student Record In The Database Table
	public static Integer createRecord(Student studentObj) {
		Session sessionObj = getSessionFactory().openSession();

		//Creating Transaction Object
		Transaction transObj = sessionObj.beginTransaction();
		sessionObj.save(studentObj);

		// Transaction Is Committed To Database
		transObj.commit();

		// Closing The Session Object
		sessionObj.close();
		logger.info("Successfully Created " + studentObj.toString());
		return studentObj.getStudentId();
	}

	// Method 2: This Method Is Used To Display The Records From The Database Table
	@SuppressWarnings("unchecked")
	public static List displayRecords() {
		Session sessionObj = getSessionFactory().openSession();
		List studentsList = sessionObj.createQuery("FROM Student").list();

		// Closing The Session Object
		sessionObj.close();
		logger.info("Student Records Available In Database Are?= " + studentsList.size());
		return studentsList;
	}

	// Method 3: This Method Is Used To Update A Record In The Database Table
	public static void updateRecord(Student studentObj) {
		Session sessionObj = getSessionFactory().openSession();

		//Creating Transaction Object
		Transaction transObj = sessionObj.beginTransaction();
		Student stuObj = (Student) sessionObj.load(Student.class, studentObj.getStudentId());
		stuObj.setStudentName(studentObj.getStudentName());
		stuObj.setStudentAge(studentObj.getStudentAge());

		// Transaction Is Committed To Database
		transObj.commit();

		// Closing The Session Object
		sessionObj.close();
		logger.info("Student Record Is Successfully Updated!= " + studentObj.toString());
	}

	// Method 4(a): This Method Is Used To Delete A Particular Record From The Database Table
	public static void deleteRecord(Integer studentId) {
		Session sessionObj = getSessionFactory().openSession();

		//Creating Transaction Object
		Transaction transObj = sessionObj.beginTransaction();
		Student studObj = findRecordById(studentId);
		sessionObj.delete(studObj);

		// Transaction Is Committed To Database
		transObj.commit();

		// Closing The Session Object
		sessionObj.close();
		logger.info("Successfully Record Is Successfully Deleted!=  " + studObj.toString());

	}

	// Method 4(b): This Method To Find Particular Record In The Database Table
	public static Student findRecordById(Integer studentId) {
		Session sessionObj = getSessionFactory().openSession();
		Student stu = (Student) sessionObj.load(Student.class, studentId);

		// Closing The Session Object
		sessionObj.close();
		return stu;
	}

	// Method 5: This Method Is Used To Delete All Records From The Database Table
	public static void deleteAllRecords() {
		Session sessionObj = getSessionFactory().openSession();

		//Creating Transaction Object
		Transaction transObj = sessionObj.beginTransaction();
		Query queryObj = sessionObj.createQuery("DELETE FROM Student");
		queryObj.executeUpdate();

		// Transaction Is Committed To Database
		transObj.commit();

		// Closing The Session Object
		sessionObj.close();
		logger.info("Successfully Deleted All Records From The Database Table!");
	}
}
4. Hibernate Database Configuration
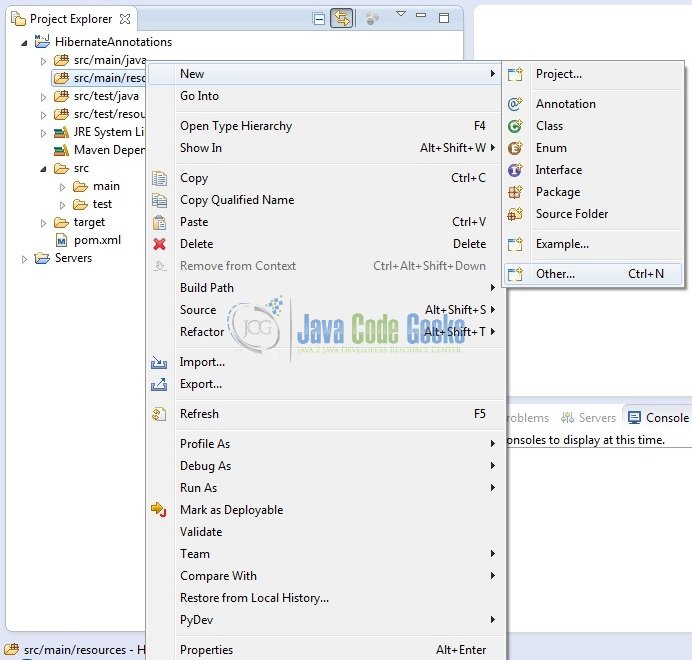
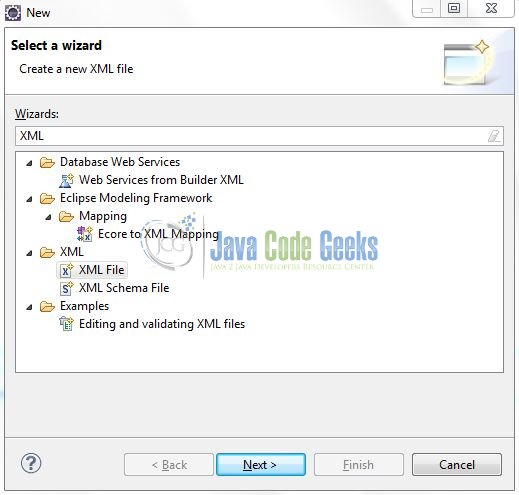
To configure the Hibernate framework, we need to implement a configuration file i.e. hiberncate.cfg.xml. Right click on resources folder New -> Other
A new pop window will open and select the wizard as an XML file.
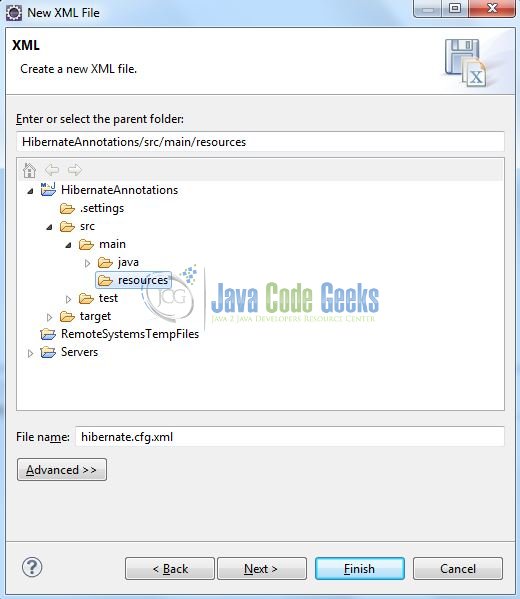
Again, a pop-up window will open. Verify the parent folder location as HibernateAnnotations/src/main/resources and enter the file name as hibernate.cfg.xml. Click Finish.
Once the file is created, we will include the database configuration. Add the following code to it:
hibernate.cfg.xml
<?xml version='1.0' encoding='utf-8'?>
<!DOCTYPE hibernate-configuration PUBLIC
        "-//Hibernate/Hibernate Configuration DTD 3.0//EN"
        "http://www.hibernate.org/dtd/hibernate-configuration-3.0.dtd">

<hibernate-configuration>
	<session-factory>
		<!-- SQL Dialect -->
		<property name="hibernate.dialect">org.hibernate.dialect.MySQLDialect</property>

		<!-- Database Connection Settings -->
		<property name="hibernate.connection.driver_class">com.mysql.jdbc.Driver</property>
		<property name="hibernate.connection.url">jdbc:mysql://localhost:3306/hibernateAnnotationsDb</property>
		<property name="hibernate.connection.username">root</property>
		<property name="hibernate.connection.password">admin@123</property>

		<!-- Specifying Session Context -->
		<property name="hibernate.current_session_context_class">org.hibernate.context.internal.ThreadLocalSessionContext</property>

		<!-- Mapping With Model Class Containing Annotations -->
		<mapping class="com.jcg.hibernate.annotations.Student" />
	</session-factory>
</hibernate-configuration>
Notes:
- Here, we instructed Hibernate to connect to a MySQL database named
hibernateAnnotationsDb. As developers can see, we supplied Database URL, Username, and Password for the connection. - We have also instructed Hibernate framework to use
MySQLDialecti.e. Hibernate will optimize the generated SQL statements for MySQL. - This configuration will be used to create a Hibernate
SessionFactoryobject.
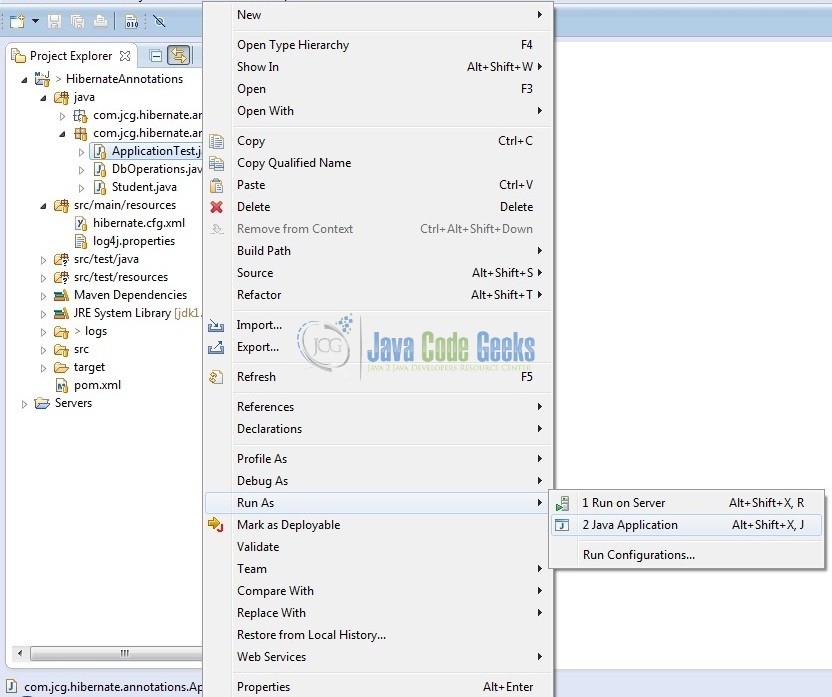
5. Run the Application
To run the Hibernate application, Right click on the ApplicationTest class, Run As -> Java Application.
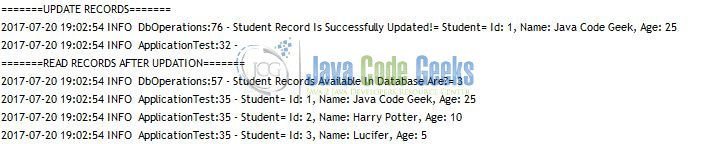
6. Project Demo
When we will run the application, developers will see that 3 student records are created, then 1 is updated, then 1 is deleted, and finally, all students are deleted from the database table. Developers can debug the example and see what happens in the database after every step. Enjoy!
- Create Student Records

- Display Students Records

- Update Student Record
- Delete Student Record

- Delete All Records

7. Conclusion
This tutorial shows how easily we can configure session factory connection details using XML and entities using annotation configuration respectively in Hibernate and access the database.
- By using XML, database connection properties can be easily changed without changing the Java source files which are an added advantage.
- By using annotations, Java entity classes are more expressive and developers don’t have to refer to another XML file for figuring out the Hibernate-Database mapping.
8. Download the Eclipse Project
This was an example of Hibernate annotations.
You can download the full source code of this example here: Hibernate Annotations
