Java API documentation is a crucial resource for developers, providing insights into the classes, methods, and functionalities of various Java applications, libraries, and frameworks. Introduced in Java 18, the @snippet tag streamlines and enhances how to incorporate code snippets into Java Doc. In this article, we’ll explore how to incorporate code snippets effectively using the @snippet tag, illustrating full working examples and source code.
1. Understanding the @snippet Tag
JEP 413 introduced the @snippet tag to declare code fragments to appear in the generated documentation. It can be used to declare both inline snippets where the code fragment is included within the tag itself, and external snippets, where the code fragment is read from a separate source file. The @snippet tag helps to add short and clear examples.
1.1 Basic Syntax
The {@snippet:"Code snippet goes here"} tag consists of both opening and curly braces which are used to mark the beginning and end of each code snippet. The code snippets are placed following a colon sign : and should be enclosed within these curly braces.
/**
 * {@snippet :
 * // Code snippet here
 * }
 *
 */
The @snippet tag offers numerous benefits including:
- Code Syntax Highlighting: Syntax is accurately highlighted, improving readability and understanding.
- External Snippet Linking: Complex or frequently used snippets can be stored and referenced externally, promoting modularity and reusability.
- Code Formatting: Consistent formatting aligns snippets with surrounding documentation, ensuring a polished presentation.
- Improved Readability
2. Leveraging the @snippet Tag – Inline Snippets
Inline snippets are defined directly within the Javadoc comment. Suppose we want to demonstrate how to manipulate lists using Java’s ArrayList class, we will illustrate common operations such as adding, removing, and iterating through elements. Below is how we can incorporate code snippets into the documentation.
package com.jcg.codesnippetexamples;

import java.util.ArrayList;

/**
 * This class demonstrates the usage of ArrayList in Java.
 *
 * {@snippet :
 *
 *      ArrayList<String> list = new ArrayList<>();
 *
 *      list.add("pumpkin");
 *      list.add("cucumber");
 *      list.add("lettuce");
 *
 *      list.remove("cucumber");
 *
 *      for (String item : list) {
            System.out.println(item);
        }
 * }
 *
 */
public class ArrayListExample {

    /**
     * Adds elements to an ArrayList.
     * {@snippet :
     * public static void addElement() {
     *
     *       ArrayList list = new ArrayList();
     *
     *       list.add("lettuce");
     *       list.add("cucumber");
     *       list.add("pumpkin");
     * }
     * }
     */
    public static void addElements() {
        // Create a new ArrayList
        ArrayList<String> list = new ArrayList<>();

        // Add elements
        list.add("pumpkin");
        list.add("cucumber");
        list.add("lettuce");

        // Print elements
        for (String item : list) {
            System.out.println(item);
        }
    }

    /**
     * Removes an element from the ArrayList.
     * {@snippet :
     * public static void removeElement() {
     *
     *       ArrayList<String> list = new ArrayList<>();
     *
     *       list.add("lettuce");
     *       list.add("cucumber");
     *       list.add("pumpkin");
     *
     *       list.remove("cucumber");
     * }
     * }
     */
    public static void removeElement() {
        // Create a new ArrayList
        ArrayList list = new ArrayList();

        // Add elements
        list.add("lettuce");
        list.add("cucumber");
        list.add("pumpkin");

        // Remove an element
        list.remove("cucumber");

        // Print elements
        for (String item : list) {
            System.out.println(item);
        }
    }
}
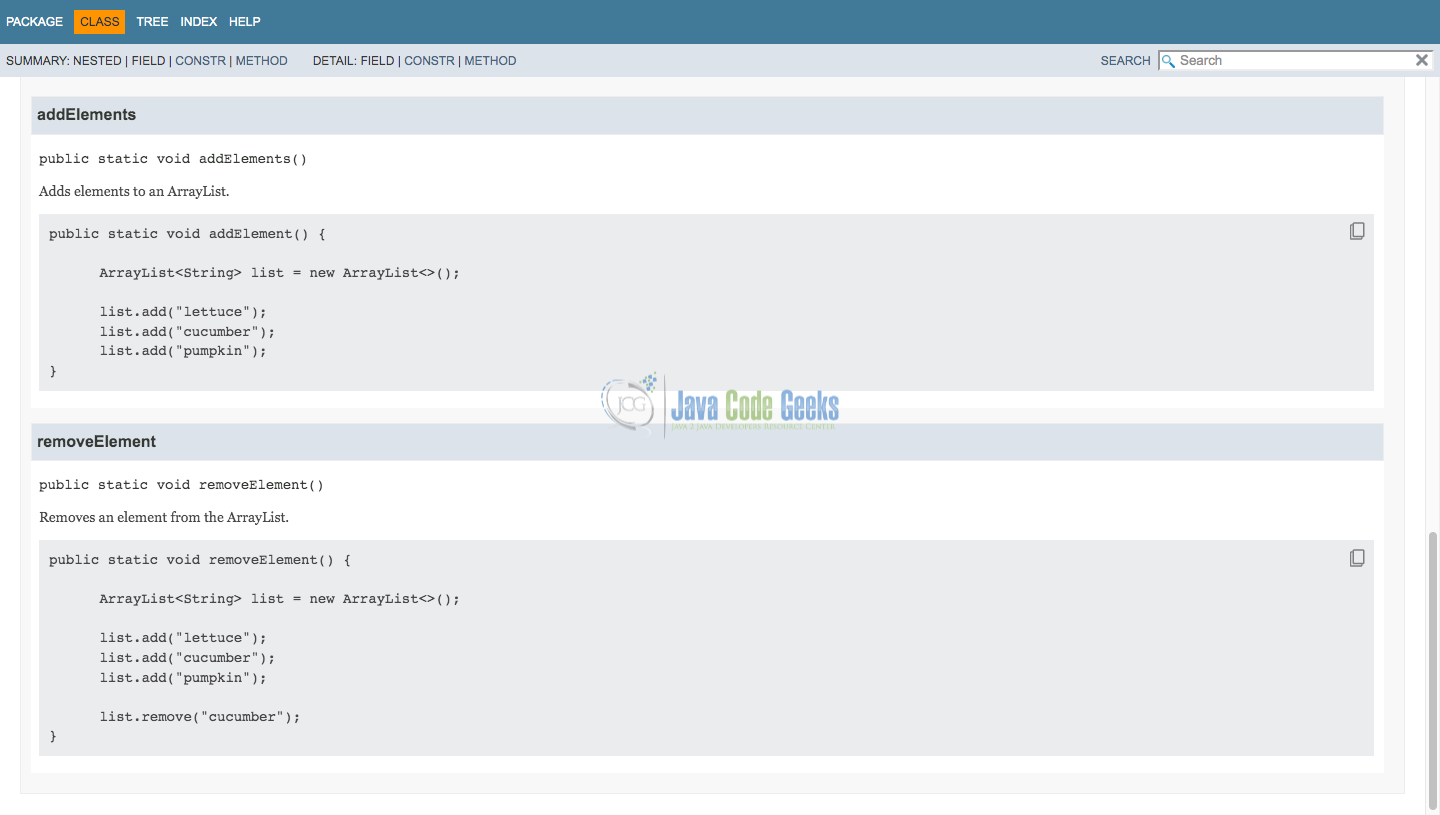
In the above example, we’ve included two methods addElements() and removeElement(), each demonstrating specific operations with ArrayList. When the above code is run through the javadoc -d docs tool, the generated Java Doc is:
3. External Snippets
External snippets are referenced from separate files, promoting reusability. The attributes in the {@snippet ...} tag when using external code snippets identify the file and the name of the region of the file to be displayed. The @start and @end Tags define the bounds of the region.
We can begin by creating separate files containing the external code snippets we wish to include in our documentation. Create a folder named snippet-files inside src/main/java folder and then create a file named MathUtils.java inside the snippets-file folder with the code:
public class MathUtils {

    // @start region="hypotenuse"
    public double calculateHypotenuse(double side1, double side2) {

        return Math.sqrt(Math.pow(side1, 2) + Math.pow(side2, 2));

    }
    // @end region="hypotenuse"
}
The above block of code defines a class called MathUtils, which contains a mathematical utility method named calculateHypotenuse that calculates the length of the hypotenuse of a right triangle given the lengths of its two perpendicular sides.
The comment // @start region="hypotenuse" and // @end region="hypotenuse" define the bounds of the region. The @start tag defines the start region while the @end tag is used to define the end region.
Now, Let’s incorporate this code into a Javadoc comment within a class called Codesnippetexamples.java
/**
 * External code snippet showing how to calculate hypotenuse.
 * {@snippet file="MathUtils.java" region="hypotenuse"}
 */
public class Codesnippetexamples {

    public static void main(String[] args) {

        double side1 = 3.0;
        double side2 = 4.0;

        MathUtils mathu = new MathUtils();

        double hypotenuse = mathu.calculateHypotenuse(side1, side2);
        System.out.println("Hypotenuse: " + hypotenuse);

    }

}
The above code block demonstrates the use of the @snippet tag in Java API documentation to reference the external code snippet for calculating the hypotenuse of a right triangle. The @snippet tag instructs the Javadoc generator to reference the provided MathUtils.java file and include the code within the hypotenuse region as part of the generated documentation for this code snippet.
Explanation
The {@snippet file="MathUtils.java" region="hypotenuse"} @snippet tag is doing the following:
file="MathUtils.java": Specifies the external file containing the code snippet.region="hypotenuse": Identifies the specific region within the file to include.
To create the Javadoc documentation, we need to indicate the folder snippet-files containing the snippets by using the --snippet-path option like this:
javadoc -d doc com.jcg.codesnippetexamples --snippet-path snippet-files
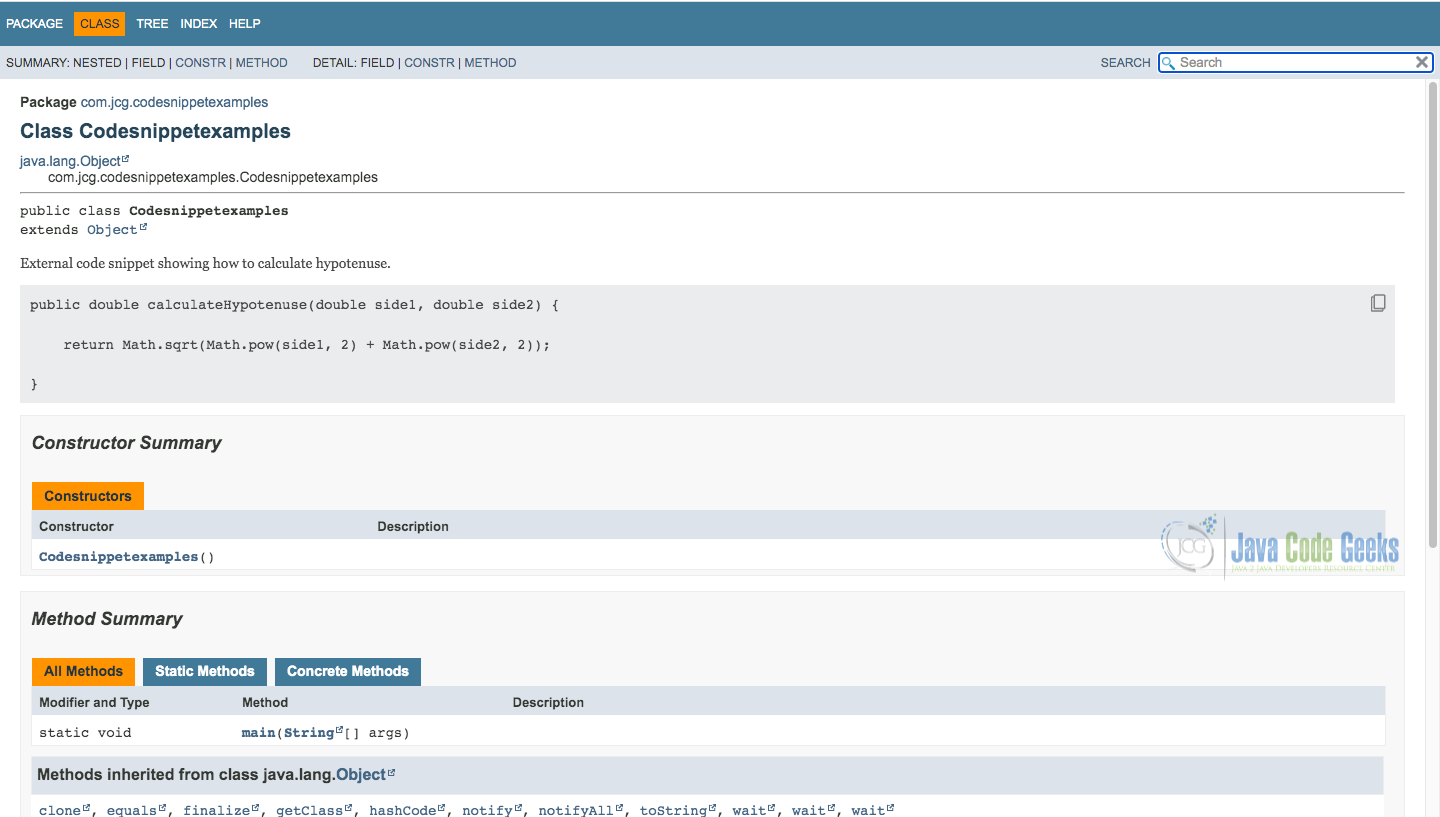
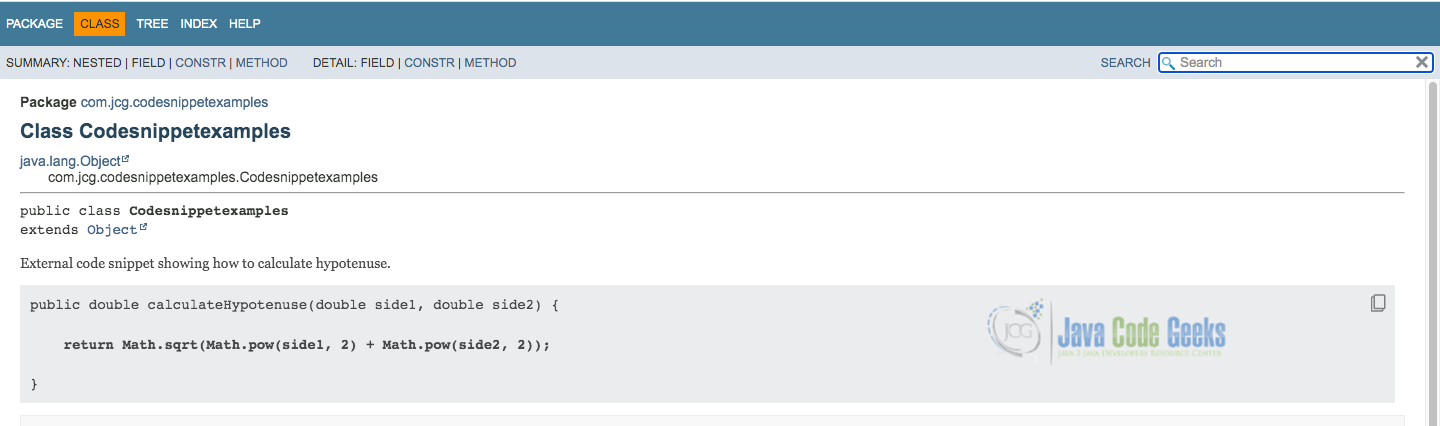
The above command produces the documentation. Below is the resulting Javadoc:
4. Leveraging the @link Tag
The @link tag allows us to create hyperlinks to other classes, methods, or fields within the documentation. This facilitates navigation and provides context for related elements. The code below shows how to use the @link tag in practice:
    /**
     * Removes an element from the ArrayList.
     * {@snippet :
     * public static void removeElement() {
     *
     *       ArrayList list = new ArrayList();
     *
     *       list.add("lettuce");
     *       list.add("cucumber");
     *       list.add("pumpkin");
     *
     *       list.remove("cucumber"); // @link substring="list.remove" target="ArrayList#remove(Object)"
     * }
     * }
     */
    public static void removeElement() {
        // Create a new ArrayList
        ArrayList list = new ArrayList();

        // Add elements
        list.add("lettuce");
        list.add("cucumber");
        list.add("pumpkin");

        // Remove an element
        list.remove("cucumber");

        // Print elements
        for (String item : list) {
            System.out.println(item);
        }
    }
}
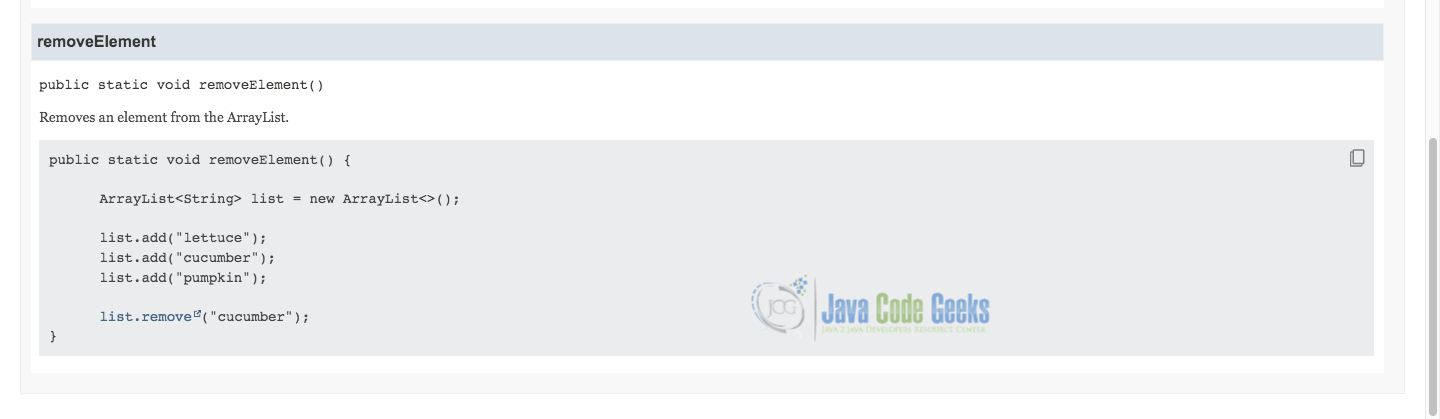
The above code uses the @link tag to provide a hyperlink-like functionality. The substring attribute specifies the text to be linked, which is list.remove. The target attribute specifies where the link should point to, in this case, it directs to the documentation for the remove method of the ArrayList class, specifically to the version that takes an Object parameter.
The generated JavaDoc is:
5. Utilizing the @highlight Tag
While the @snippet tag facilitates embedding code snippets in Java API documentation, the @highlight makes important parts of the code stand out more by drawing attention to crucial parts of the code.
public class MathUtils {

    // @start region="hypotenuse"
    public double calculateHypotenuse(double side1, double side2) {

        return Math.sqrt(Math.pow(side1, 2) + Math.pow(side2, 2)); // @highlight

    }
    // @end region="hypotenuse"
}
In this example, the @highlight tag draws attention to the specific line where we declare it, and the resulting output is :
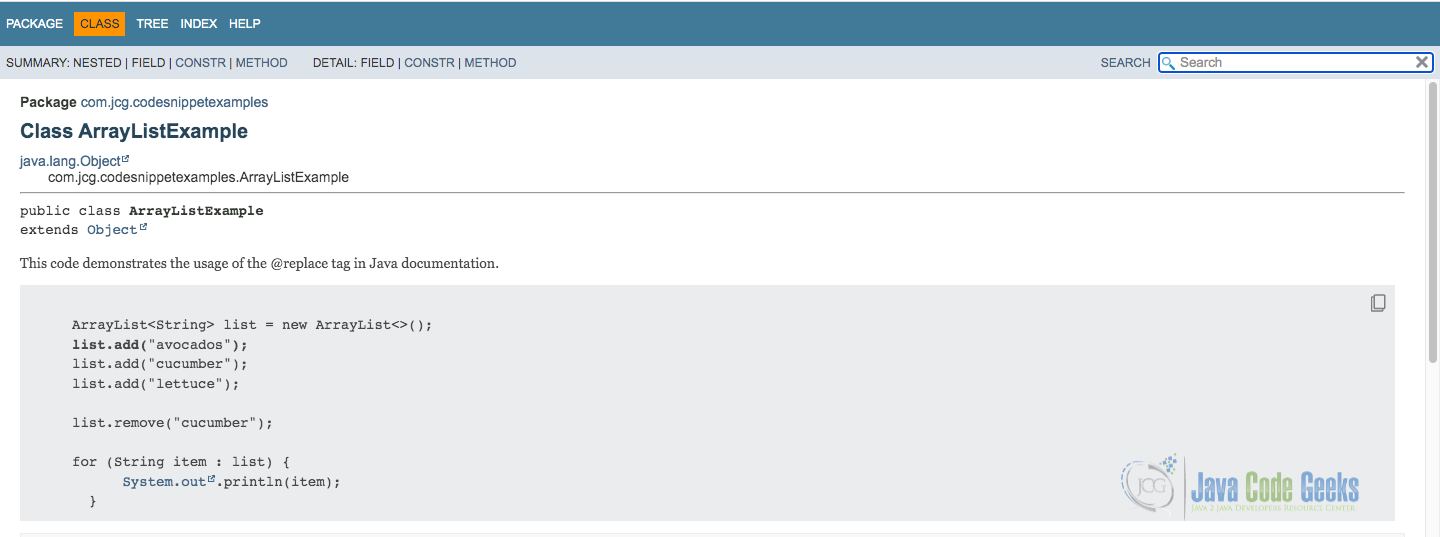
6. Employing the @replace Tag
The @replace tag within the @snippet tag in Javadoc documentation is designed to replace parts of the content of the snippet with some replacement text.
Here’s how it works:
/**
 * This code demonstrates the usage of the @replace tag in Java documentation.
 *
 * {@snippet :
 *
 *      ArrayList list = new ArrayList();
 *      list.add("pumpkin"); // @highlight @replace regex='".*"' replacement='"avocados"'
 *      list.add("cucumber");
 *      list.add("lettuce");
 *
 *      list.remove("cucumber");
 *
 *      for (String item : list) {
            System.out.println(item); // @link substring="System.out" target="System#out"
        }
 * }
 *
 */
Here, we replaced the text pumpkin with avocados, and the generated documentation is shown below:
7. Conclusion
In this article, we explored how the @snippet tag can be employed to insert code snippets into a Javadoc comment. Furthermore, we examined the utilization of in-line and external code snippets alongside @highlight, @replace, and @link tags and attributes.
In conclusion, the introduction of JEP 413 and the @snippet tag in Java documentation represents a significant advancement in enhancing the usefulness of API documentation. By integrating code snippets into documentation comments, we can provide concrete examples and practical demonstrations of API usage.
8. Download the Source Code
This was an example of using Java doc code snippets.
You can download the full source code of this example here: Enhancing Java API Documentation with Code Snippets
