IntelliJ IDEA GUI Designer Tutorial
In this post, we feature a comprehensive Tutorial on IntelliJ IDEA GUI Designer. We are going to take you through the process of creating a ‘Display Image’ application using a GUI.
The following table shows an overview of the whole article:
1. Introduction
Graphical User Interface (GUI) provides an enhanced user experience. Fortunately, Java provide a set of components ‘Swing components’ which allow for the creation of a User Interface.
IntelliJ provides 2 types of GUI component:
- GUI form
- GUI Dialog
It uses special XML format with extension .form to design GUI component.
Table Of Contents
2. Create New Project
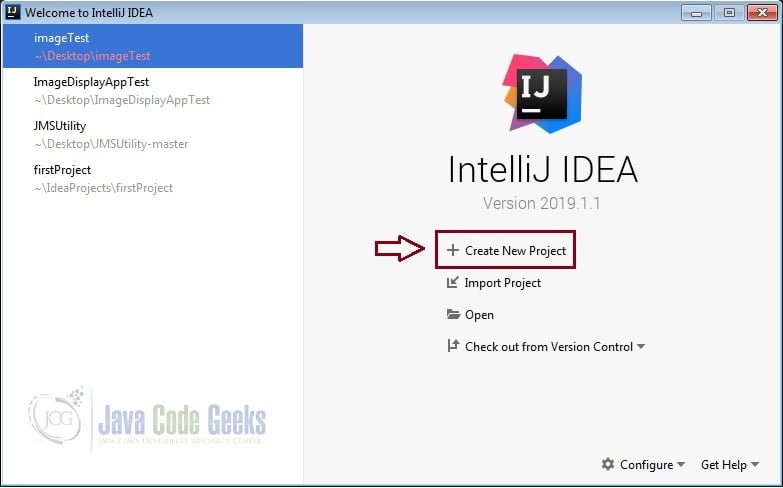
Start by creating a new Java Project in IntelliJ.
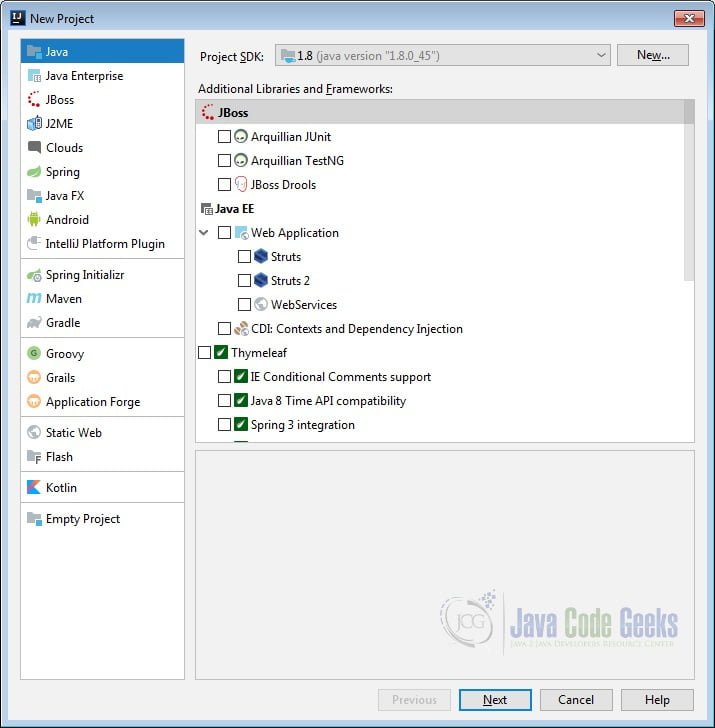
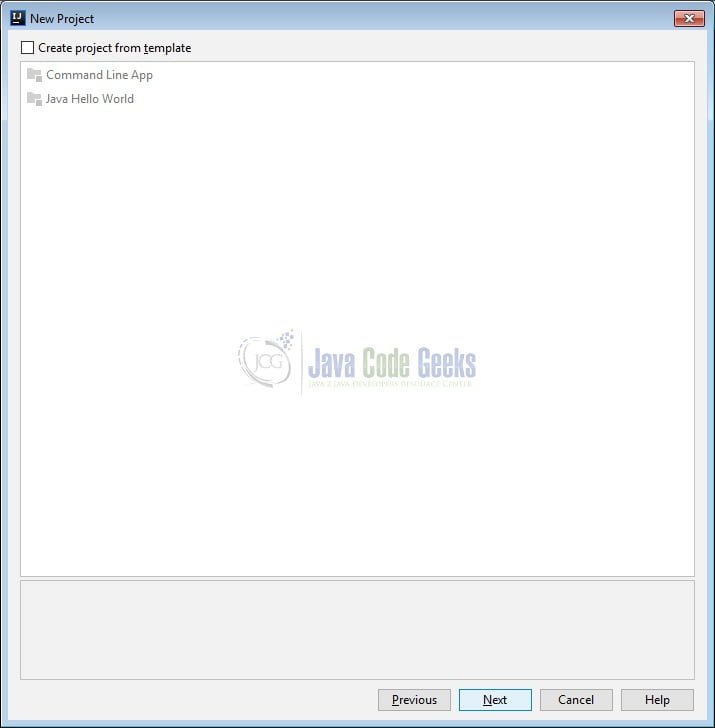
Make sure not to check the creating project from template:
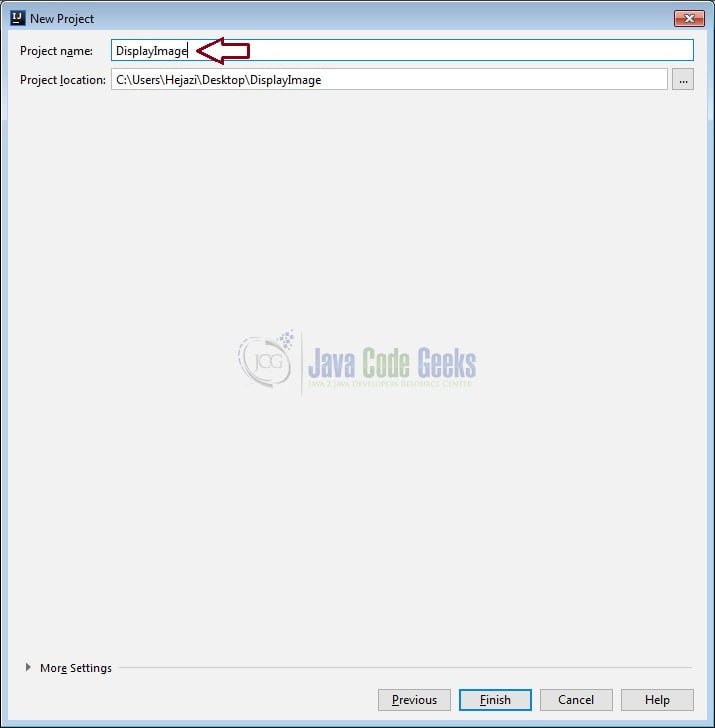
Now choose a name for the project:
3. Structure of the Packages
As you can see there will be a package named src. We now create a new package under it:
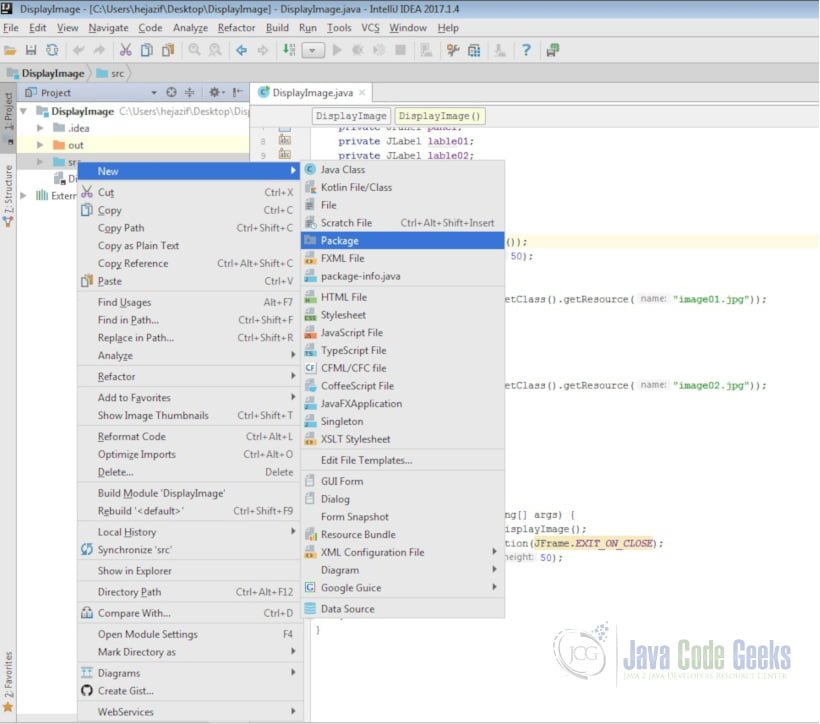
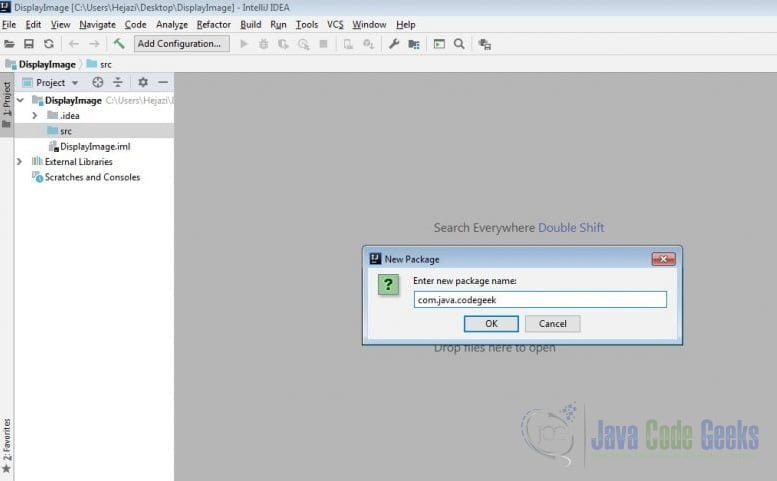
Now we choose a name for out package, for example: com.java.codegeek
Creating new GUI form or Dialog can be done by right click on src → New → GUI Form or Dialog
For
both GUI form and Dialog components, two files will be created:
- form file (extension
.form) - bound class (extension .java)
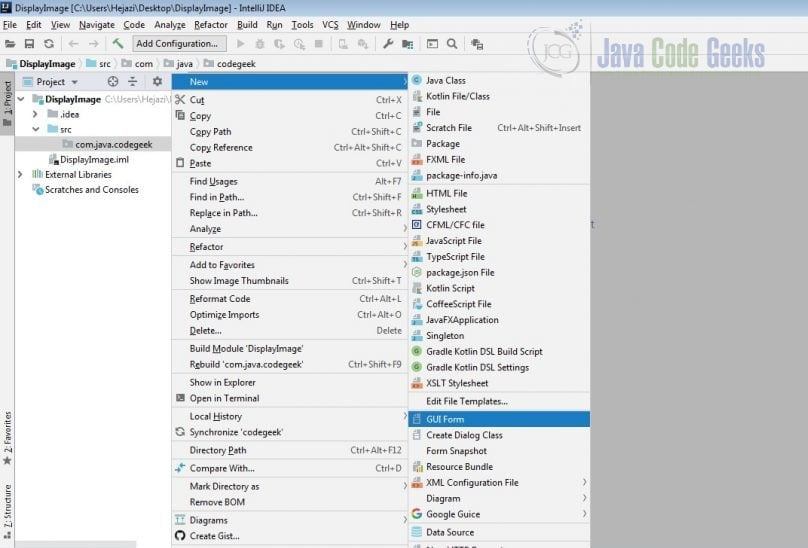
Here we choose GUI Form.
Name the form ‘DisplayImage’ and configure it as shown in the image below.
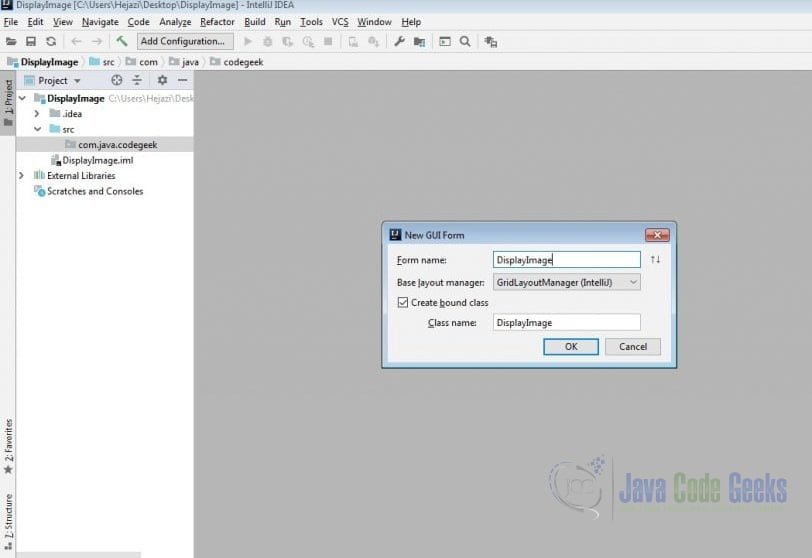
By default, IntelliJ IDEA automatically creates a Java class at the same time it creates a new GUI form. The new form automatically binds to the new class. When components are added to the design form, a field for each component is automatically inserted into the source file of the Form’s class (with some exceptions such as JPanels and JLabels which don’t automatically get field names when placed on a Form). (https://www.jetbrains.com/help/idea/bound-class.html)
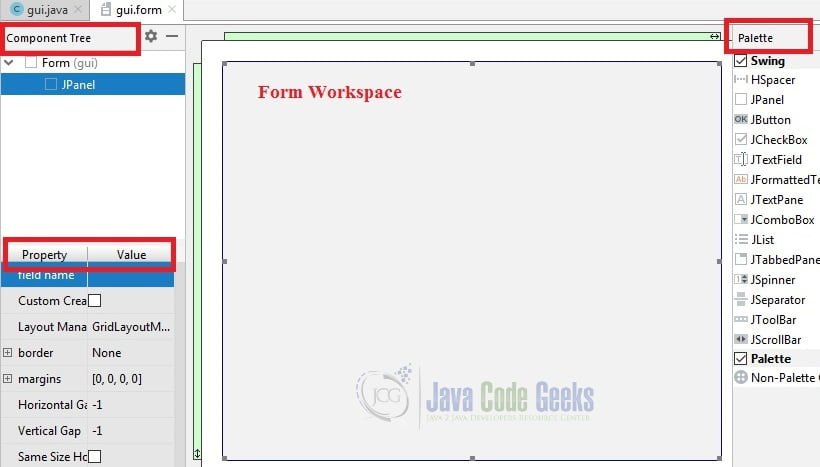
The GUI Designer consists of the following main components:
- Components Treeview
- Properties Inspector
- Components Palette
- Form Workspace
4. Configure Components of GUI Form
4.1 Component Tree
In the component tree you can see the JPanel. This treeview displays the components contained in the design form and enables you to navigate to and select one or more components.
When you create a new Form, a JPanel component is automatically added to the Form Workspace and it appears as a child of the Form in the Component Treeview. This JPanel is the top of the UI component hierarchy (in the Java sense) for the current Form.
4.2 Properties Inspector
The Property Inspector window shows properties for the component currently selected in the form workspace, or the form itself if no components exist or none are selected. https://www.jetbrains.com/help/idea/inspector.html
Several types of property editors appear in the Value column of the inspector:
Several types of property editors appear in the Value column of the inspector:
- Text field: Type a value.
- Pick list: Pick a value from a drop-down list of valid choices.
- Checkbox: Set value for Boolean type properties.
- Dialog: Presents an ellipsis button which opens a dialog box.
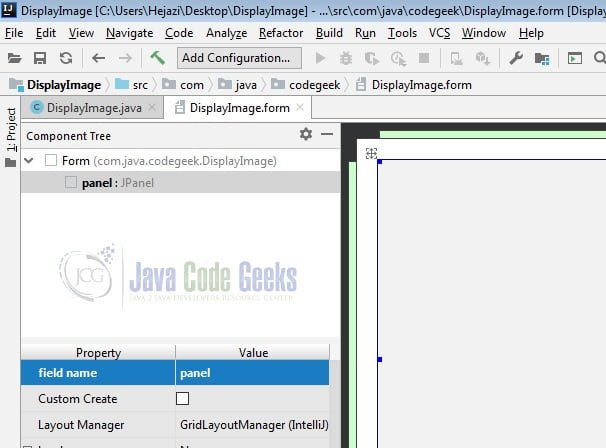
If you switch to the DisplayImage.java file you can now see the jPanel as a variable in the DisplayImage class:
DisplayImage.java
package com.java.codegeek;

import javax.swing.*;
import java.awt.*;

public class DisplayImage extends JFrame {
    private JPanel panel;
}
4.3 Components Palette
The component palette provides quick access to commonly used components (JavaBeans) available for adding to forms. It appears by default at the right side of the frame next to the Form Workspace.
You can add a new UI component to the form in following way:
Select a component in the palette move the cursor to the Form Workspace and click where you want to add the component.
Two groups of components are present by default:
- Swing: contains components from the Swing component library.
- Palette: contains a single component labeled Non-Palette component. When you select this component and add it to a Form, a dialog appears in which you can select any component class accessible to your project, or any other existing Form. This is useful in cases where you want to use a component without adding it to the Component Palette.
- (https://www.jetbrains.com/help/idea/palette.html )
4.4 Form Workspace
The Form Workspace occupies the center part of the frame. It is a gray rectangle which appears when you create a new Form.
Back to the .form file, drag a JLabel onto the panel.
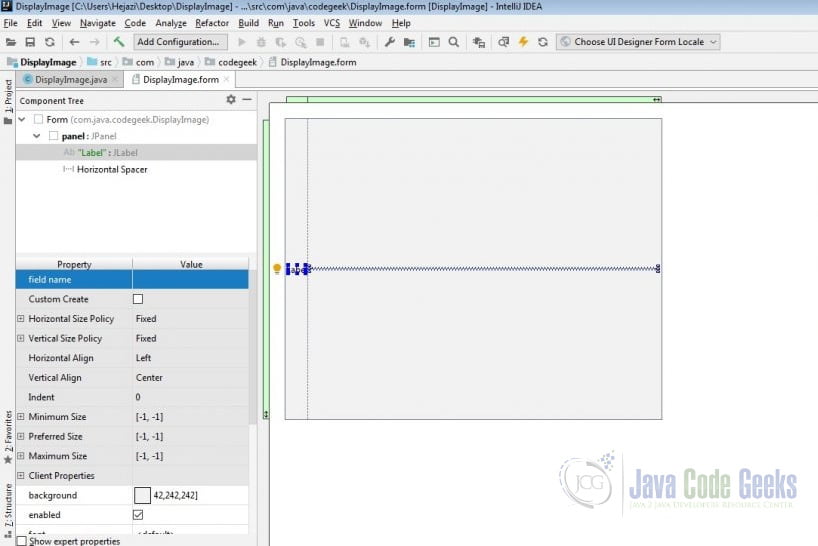
You can change the field name of the JLable in the Component tree (as you did with the JPanel) and set it ‘lable01’.
Add another JLable on the panel and name it ‘lable02’. As you see, all these lables are contained by panel.
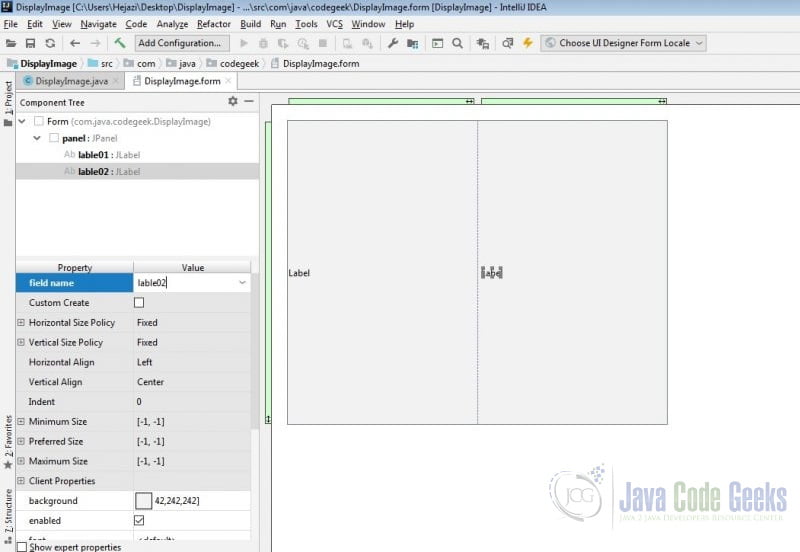
We want to display 2 images on these lables. So first you should copy your image files into the project folder:
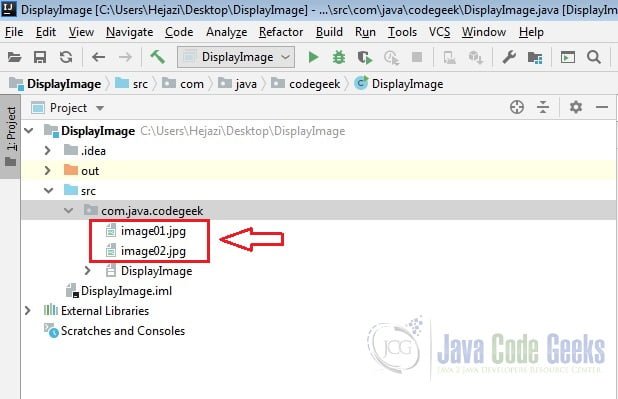
Now we should set these images as ‘icon’ property value for the JLables.
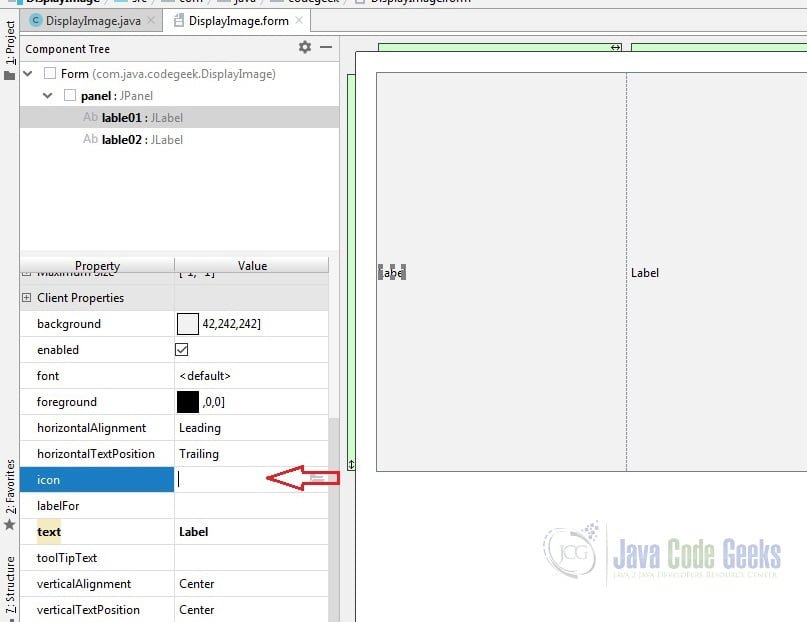
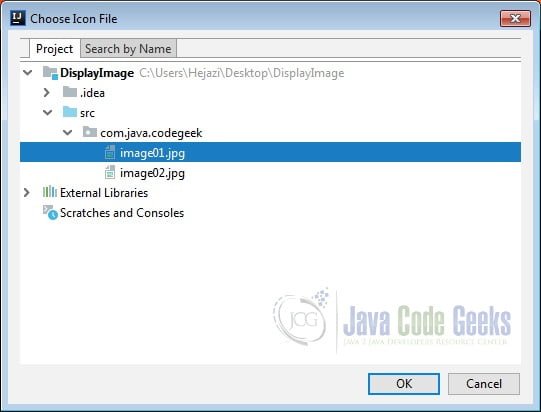
Repeat the same process for assigning image02 to icon property of lable02.
5. Setup Bounded Java Class
Add ‘ImageIcon’ variables to ‘DisplayImage.java’:
DisplayImage.java
package com.java.codegeek;

import javax.swing.*;
import java.awt.*;

public class DisplayImage extends JFrame {
    private JPanel panel;
    private JLabel lable01;
    private JLabel lable02;
    private ImageIcon icon01;
    private ImageIcon icon02;
}
Now we should set the layout in java class, assign the images to the lables and add the panel:
DisplayImage.java
 public DisplayImage() {

        setLayout(new FlowLayout());
        setSize(50,50);

        //label01
        icon01 = new ImageIcon(getClass().getResource("image01.jpg"));

        lable01.setIcon(icon01);
        panel.add(lable01);

        //label02
        icon02 = new ImageIcon(getClass().getResource("image02.jpg"));

        lable02.setIcon(icon02);
        panel.add(lable02);

        add(panel);
        validate();
}
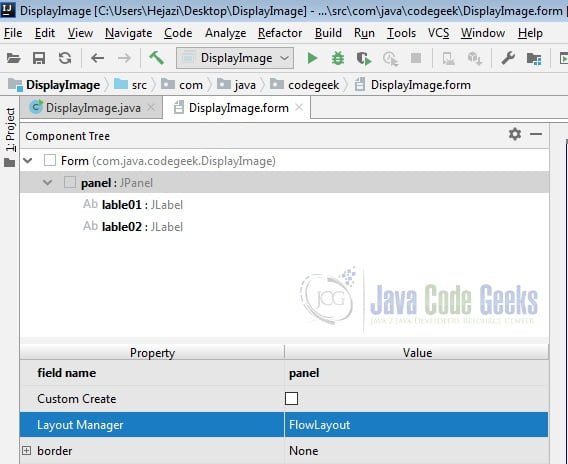
We should also set the value of Layout Manager property for the panel, here we chose ‘FlowLayout’:
6. Run the Project
In order to run the application we need a main() method for our class:
DisplayImage.java
 public static void main(String[] args) {
        DisplayImage gui = new DisplayImage();
        gui.setDefaultCloseOperation(JFrame.EXIT_ON_CLOSE);
        gui.setSize(50, 50);
        gui.setVisible(true);
        gui.pack();
        gui.setTitle("Image");
    }
Now from the menu, Run -> Run ‘DisplayImage’:

7. Download the Complete Source Code
This was a tutorial of IntelliJ IDEA GUI Designer for displaying images.
You can download the full source code of this example here: IntelliJ IDEA GUI Designer Tutorial

