1. Introduction
In this post, we feature a comprehensive Example on IntelliJ IDEA Automatic Deploy. IntelliJ IDEA is a Java integrated development environment (IDE) developed by JetBrains (formerly known as IntelliJ). It is one of the leading IDE software that provides comprehensive facilities to the programmer fraternity for software development. It has number of features e.g. code completion, refactoring, code compilation and execution, navigation among project files, integration with version control systems like Git, Mercurial, Perforce, and SVN etc. Automatic deployment, sometimes also called hot deployment, means that any changes made to web resources will be reflected at the run time without restarting the server. It is quite a useful feature during the development process and can save a lot of time.
2. Technologies used
The example code in this article was built and run using:
- Java 1.8.0_102
- Tomcat 9.0.10
- IntelliJ IDEA 14.0.3
3. Create a simple web application
Let’s first see how can we create a new web application project. There are mainly 2 ways. Firstly, we can create it from the Welcome screen. Secondly, this can be done from File menu by choosing New Project. Here, I’ll follow the Welcome screen option and click on Create New Project.

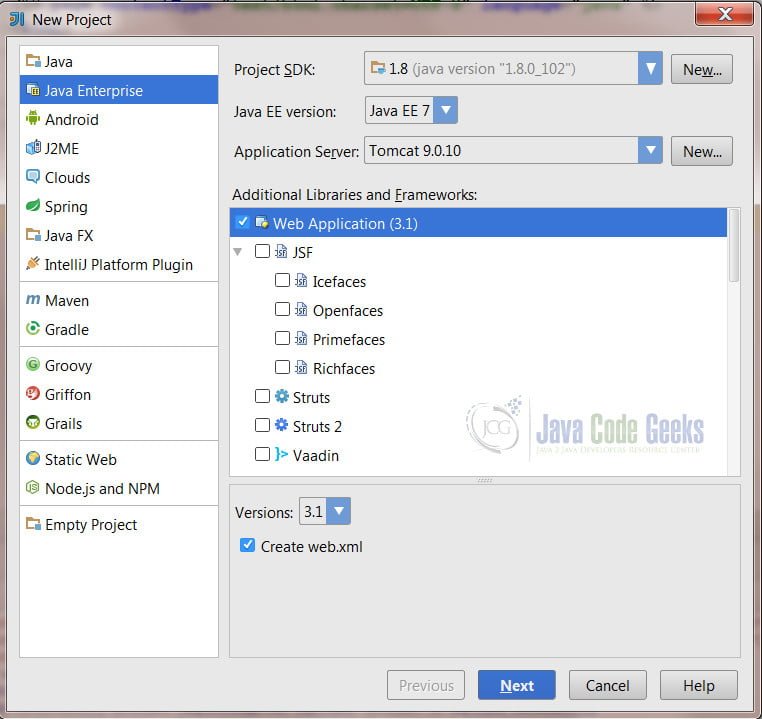
Choose Java Enterprise. The IDE will automatically pick the Java version installed on your machine. If you want to pick another version, you may do that by clicking New and then point it to the desired JDK path. Similarly, for the Application Server, click on the New button and you will see number of available options. For this article, I will choose Tomcat server and provide the path where my Tomcat has been installed.
Then I will choose Web Application under the options available for Additional Libraries and Frameworks and press Next.
This will create a very simple web application project for you as shown below.
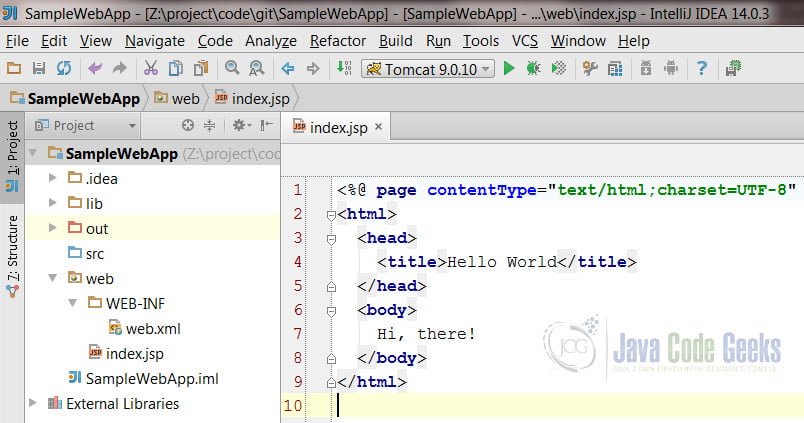
In the next section, we will update the index.jsp page and run the web application.
4. Running the application
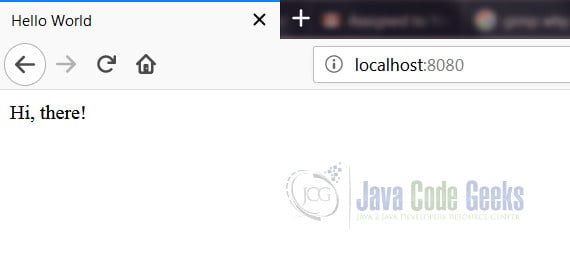
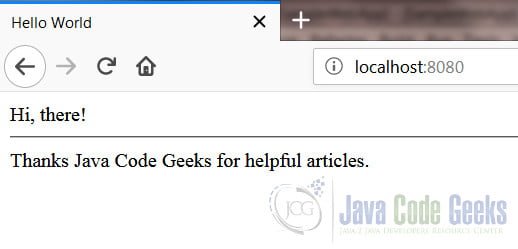
Now, run the application by going to the Run menu. You may also run it by pressing Shift + F10 or by clicking the Play button. The IDE will open your default browser and go to http://localhost:8080. You will see the output in the browser as shown below. If by any chance, port 8080 is being used by some other application, you may edit the configuration using the Run menu and choose any other available port. You may also choose your favorite browser here.

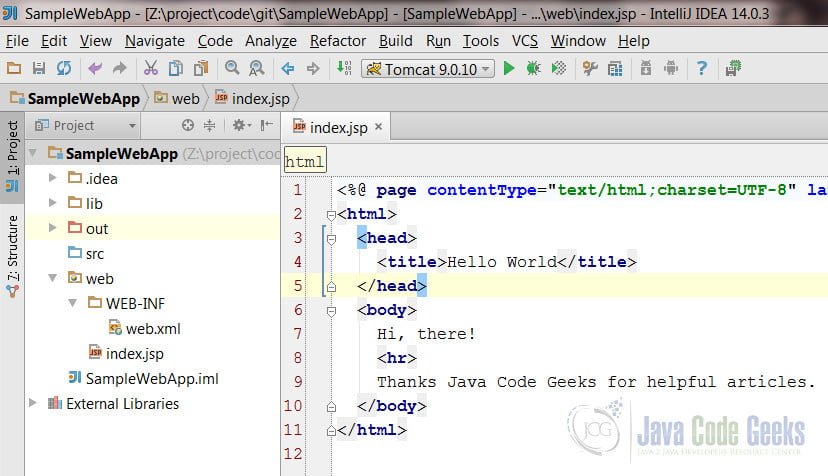
Let’s make any changes to the JSP page and see if the changes are reflected automatically in the browser. In the below image, you will notice that I have changed the message in the body tag. Now go to the same browser window and refresh the page. Notice that the page output remains the same.
For instructing the IDE to pick up any changes, if the Run or the Debug tool window is active, you may achieve the automatic deployment by either clicking the Update icon on the toolbar of the tool window, or by selecting Run | Update ‘<app name>’ application.
Choose the radio button Update Resources. You may check the other options by clicking on Application Update Options
Now go back to the browser window and refresh the page. The browser should display the updated output now.
5. Summary
In the above example, I have demonstrated how you can turn on the automatic deployment for your web project in IntelliJ IDEA. This feature is especially useful while developing HTML, JSP, JavaScript, CSS and image files.
6. Download the Source Code
That was an example of the IntelliJ IDEA Automatic Deploy.
