In this article, we shall show you the working of JUnit timeout. JUnit provides a very good way of testing your methods against the timeout. In JUnit Test Timeout example, we will show how we can test out methods for timeouts.
There are times when we want our methods to execute in a specific time. For example, we want a method to be completed in 1 second. This can be achieved easily by using different types in JUnit.
1. Introduction
As a regular reader, you already know that JUnit is a powerful way of unit testing our programs. It provides various techniques through which we can test our methods.
Let’s take a case where our method is taking a lot of time to execute. It causes a lot of performance issue and you want to test in a way so that it completes in a specific time. What will you do?
To answer this, JUnit provides a way through which this can be achieved. We will see in this example how we can do that.
2. Ways to Test Timeout
So, JUnit provides 3 different ways of testing methods against the time.
- First is the
timeoutparameter to the@Testannotation - Second, using global
@Ruleannotation - Lastly using the
@ClassRuleannotation
We will see these 3 methods in details in below example.
3. Project Setup
You may skip project creation and jump directly to the beginning of the example below.
We are using Eclipse for this project. We are also using Maven as a dependency build tool. Open Eclipse, Click File -> New -> Maven Project.
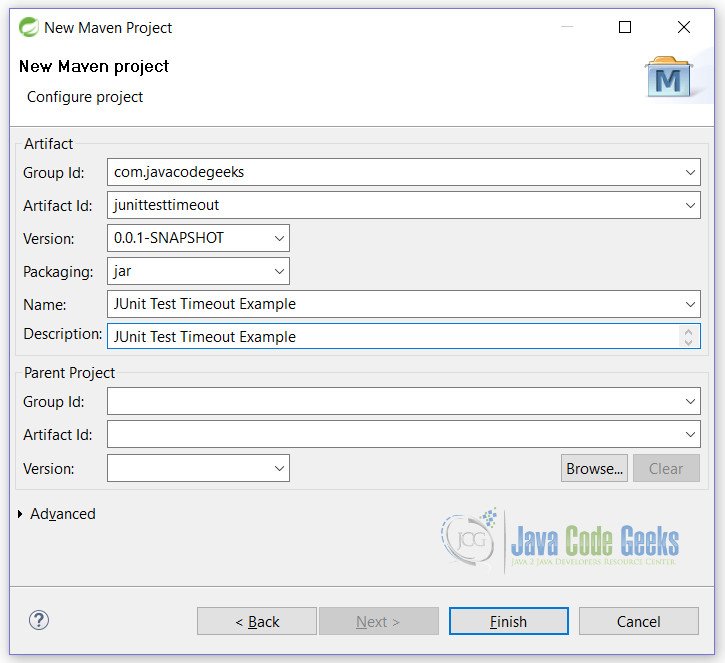
Fill in the details as shown and click Next button.

Fill all details as shown and click on Finish button.
We are done with the project setup.
4. JUnit Test Timeout Example
First of all copy below code and paste in your pom.xml.
pom.xml
    <dependencies>
        <dependency>
            <groupId>junit</groupId>
            <artifactId>junit</artifactId>
            <version>4.12</version>
        </dependency>
    </dependencies>

    <properties>
        <maven.compiler.source>1.8</maven.compiler.source>
        <maven.compiler.target>1.8</maven.compiler.target>
    </properties>
Now we create a simple bean class for testing.
Bank.java
package junittesttimeout;

import java.util.concurrent.TimeUnit;

public class Bank {

	private double totalCash;
	private int totalAccounts;

	public Bank(double cash, int accounts) {
		this.totalCash = cash;
		this.totalAccounts = accounts;
	}

	public double getTotalCash() throws InterruptedException {
		double cash = 0.0;
		for (int index = 0; index < 5; index++) {
			cash += index;
			TimeUnit.SECONDS.sleep(1);
		}
		return cash;
	}

	public int getTotalAccounts() throws InterruptedException {
		TimeUnit.MILLISECONDS.sleep(500);
		return totalAccounts;
	}

	@Override
	public String toString() {
		return "Bank [cash=" + totalCash + ", accounts=" + totalAccounts + "]";
	}
}
This class is used for testing purpose only. As you can see, we are having time sleep statements(highlighted) in the program. That are used for testing timeout scenarios.
5. Test Class
Let’s explore the various strategies.
5.1 Using timeout parameter
We can use timeout parameter with @Test
TestClass.java
package junittesttimeout;

import static org.hamcrest.CoreMatchers.is;
import static org.junit.Assert.assertThat;

import org.junit.BeforeClass;
import org.junit.Test;

public class TestTimeout {

	private static Bank bank;

	@BeforeClass
	public static void init() {
		bank = new Bank(500000, 100);
	}

	@Test(timeout = 2000)
	public void totalCashTest() throws InterruptedException {
		assertThat(10.0, is(bank.getTotalCash()));
	}

	@Test(timeout = 1000)
	public void totalAccountsTest() throws InterruptedException {
		assertThat(100, is(bank.getTotalAccounts()));
	}
}
In this example, at line 18 and 23, we have set the timeout on tests. Now when the method starts execution and it takes more time than the timeout specified it will not pass and eventually fail. If test the case executes within a specified time then it will pass.

5.2 Using @Rule annotation
We can use @Rule annotation. This is helpful when we want all our test cases to be passed within a specific time. For example, we want our each test case to be executed in 2 seconds. See example below for more details.
TestTimeoutGlobal.java
package junittesttimeout;

import static org.hamcrest.CoreMatchers.is;
import static org.junit.Assert.assertThat;

import org.junit.BeforeClass;
import org.junit.Rule;
import org.junit.Test;
import org.junit.rules.Timeout;

public class TestTimeoutGlobal {

	private static Bank bank;

	@Rule
    public Timeout globalTimeout = Timeout.seconds(2);

	@BeforeClass
	public static void init() {
		bank = new Bank(500000,100);
	}

	@Test
	public void totalCashTest() throws InterruptedException {
		assertThat(10.0, is(bank.getTotalCash()));
	}

	@Test
	public void totalAccountsTest() throws InterruptedException {
		assertThat(100, is(bank.getTotalAccounts()));
	}
}
Here we simply, create @Rule at starting of the class. It applies to each and every test case in a class including @BeforeClass and @Before annotations.
5.3 Using @ClassRule annotation
We can use the @ClassRule annotation on class. It will see that all methods in a class execute in a specific time. So, here we want all the test cases collectively to be passed within a specific time of 10 seconds.
TestTimeoutGlobalClass.java
package junittesttimeout;

import static org.hamcrest.CoreMatchers.is;
import static org.junit.Assert.assertThat;

import org.junit.BeforeClass;
import org.junit.ClassRule;
import org.junit.Test;
import org.junit.rules.Timeout;

public class TestTimeoutGlobalClass {

	private static Bank bank;

	@ClassRule
	public static Timeout globalTimeout = Timeout.seconds(10);

	@BeforeClass
	public static void init() {
		bank = new Bank(500000, 100);
	}

	@Test
	public void totalCashTest() throws InterruptedException {
		assertThat(10.0, is(bank.getTotalCash()));
	}

	@Test
	public void totalAccountsTest() throws InterruptedException {
		assertThat(100, is(bank.getTotalAccounts()));
	}
}
Difference between
@Rule and @ClassRule is that, former is used for testing each method for a specific time, whereas latter is used to test all methods to be executed in a specific time.Above example will simply executes the methods of the class and sees that all test cases passed in a specific time of i.e. 10 seconds.
6. Conclusion
Through this example, you have learned how we can test our methods against time. We have used 3 strategies for this.
- using timeout parameter with
@Test - using
@Ruleannotation - using
@ClassRuleannotation
7. Download the Eclipse Project
This is an example of JUnit Test Timeout.
You can download the full source code of this example here: JUnitTestTimeoutExample.zip
