In this example we shall show users the usage of property based testing. JUnit quickcheck example will demonstrates the way to test the methods with the help of property based testing. There are cases when you want to test your methods with some constraints and with random parameter values.
We can achieve the same with manual process also, but in that case every test scenario may not be covered. You may want to test your cases to be passed with random values of parameters. This can be achieved by the property based testing.
This concept was evolved from the Haskell language and the part that covers it is known as QuickCheck. This is also available for Java as an extra library. We will be using the same in our example.
1. Introduction
First of all, lets start with the question. What is property based testing? The way which provides the solution for the above scenarios i.e. to test with random parameter values is known as property based testing.
In Java, we can achieve this by using the junit-quickcheck library. This library will provides the way to test our cases with the property based testing.
2. Tools Used
We will use the following tools and technologies for this example and show how this works.
- Java
- JUnit 4.12
- junit-quickcheck – Library that will be used for property based testing
- Eclipse – IDE for code
- Maven – build and dependency tool
3. Project Setup
Create a new Maven project for JUnit quickcheck example.
You may skip project creation and jump directly to the beginning of the example below.
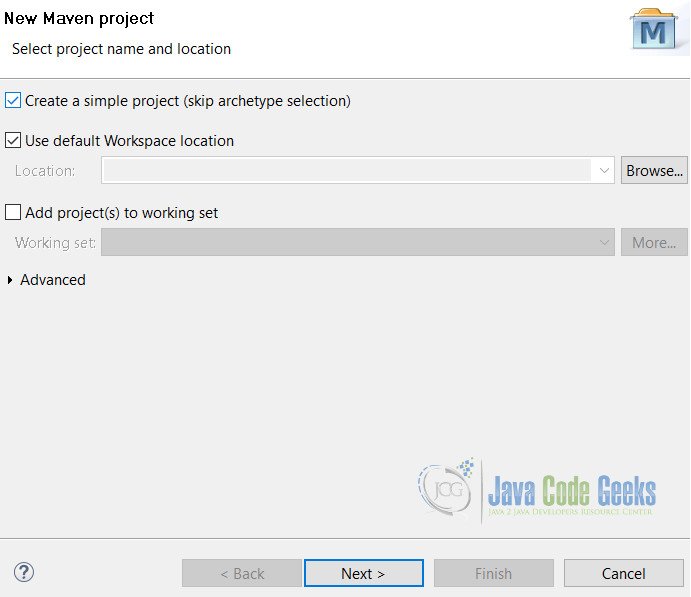
Click File -> New -> Maven Project.
Fill in the details as shown and click on Next button.
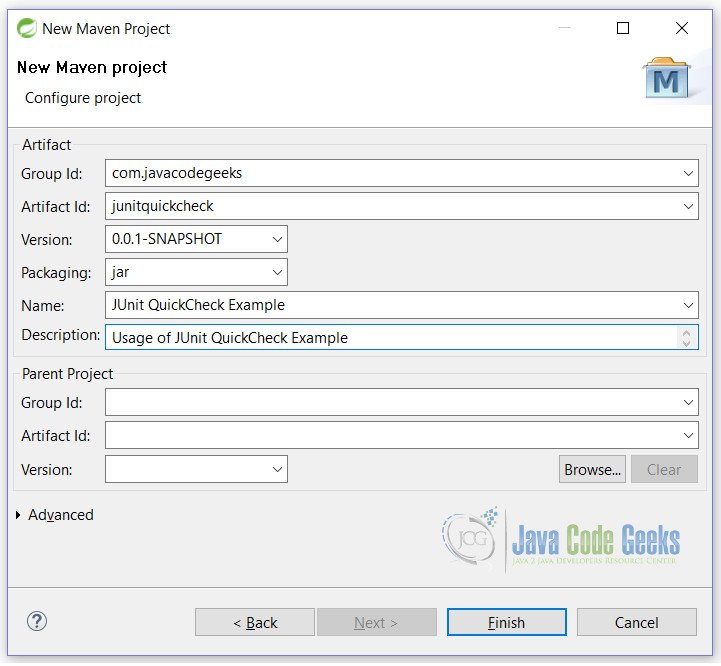
Fill in the details and click on Finish button.
With the click on Finish button, setup is done. Now we will start with the JUnit quickcheck example.
4. JUnit Quickcheck Example
Open pom.xml and add the following lines to the file.
pom.xml
<dependencies>
     <dependency>
          <groupId>junit</groupId>
          <artifactId>junit</artifactId>
          <version>4.12</version>
     </dependency>

     <!-- For matchers used in example -->
     <dependency>
          <groupId>org.hamcrest</groupId>
          <artifactId>java-hamcrest</artifactId>
          <version>2.0.0.0</version>
     </dependency>

     <!-- Core junit-quickcheck -->
     <dependency>
          <groupId>com.pholser</groupId>
          <artifactId>junit-quickcheck-core</artifactId>
          <version>0.7</version>
     </dependency>

     <!-- consists of generators for basic Java types, such as primitives, arrays,
      and collections -->
     <dependency>
          <groupId>com.pholser</groupId>
          <artifactId>junit-quickcheck-generators</artifactId>
          <version>0.7</version>
     </dependency>
</dependencies>
In our example we are using some matchers to work with. For that purpose, we are using Java Hamcrest (highlighted above) library. To run the class with the quickcheck, we need to annotate the class with @RunWith(JUnitQuickcheck.class) annotation
QuickCheck.java
package junitquickcheck;

import static org.hamcrest.Matchers.greaterThan;
import static org.junit.Assert.assertTrue;
import static org.junit.Assume.assumeThat;

import org.junit.runner.RunWith;

import com.pholser.junit.quickcheck.Property;
import com.pholser.junit.quickcheck.When;
import com.pholser.junit.quickcheck.generator.InRange;
import com.pholser.junit.quickcheck.runner.JUnitQuickcheck;

@RunWith(JUnitQuickcheck.class)
public class QuickCheck {

	@Property(trials = 5)
	public void simple(int num) {
		System.out.println("simple:" + num);
		assertTrue(num > 0);
	}

	@Property(trials = 5)
	public void assume(int num) {
		System.out.print(" | Before:" + num);
		assumeThat(num, greaterThan(0));
		System.out.println(" | Afer:" + num);
		assertTrue(num > 0);
	}

	@Property(trials = 5)
	public void inRange(@InRange(minInt = 0, maxInt = 100) int num) {
		System.out.println("InRange: " + num);
		assertTrue(num > 0);
	}

	@Property(trials = 5)
	public void when(@When(satisfies = "#_ > 1000 && #_ < 100000") int num) {
		System.out.println("when: " + num);
		assertTrue(num > 0);
	}

	@Property(trials = 5)
	public void seed(@When(seed = 1L) int num) {
		System.out.println("seed: " + num);
		assertTrue(num > 0);
	}

}
Line 14: Run with @RunWith(JUnitQuickcheck.class) annotation usage
Line 17: @Property annotation usage
Line 26: assumeThat() method usage
Line 32: @InRange annotation usage
Line 38: @When annotation usage
Line 44: seed usage
In the following sections we will be explaining each and every case defined in this class. For the sake of reading and knowledge, we have used the println statements in the class.
4.1 Simple Unit Test
We will start by testing with very simple test case where we put @Property annotation on a method.
     ...
     @Property(trials=5)
     public void simple(int num) {
          System.out.println("simple:" + num);
          assertTrue(num>0);
     }
     ...
In this method, we have used @Property annotation with trials as attribute to it. By default junit-quickcheck library uses 100 random generated values. But we can increase or decrease accordingly as to suit the test cases.
This test will run with 5 random numbers.
The test may or may not pass, due the random numbers generated. In our case it was failed as some values are negative and 0 as well. See the output of above case.
Output
simple:-257806626
simple:257806626
simple:0
4.2 Using Assume Class
Now we want to assume something before running our test cases. Like in above example, we want to generate only positive values. In that case we will use the Assume class from JUnit. The assumeThat() method will assume the values to be passed before any other values to be tested.
     ...
     @Property(trials = 5)
     public void assume(int num) {
          System.out.print(" | Before:" + num);
          assumeThat(num, greaterThan(0));
          System.out.println(" | Afer:" + num);
          assertTrue(num > 0);
     }
     ...
Now, this test will pass, as we have already checked the generated values should be greater than 0. In this case, we are using the greaterThan() method of Hamcrest library.

Output
 | Before:1773769579 | After:1773769579
 | Before:-733573616 | Before:-111086781
 | Before:559050708 | After:559050708
 | Before:-940357482
It is cleared from output, cases that pass the assumeThat will only go through the case for testing. Others will be ignored safely.
4.3 @InRange Annotation
We can also test our cases by allowing the parameters to be in some range.
For this scenario, we will be using @InRange annotation.
     ...
     @Property(trials=5)
     public void inRange(@InRange(minInt = 0, maxInt = 100) int num) {
          System.out.println("InRange: " + num);
          assertTrue(num>0);
     }
     ...
In this case, we are passing the @InRange annotation to set the minimum and maximum value to be generated.
Output
InRange: 91
InRange: 49
InRange: 57
InRange: 57
InRange: 88
As seen in this output, only numbers between 0 and 100 are generated. The primary difference between assumeThat() and @InRange is that, in assumeThat() case all numbers are generated and then values are tested. Whereas in case of @InRange, values are generated accordingly and then passed to test.
4.4 @When Annotation
@When is used in case where we wan to have a constraint. We will be using @When annotation with satisfies attribute which is an OGNL expression for this example to work.
...
@Property(trials = 5)
public void when(@When(satisfies = "#_ > 1000 && #_ < 100000") int num) {
System.out.println("when: " + num);
assertTrue(num > 0);
}
...
This test case will pass, only if the parameter satisfies the condition. junit-quickcheck generates values for a property parameter with a constraint expression until the ratio of constraint failures constraint passes is greater than the discardRatio specified by @When. Exceeding the discard ratio raises an exception and thus fails the property. In most cases this test fails, so you need to increase your trials to more, may be around 2000.
4.5 Using Seed
For each property, junit-quickcheck uses a unique value as a seed for the source of randomness for generating values. We can fix the seed to some specific value with @When annotation . You may want to fix the seed when a property fails, so that you can test the property over and over again with the same set of generated values that caused the failure.
     ...
     @Property(trials = 5)
     public void when(@When(seed = 1L) int num) {
          System.out.println("seed: " + num);
          assertTrue(num > 0);
     }
     ...
Here every time test case runs, it will start generating number from seed value only.
Output
seed: 1715954472
seed: -397543022
seed: 397543022
seed: 0
4.6 Shrinking
When a property is disproved for a given set of values, junit-quickcheck will attempt to find “smaller” sets of values that also disprove the property, and will report the smallest such set.
4.6.1 Various parameters used with shrinking process
- By default, shrinking is enabled. To disable it, set the
shrinkattribute of a@Propertyannotation to false. Example:@Property(shrink = false) - To reduce or increase the maximum number of
shrinkattempts made for a given property, set themaxShrinksattribute of that@Property. Example:@Property(maxShrinks = 5) - To reduce or increase the maximum “depth” of the
shrinksearch “tree” for a given property, set themaxShrinkDepthattribute of that@Property. Example:@Property(maxShrinkDepth = 3)
For the details of how to use it, users are advised to visit junit-quickcheck library.
5. Conclusion
In conclusion, JUnit Quickcheck example demonstrates the way to test our code by passing the random values to parameters during running. This method of testing is known as property based testing. Users have learnt the use of junit-quickcheck library for implementing the property based testing in Java.
6. Download
This is a JUnit Quickcheck Example
You can download the full source code of this example here: JUnitQuickcheckExample.zip

In Section “4.4 @When Annotation” the discardRatio can/should be ajusted as well. Otherwise this test will almost always fail.