In this post we shall show users how to test the multi threaded java application with the help of JUnit. JUnit MultiThread example clears users mind to understand the basic usage of testing the multi threading application.
Users are advised to visit the JUnit Hello World example for basic understanding of the JUnit. For testing the methods by passing value through keyboard, visit JUnit Keyboard Input example.
We will cover the details in the following example.
1. Introduction
Testing multi threaded applications using JUnit is not so difficult as thought by some developers. We will try to understand the way of testing such applications. This is an example, where a counter is to be accessed and updated by many threads simultaneously. JUnit MultiThread example shows very basic usage.
2. Technology Stack
Technologies used in this example are
- Java
- JUnit 4.12
- Eclipse (users can use any IDE of their choice)
- Maven (for dependency management)
3. Project Setup
You may skip project creation and jump directly to the beginning of the example below.
Start creating a Maven project.
Select File -> New -> Maven Project
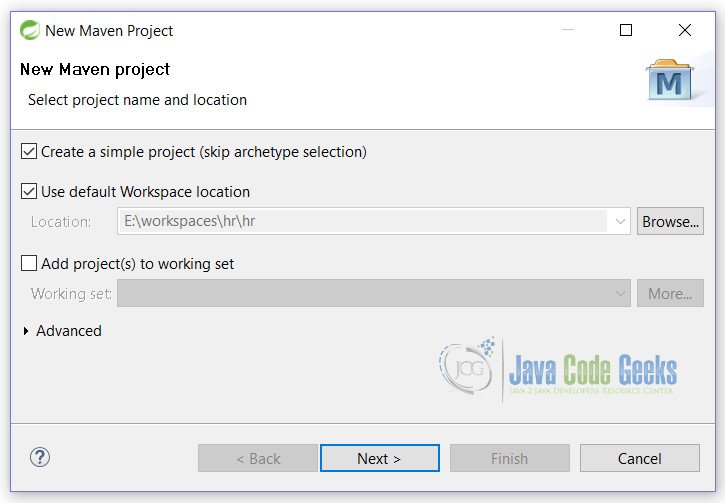
Clicking on Next button, users are taken to next screen as shown below. Fill in the details as follows.
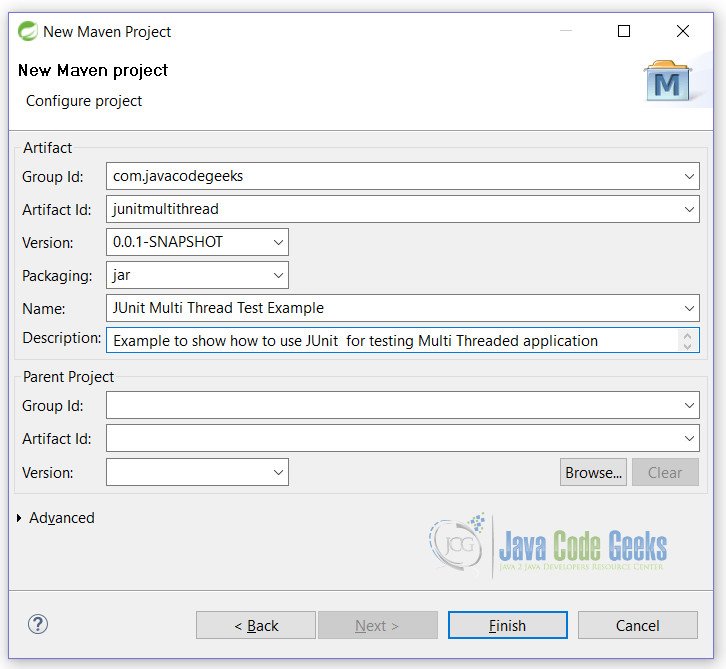
We are done with the creation of the Maven project, with the click of Finish button.
4. JUnit MultiThread Example
Now, let’s start with the coding part. Start by adding the following lines to the pom.xml.
pom.xml
<dependencies>
     <!-- JUnit -->
     <dependency>
          <groupId>junit</groupId>
          <artifactId>junit</artifactId>
          <version>4.12</version>
     </dependency>

     <!-- Concurrent JUnit -->
     <dependency>
          <groupId>com.vmlens</groupId>
          <artifactId>concurrent-junit</artifactId>
          <version>1.0.0</version>
     </dependency>
</dependencies>
As users can see, we are using JUnit 4.12 and a library concurrent-junit for testing the JUnit multi thread applications.
4.1 concurrent-junit
Concurrent-junit library helps the users to test the methods for multi threading. It will create threads for testing methods. By default, number of threads created by this library is 4, but we can set the desired number of threads. This can be achieved by @ThreadCount annotation of concurrent-junit. We will see the use of @ThreadCount annotation later in the example.
4.2 Classes
CountCheck.java
package junitmultithread;

import java.util.concurrent.atomic.AtomicInteger;

public class CountCheck {

	private final AtomicInteger count = new AtomicInteger();

	public void initialize(int number){
		count.set(number);
	}

	public void addOne() {
		count.incrementAndGet();
	}

	public int getCount() {
		return count.get();
	}
}
If users closely examine, we are using the AtomicInteger for our variable. Since taking variable as an Integer will not help. Increment an Integer is a multi step process which will create race condition.
Methods used in example are explained below.
initialize()method initializes the variable.addOne()method increments the variable.getCount()method returns the value of variable.
Next, create a class with JUnit test.
CountCheckTest.java
package junitmultithread;

import static org.junit.Assert.assertEquals;

import org.junit.After;
import org.junit.Before;
import org.junit.Test;
import org.junit.runner.RunWith;

import com.anarsoft.vmlens.concurrent.junit.ConcurrentTestRunner;
import com.anarsoft.vmlens.concurrent.junit.ThreadCount;

@RunWith(ConcurrentTestRunner.class)
public class CountCheckTest {

	private CountCheck counter = new CountCheck();

	@Before
	public void initialCount(){
		counter.initialize(2);
	}

	@Test
	public void addOne() {
		counter.addOne();
	}

	@After
	public void testCount() {
		assertEquals("Value should be 6", 6, counter.getCount());
	}
}
First of all, let’s analyze the code line by line.
Line 13 is using @RunWith(ConcurrentTestRunner.class) annotation, that helps to run the application with threads. As we have previously explained, by default it will create 4 threads.
Line 19 is using method, that will run before all test methods and initialize the counter variable. This example creates 4 threads which calls the addOne() method of CheckCount.java class.
Line 24 is our main test case.
Line 29 will run after all threads stop executing the threads.

After running the CheckCountTest.java class, the output will be shown in JUnit window.
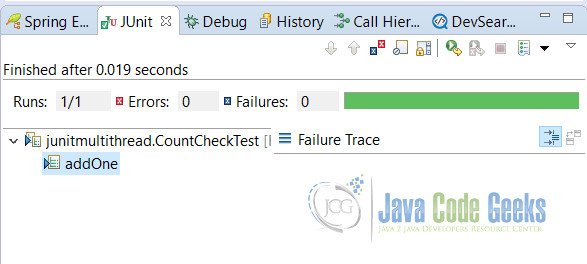
As a result, test case is passed, because we are testing with the assertEquals(), which tests for equality.
4.2.1 Use of @ThreadCount
Finally, we will show the usage of @ThreadCount annotation.
CountCheckThreadCountTest.java
See the highlighted code, which is different from the above code.
package junitmultithread;

import static org.junit.Assert.assertEquals;

import org.junit.After;
import org.junit.Before;
import org.junit.Test;
import org.junit.runner.RunWith;

import com.anarsoft.vmlens.concurrent.junit.ConcurrentTestRunner;
import com.anarsoft.vmlens.concurrent.junit.ThreadCount;

@RunWith(ConcurrentTestRunner.class)
public class CountCheckThreadCountTest {

	private CountCheck counter = new CountCheck();
	private final static int THREAD_COUNT = 5;

	@Before
	public void initialCount() {
		counter.initialize(2);
	}

	@Test
	@ThreadCount(THREAD_COUNT)
	public void addOne() {
		counter.addOne();
	}

	@After
	public void testCount() {
		assertEquals("Value should be 7", 7, counter.getCount());
	}
}
We have taken thread count to 5. Remember, by default there are 4 threads.
5. Conclusion
In conclusion, through this example, we learnt to test the multi threaded applications using JUnit. Also, you got to know about the use of the concurrent-junit library to test the multi threading application.
6. Download the Eclipse project
This is an example of JUnit MultiThread.
You can download the full source code of this example here: JUnitMultiThread.zip
