In this article we’ll see how to build a REST API using Spring Boot and Java Config.
1. Introduction
Spring is a diversified framework and we can build basically any kind of application using its tools. Also, a majority of applications today use Spring Boot as the background of web services to connect and create a Server-Client solution.
In the next session, we will see how to create a simple REST API with Spring Boot and Java Config as a good alternative to make the application development easier.
1.1 Pre-requisites
The minimum Java version for executing the article’s example is JDK 8 (find here), but we can use the most recently released Java version JDK 16 on Oracle’s official site or the OpenJDK version.
Also, I’m using the most recent IntelliJ version, but you can use any IDE with support for the versions recommended above.
2. Getting Started
We’re going to start a simple REST API with Spring Boot and you can use Spring Initializr to start your own. But, I’ll explain the dependencies that we’re going to use.
To start the project, we are going to import these dependencies below:
- Spring Web
- Spring Data JPA
- H2 Database
Your pom.xml will look like this.
pom.xml
<?xml version="1.0" encoding="UTF-8"?>
<project xmlns="http://maven.apache.org/POM/4.0.0" xmlns:xsi="http://www.w3.org/2001/XMLSchema-instance"
	xsi:schemaLocation="http://maven.apache.org/POM/4.0.0 https://maven.apache.org/xsd/maven-4.0.0.xsd">
	<modelVersion>4.0.0</modelVersion>
	<parent>
		<groupId>org.springframework.boot</groupId>
		<artifactId>spring-boot-starter-parent</artifactId>
		<version>2.5.1</version>
		<relativePath/> <!-- lookup parent from repository -->
	</parent>
	<groupId>com.example.javacodegeeks</groupId>
	<artifactId>springjavaconfigapi</artifactId>
	<version>0.0.1-SNAPSHOT</version>
	<name>springjavaconfigapi</name>
	<description>REST API Spring Boot and Java Config</description>
	<properties>
		<java.version>1.8</java.version>
	</properties>
	<dependencies>
		<dependency>
			<groupId>org.springframework.boot</groupId>
			<artifactId>spring-boot-starter-data-jpa</artifactId>
		</dependency>
		<dependency>
			<groupId>org.springframework.boot</groupId>
			<artifactId>spring-boot-starter-web</artifactId>
		</dependency>

		<dependency>
			<groupId>com.h2database</groupId>
			<artifactId>h2</artifactId>
			<scope>runtime</scope>
		</dependency>
		<dependency>
			<groupId>org.springframework.boot</groupId>
			<artifactId>spring-boot-starter-test</artifactId>
			<scope>test</scope>
		</dependency>
	</dependencies>

	<build>
		<plugins>
			<plugin>
				<groupId>org.springframework.boot</groupId>
				<artifactId>spring-boot-maven-plugin</artifactId>
			</plugin>
		</plugins>
	</build>

</project>
Basically, our REST API will have the web libraries to deal with HTTP requests (POST, PUT, GET, DELETE), and we added JPA to handle the data produced on this API. Also, the H2 is an open-source lightweight database relational embedded and configured to run as an in-memory database, which means that data will not persist on the disk.
2.1 Creating the service basis
Now, let’s talk about our service. We’ll create a simple service that manages characters. The data will be stored on the H2 database and managed by the REST API using the MVC model.
The following code defines the Character in our application:
Actor.java
package com.example.javacodegeeks.springjavaconfigapi.model;

import java.util.Objects;

import javax.persistence.Entity;
import javax.persistence.GeneratedValue;
import javax.persistence.Id;

@Entity
public class Actor {
  @Id
  @GeneratedValue
  private Long id;
  private String name;
  private String role;

  public Actor() {}

  public Actor(String name, String role) {

    this.name = name;
    this.role = role;
  }

  public Long getId() {
    return this.id;
  }

  public String getName() {
    return this.name;
  }

  public String getRole() {
    return this.role;
  }

  public void setId(Long id) {
    this.id = id;
  }

  public void setName(String name) {
    this.name = name;
  }

  public void setRole(String role) {
    this.role = role;
  }

  @Override
  public boolean equals(Object o) {

    if (this == o)
      return true;
    if (!(o instanceof Actor))
      return false;
    Actor employee = (Actor) o;
    return Objects.equals(this.id, employee.id) && Objects.equals(this.name, employee.name)
        && Objects.equals(this.role, employee.role);
  }

  @Override
  public int hashCode() {
    return Objects.hash(this.id, this.name, this.role);
  }

  @Override
  public String toString() {
    return "Actor{" + "id=" + this.id + ", name='" + this.name + '\'' + ", role='" + this.role + '\'' + '}';
  }
}
What we can highlight in this class is the use of the JPA annotation @Entity. That makes the Character object ready for storage in the JPA-based data store. Further, the other annotations are from JPA and indicate the primary key (@Id) and that is automatically populated (@GeneratedValue) by the JPA provider.
Moving on, we create a CharacterRepository class that will deal with the CRUD (Create, Read, Update, Delete) on our application.
CharacterRepository.java
package com.example.javacodegeeks.springjavaconfigapi.repository;

import com.example.javacodegeeks.springjavaconfigapi.model.Actor;
import org.springframework.data.jpa.repository.JpaRepository;

public interface ActorRepository extends JpaRepository {

}
3. Building Initial Data with Java Config
Java Config allows easy and type-safe access to configuration properties. Almost every application needs access to configuration settings, such as hostnames or a port number.
Normally, a Java .properties stores the application configuration, and Java Config will verify those properties and provide useful methods to handle all the configuration present.
Spring has a solution to provide our API properties without the need for a .properties file. Annotating a class with the @Configuration indicates that the Spring IoC container can use the class as a source of bean definitions.
We’ll use some Java Configuration to create pre-load data into our application with our API basis implemented previously.
LoadDataBase.java
package com.example.javacodegeeks.springjavaconfigapi;

import com.example.javacodegeeks.springjavaconfigapi.model.Actor;
import com.example.javacodegeeks.springjavaconfigapi.repository.ActorRepository;
import org.slf4j.Logger;
import org.slf4j.LoggerFactory;
import org.springframework.boot.CommandLineRunner;
import org.springframework.context.annotation.Bean;
import org.springframework.context.annotation.Configuration;

@Configuration
public class LoadDataBase {
    private static final Logger log = LoggerFactory.getLogger(LoadDataBase.class);

    @Bean
    CommandLineRunner initDatabase(ActorRepository repository) {

        return args -> {
            log.info("Preloading " + repository.save(new Actor("Luke Skywalker", "jedi")));
            log.info("Preloading " + repository.save(new Actor("Darth Vader", "sith")));
        };
    }
}
We’re using the CommandLineRunner, a useful class that runs some command line. Further, Spring will run that bean once the application context is loaded.
The bean we created using CommandLineRunner class will create two entities and store them into our H2 database memory.
4. Building the REST services
Now, we’re going to create some web services into our API. These services will deal with the data handling, basically doing the CRUD (Create, Read, Update, Delete) in our API. That said, let create our HTTP services using Spring Boot stuff.
ActorController.java
package com.example.javacodegeeks.springjavaconfigapi.controller;

import com.example.javacodegeeks.springjavaconfigapi.ActorNotFoundException;
import com.example.javacodegeeks.springjavaconfigapi.model.Actor;
import com.example.javacodegeeks.springjavaconfigapi.repository.ActorRepository;
import org.springframework.web.bind.annotation.*;

import java.util.List;

@RestController
public class ActorController {
    private final ActorRepository repository;

    public ActorController(ActorRepository repository) {
        this.repository = repository;
    }

    @PostMapping("/actors")
    Actor newActor(@RequestBody Actor newActor) {
        return repository.save(newActor);
    }

    // All
    @GetMapping("/actors")
    List all() {
        return repository.findAll();
    }

    // Single
    @GetMapping("/actors/{id}")
    Actor one(@PathVariable Long id) {
        return repository.findById(id)
                .orElseThrow(() -> new ActorNotFoundException(id));
    }

    @PutMapping("/actors/{id}")
    Actor updateActor(@RequestBody Actor newActor, @PathVariable Long id) {
        return repository.findById(id)
                .map(employee -> {
                    employee.setName(newActor.getName());
                    employee.setRole(newActor.getRole());
                    return repository.save(employee);
                })
                .orElseGet(() -> {
                    newActor.setId(id);
                    return repository.save(newActor);
                });
    }

    @DeleteMapping("/actors/{id}")
    void deleteActor(@PathVariable Long id) {
        repository.deleteById(id);
    }
}
Firstly, notice the @RestController annotation. That indicates the data returned by each method will be written straight into the response body instead of rendering a template.
Also, we injected an ActorRepository to handling our persistent data.
Finally, our HTTP methods are implemented with the proper annotation provided by Spring Boot:
@GetMapping– is the GET HTTP method. We create two GET methods here: one to list all actors from the database and the other to take a single one.@PostMapping– is the POST HTTP method. This method will receive a JSON object with the actor’s data to create a new one into our database.@PutMapping– is the PUT HTTP method. When an update is needed, we use this method sending the JSON object with the new data and providing the ID that already exists on our database.@DeleteMapping– is the DELETE HTTP method. This method will erase the data using the ID informed on the request.
We also have a class to deal with data not found on our API.
ActorNotFoundException.java
package com.example.javacodegeeks.springjavaconfigapi;

public class ActorNotFoundException extends RuntimeException {

    public ActorNotFoundException(Long id) {
        super("Could not find actor " + id);
    }
}
When the ActorNotFoundException is thrown, Spring MVC will render it to use the HTTP 404 response, following the HTTP standard in our API. For that, we create another class called ActorNotFoundAdvice.
ActorNotFoundAdvice.java
package com.example.javacodegeeks.springjavaconfigapi.controller;

import com.example.javacodegeeks.springjavaconfigapi.ActorNotFoundException;
import org.springframework.http.HttpStatus;
import org.springframework.web.bind.annotation.ControllerAdvice;
import org.springframework.web.bind.annotation.ExceptionHandler;
import org.springframework.web.bind.annotation.ResponseBody;
import org.springframework.web.bind.annotation.ResponseStatus;

@ControllerAdvice
public class ActorNotFoundAdvice {
    @ResponseBody
    @ExceptionHandler(ActorNotFoundException.class)
    @ResponseStatus(HttpStatus.NOT_FOUND)
    public String ActorNotFoundHandler(ActorNotFoundException ex) {
        return ex.getMessage();
    }
}
The @ControllerAdvice annotation allows the user to write global codes to use in a range of controllers. Clarifying, Spring container will use this annotation to apply on existing @Controller annotated classes and work in a commonplace to write our code, avoiding duplication.
The next annotation @ResponseBody renders the response into the body. Also, @ExceptionHandler configures the advice to only respond if an ActorNotFoundException is thrown.
Finally, the @ResponseStatus will set the issue to the HttpStatus.NOT_FOUND (a.k.a. 404).
5. Starting and Testing the API
5.1 Starting the application
But first, let start our application using this command on a terminal, inside our application root path:
Start application command
$ ./mvnw clean spring-boot:run
We can see some information on our initialization screen, like the creating of initial data that we did previously.
Initilization screen
INFO 63654 --- [           main] c.e.j.springjavaconfigapi.LoadDataBase   : Preloading Actor{id=1, name='Luke Skywalker', role='jedi'}
INFO 63654 --- [           main] c.e.j.springjavaconfigapi.LoadDataBase   : Preloading Actor{id=2, name='Darth Vader', role='sith'}
5.2 Testing with Postman
To test our application, we can use an API testing tool. I recommend Postman to do the tests on our application, but you can use any other tool of your knowledge.
5.1 GET
Using Postman, we create a GET request to use the service that gets all data from our API (http://localhost:8080/actors/).
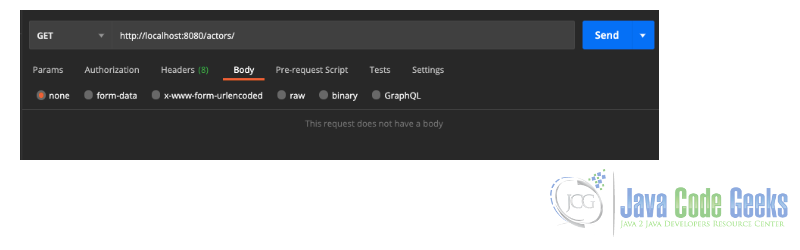
The result will bring all the previously data created on application starting.

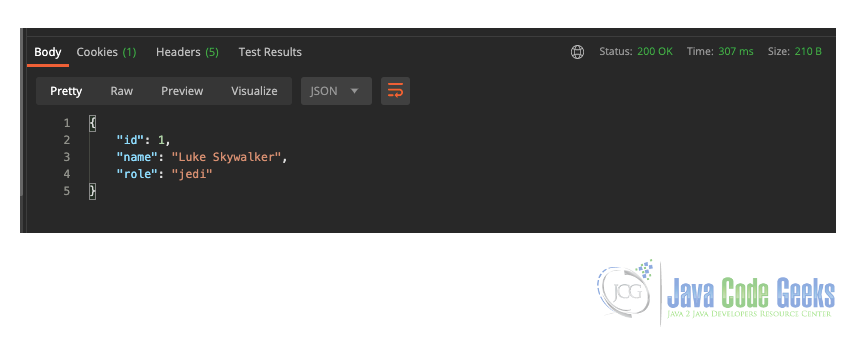
Notice that we have the Status 200 OK, which means our request was good and the response brought the expected data.
Now, to use our single GET method, we just put the already known ID into our GET method.
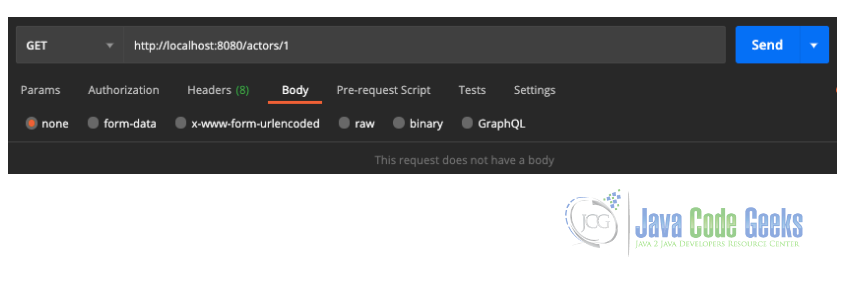
And the response should be like below:
5.2 POST
To test the POST method, we insert a simple JSON object on the Body request with the data required for the Actor entity. Also, we still use the URL http://localhost:8080/actors/.
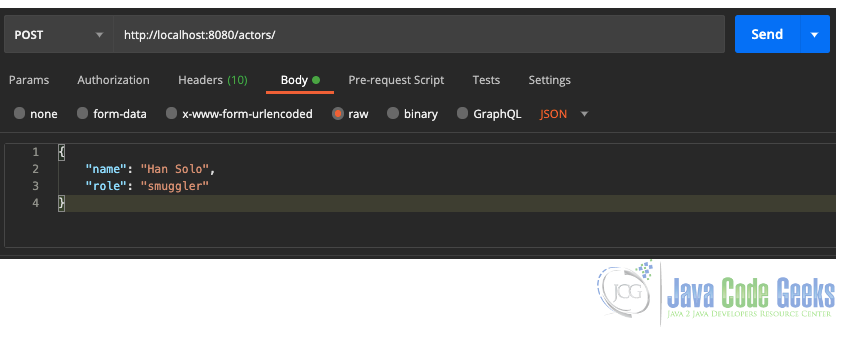
With no errors, the API returns our data including the ID for the new one.

5.3 PUT
The PUT method is pretty similar to POST, but on the URL we need to pass the ID that we’re going to update.
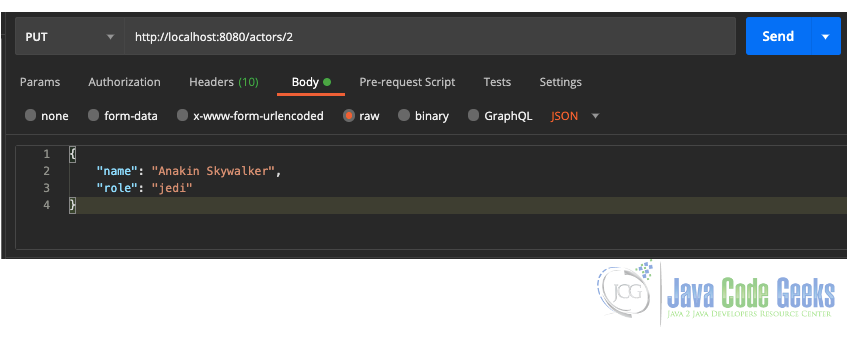
The response should return our data updated.

5.4 DELETE
And our DELETE method does as the name says: exclude the data from the API. Just using the URL passing the ID as an argument to delete the required Actor.
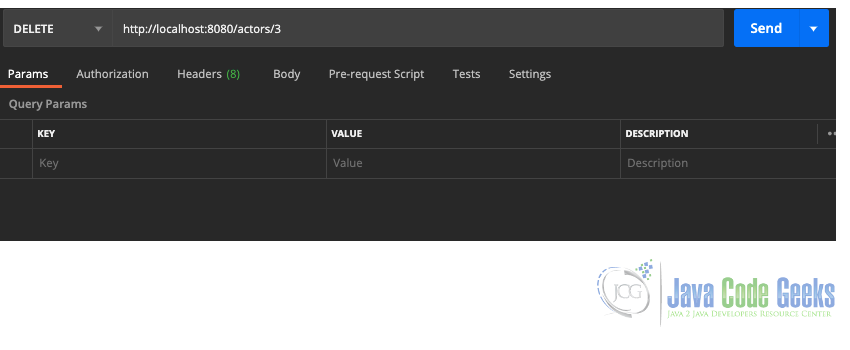
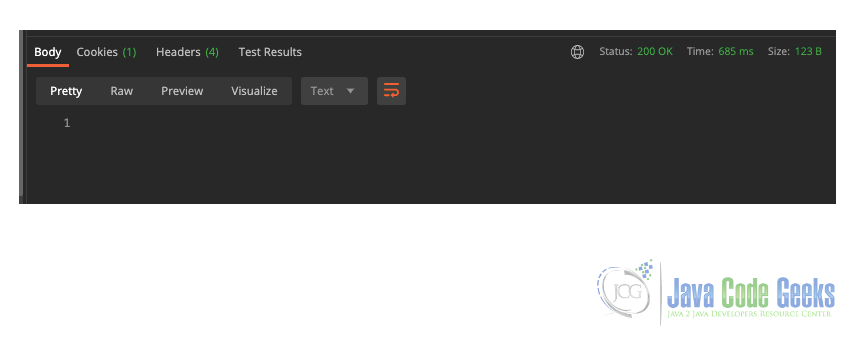
This method doesn’t have a return data on the response, but with the status 200 OK we know that the data was erased.
5.5 Not Found Exception
Our API has a not found data treatment that I show below with a GET request with an invalid ID.

We see that the response status present a 404 Not Found as expected due to the ID requested doesn’t exist on the API.
Obviously, this API is very simple and we can build up with other services, also apply the HATEOAS architecture to put the API at a high level.
6. Summary
And that’s it! We could see how to create a REST API using Spring Boot. Also, we use Java Config to create some initial data for the API and learned the basic HTTP methods (GET, POST, PUT, DELETE).
Our API was built using the MVC standard and was divided into layers using Spring JPA (model) and Spring Web (controller) to implement the REST controllers. Furthermore, the H2 database was used to deal with persistent data.
This article was based on official Spring REST services tutorial that you can find details here.
7. Download the source code
You can download the full source code of this example here: Build a REST API with Spring and Java Config
