ViewFlipper is an extension class of ViewAnimator, which animates between two or more views that have been added to it. Specfically, only one child is shown at a time.
To get a better understanding, suppose that we have two TextViews that will be used in our app, but we want only one to be displayed at a time. That is, here is the most popular use case that ViewFlipper fits in.
What we are going to implement in this example, is rendering two simple screens using ViewFlipper. We ‘ll also try to create a basic animation while navigating between them. Let’s go!
For the need of this example, we will use the following tools in a Windows 64-bit platform:
- JDK 1.7
- Eclipse 4.4 Luna
- Android SDK 4.4
You may skip project creation and jump directly to the beginning of the example below.
1. Creating a New Android Application Project
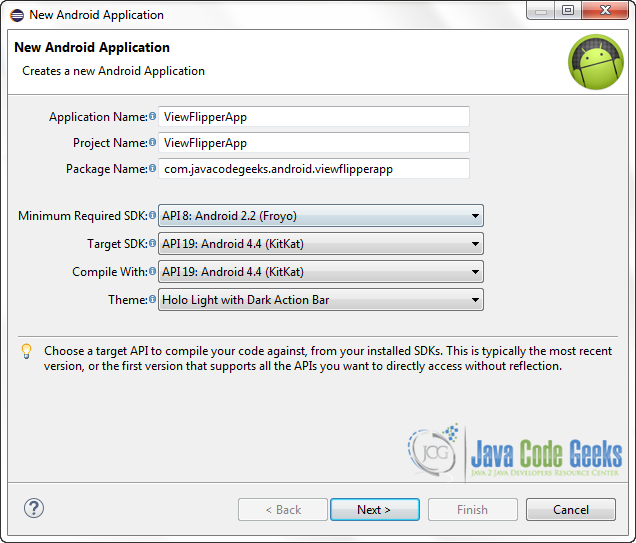
Open Eclipse IDE and go to File → New → Project → Android Application Project.
Fill in the name of the application, the project and the package in the appropriate fields and then click Next.
In the next window, the “Create Activity” option should be checked. The new created activity will be the main activity of your project. Then press Next button.
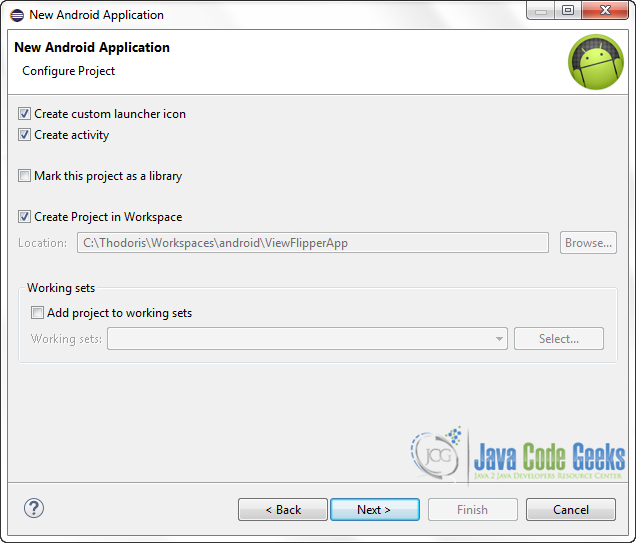
In “Configure Launcher Icon” window you should choose the icon you want to have in your app. We will use the default icon of android, so click Next button.
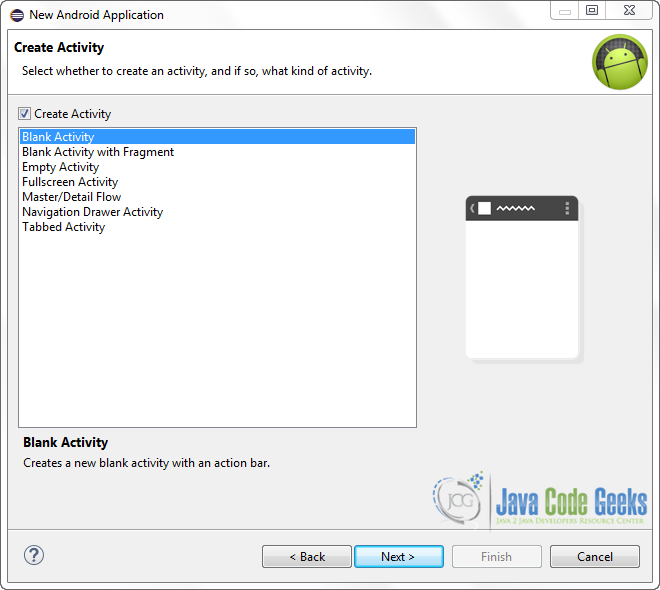
Select the “Blank Activity” option and press Next.
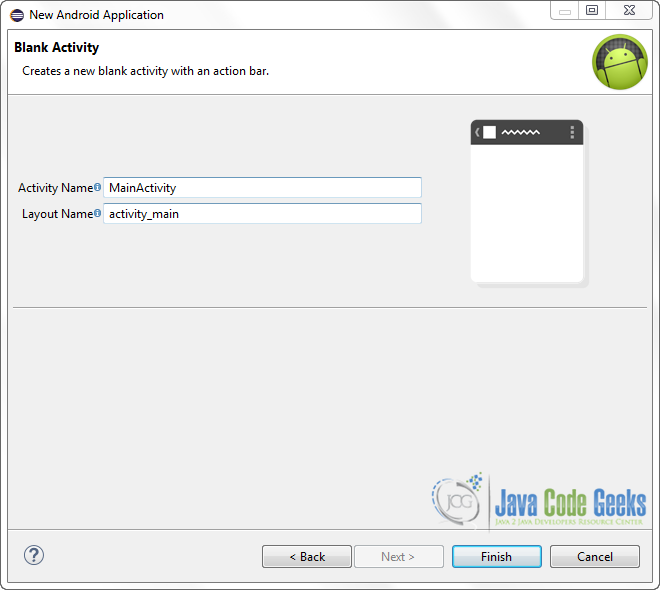
You then have to specify a name for the new Activity and a name for the layout description of your app. The .xml files for the layout will automatically be created in the res/layout folder. Finally, press Finish.
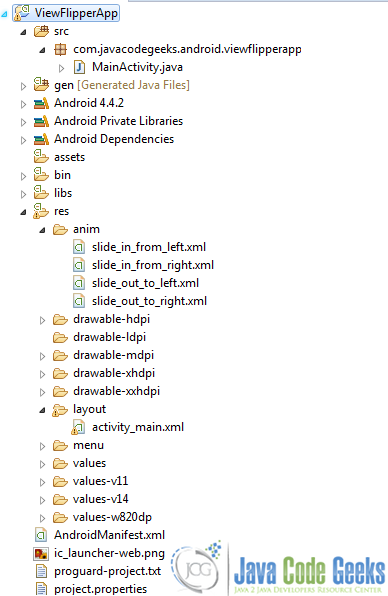
Here is the very final structure of the project, just in case you ‘ll miss something, while developing:
2. Creating the layout of the Main Activity
Let’s do it by opening res/layout/activity_main.xml and navigating to the respective xml tab and paste the following.
activity_main.xml
<?xml version="1.0" encoding="utf-8"?>
<LinearLayout xmlns:android="http://schemas.android.com/apk/res/android"
android:layout_width="fill_parent"
android:layout_height="fill_parent"
android:orientation="vertical"
android:background="#f5f5f5" >

        <ViewFlipper
            android:id="@+id/viewflipper"
            android:layout_width="fill_parent"
            android:layout_height="fill_parent"
            android:layout_margin="6dp" >


            <LinearLayout
                android:layout_width="fill_parent"
                android:layout_height="fill_parent"
                android:gravity="center"
                android:orientation="vertical" >

                <TextView
                	android:layout_width="wrap_content"
                    android:layout_height="wrap_content"
                    android:layout_marginTop="15dp"
                    android:text="Windows PC"
                    android:textColor="#b7102f"
                    android:textSize="25dp">
                </TextView>

                <ImageView
                	android:layout_marginTop="15dp"
                    android:id="@+id/imageView1"
                    android:layout_width="wrap_content"
                    android:layout_height="wrap_content"
                    android:src="@drawable/windows_pc" />
            </LinearLayout>


        	<LinearLayout
        	    android:layout_width="fill_parent"
                android:layout_height="fill_parent"
                android:gravity="center"
                android:orientation="vertical" >

                <TextView
                    android:layout_marginTop="15dp"
                    android:layout_width="wrap_content"
                    android:layout_height="wrap_content"
                    android:text="Ubuntu PC"
                    android:textColor="#191975"
                    android:textSize="25dp"
                    android:textStyle="italic" >
                </TextView>

                <ImageView
                    android:layout_marginTop="15dp"
                    android:id="@+id/imageView2"
                    android:layout_width="wrap_content"
                    android:layout_height="wrap_content"
                    android:src="@drawable/ubuntu_pc" />

        	</LinearLayout>
        </ViewFlipper>
</LinearLayout>
So, we selected a LinearLayout to hold our app’s UI and inside it a ViewFlipper element (lines 8-63), which has two children. We ‘ll follow the LinearLayout guidelines for the childrens’ design, too, so each one of them will be declared into a linear layout.
What we want our separate screens (ViewFlipper’s children) contain is an image and a corresponding TextView, declaring what the child has to do with.
So, let’s associate our children with two operating systems that I mostly use, windows and ubuntu linux. What these children will hold, is the operating system’s ImageView and a TextView that will make the animated navigation clearer.
Simple as that, windows child is presented in lines 15-36, while ubuntu linux child, in lines 39-62.
3. Coding the Main Activity
Let’s first navigate to src/com.javacodegeeks.android.textviewtest/MainActivity.java. Next, complete the class like this:
MainActivity.java
package com.javacodegeeks.android.viewflipperapp;

import android.app.Activity;
import android.os.Bundle;
import android.view.MotionEvent;
import android.widget.ViewFlipper;

public class MainActivity extends Activity {
	private ViewFlipper viewFlipper;
    private float lastX;

    @Override
    protected void onCreate(Bundle savedInstanceState) {
    	super.onCreate(savedInstanceState);
        setContentView(R.layout.activity_main);
        viewFlipper = (ViewFlipper) findViewById(R.id.viewflipper);
    }

    // Using the following method, we will handle all screen swaps.
    public boolean onTouchEvent(MotionEvent touchevent) {
    	switch (touchevent.getAction()) {

        case MotionEvent.ACTION_DOWN:
        	lastX = touchevent.getX();
            break;
        case MotionEvent.ACTION_UP:
            float currentX = touchevent.getX();

            // Handling left to right screen swap.
            if (lastX < currentX) {

            	// If there aren't any other children, just break.
                if (viewFlipper.getDisplayedChild() == 0)
                	break;

                // Next screen comes in from left.
                viewFlipper.setInAnimation(this, R.anim.slide_in_from_left);
                // Current screen goes out from right.
                viewFlipper.setOutAnimation(this, R.anim.slide_out_to_right);

                // Display next screen.
                viewFlipper.showNext();
             }

            // Handling right to left screen swap.
             if (lastX > currentX) {

            	 // If there is a child (to the left), kust break.
            	 if (viewFlipper.getDisplayedChild() == 1)
            		 break;

            	 // Next screen comes in from right.
            	 viewFlipper.setInAnimation(this, R.anim.slide_in_from_right);
            	// Current screen goes out from left.
            	 viewFlipper.setOutAnimation(this, R.anim.slide_out_to_left);

            	// Display previous screen.
                 viewFlipper.showPrevious();
             }
             break;
    	 }
         return false;
    }
}
We first define lastX variable, which will be our guide, in order to manipulate easier the transaction between the available screens. How could we “fire” the beginning of such a transaction? I thought of a tab layout and a swype event, when I first asked myself this qusetion, so let’s give it a try to the second one, which is more user-friendly.

To get our ViewFlipper‘s transactions done through swype event, we have to use MotionEvent class. Obviously, this is the specific part of our case, so let’s have a look at the standard one, too: onTouchEvent is what we want to handle touch actions between our app and the user.
The actual constants that we need from MotionEvent class, in order to implement the swype animation for our ViewFlipper element, are ACTION_DOWN and ACTION_UP. The first one indicates the initial starting location, while the second one, the final release location.
According to the fore-mentioned words, we start tracking the location of a gesture using line 24. Nevertheless, things get somehow more complicated when we have to code the ACTION_UP case, because we have to partition whether we have to do with a left-to-right gesture (lines 30-43) or with a right-to-left gesture (lines 46-59). Obviously, in each case we have to handle carefully the inherited setInAnimation and setOutAnimation methods (we ‘ll talk in detail for the animation files attached on them, in the next section).
4. Coding the animations
This is how it goes:
- We want to implement two basic swype actions.
- Each one of them, has to be defined by two separate animation files, one to declare the direction from which the next screen is coming and the other to also declare the direction to which the current screen is getting hidden.
- This means that we ‘re actually in the need of four xml animation files, in overall.
So, let’s create them in a new folder named “anim”, under the res (this means a relative path of /res/anim/).
slide_in_from_left.xml
<set xmlns:android="http://schemas.android.com/apk/res/android"
    android:shareInterpolator="false">
    <translate
        android:fromXDelta="-100%"
        android:toXDelta="0%"
        android:fromYDelta="0%"
        android:toYDelta="0%"
        android:duration="1500" />
</set>
This animation can be adapted to a screen that we want to enter our ViewFlipper element, from a hidden (-100% at X-axis) position and it matches a left-to-right gesture.
slide_out_to_right.xml
<set xmlns:android="http://schemas.android.com/apk/res/android"
    android:shareInterpolator="false">
      <translate
          android:fromXDelta="0%"
          android:toXDelta="100%"
          android:fromYDelta="0%"
          android:toYDelta="0%"
          android:duration="1500"/>
</set>
This animation can be adapted to a screen that we want to hide from our ViewFlipper element, from a visible (0% at X-axis) position and it matches a left-to-right gesture.
The following two animations are similar to the two ones that are fore-mentioned, but these ones provide functionality regarding the right-to-left gesture.
slide_in_from_right.xml
<set xmlns:android="http://schemas.android.com/apk/res/android"
    android:shareInterpolator="false">
    <translate
        android:fromXDelta="100%"
        android:toXDelta="0%"
        android:fromYDelta="0%"
        android:toYDelta="0%"
        android:duration="1500" />
</set>
slide_out_to_left.xml
<set xmlns:android="http://schemas.android.com/apk/res/android"
    android:shareInterpolator="false">
    <translate
        android:fromXDelta="0%"
        android:toXDelta="-100%"
        android:fromYDelta="0%"
        android:toYDelta="0%"
        android:duration="1500" />
</set>
For further questions, please refer to this post.
Running the application
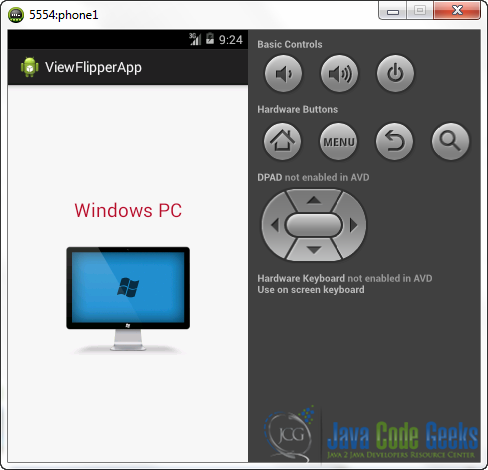
The initial screen is of course the first child of our ViewFlipper:
Let’s make a right-to-left gesture!
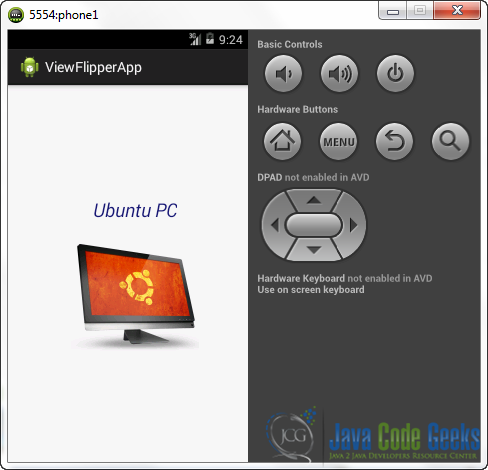
Obviously, if we now make a left-to-right gesture, the windows screen will come back.
6. Download the Eclipse Project
This was an example of ViewFlipper in Android.
You can download the full source code of this example here : ViewFlipperApp.zip

hey…
tnx to your free tut’s
i need a simple silder and want to make it a little bit object orianted so i created a class instead of coding in main activity like below :
public class Slideshow(){
public void show(){
myViewFlipper=(ViewFlipper)findViewById(R.id.myflipper);
ImageView im=new ImageView(this);
im.setImageResource(R.mipmap.ic_launcher);
myViewFlipper.addView(im);
}
}
so in my main activity i do the folowing :
SlideShow slideShow=new SlideShow();
slideShow.show();
and i face with null pointer exceptions. would you have a look at my cod please ?