In Android, a SeekBar is a ProgressBar element’s extension that allows the selection of integer values using a natural user interface. SeekBar has a thumb that can be slided in order to choose a value between 0 and some maximum that can be set from the developer.
For the need of this example, we will use the following tools in a Windows 64-bit platform:
- JDK 1.7
- Eclipse ADT 4.3 Kepler
- Android SDK 4.3
You may skip project creation and jump directly to the beginning of the example below.
1. Create a New Android Application Project
Open Eclipse IDE and go to File → New → Project → Android Application Project.
Fill in the name of the application, the project and the package in the appropriate fields and then click Next.
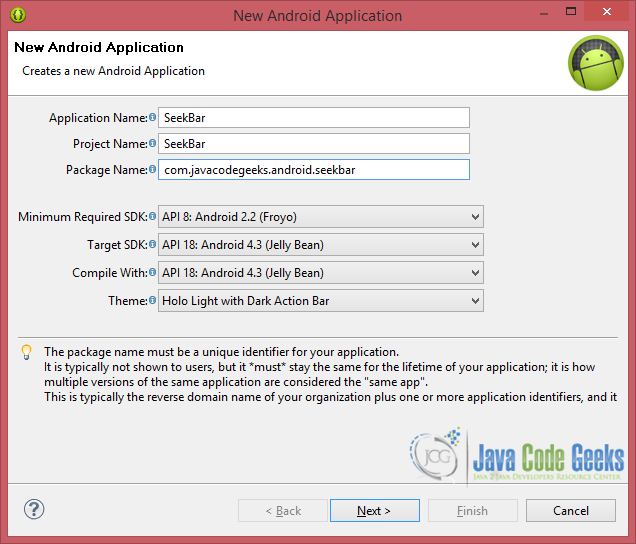
In the next window, the “Create Activity” option should be checked. The new created activity will be the main activity of your project. Then press Next button.

In “Configure Launcher Icon” window you should choose the icon you want to have in your app. We will use the default icon of android, so click Next button.
![]()
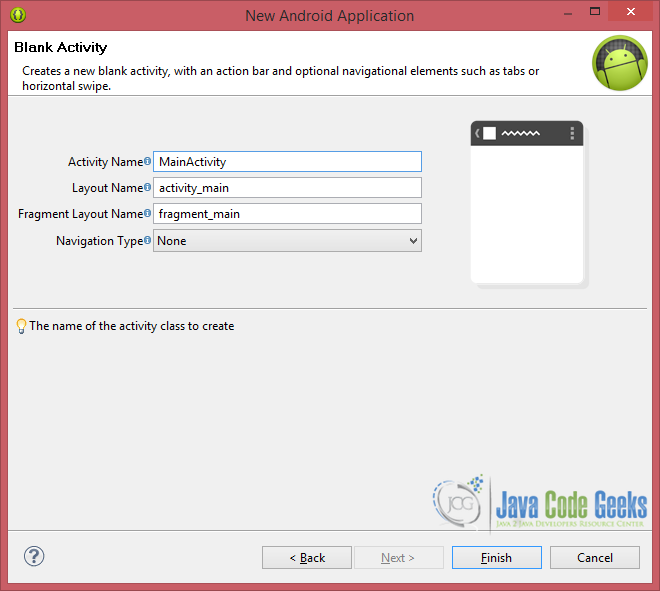
Select the “Blank Activity” option and press Next.

You then have to specify a name for the new Activity and a name for the layout description of your app. The .xml files for the layout will automatically be created in the res/layout folder. Finally, press Finish.
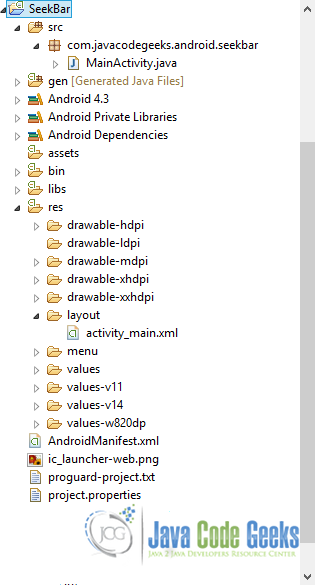
Now you can see the final structure of the project in the following image (I have deleted the fragment_main.xml, as we don’t really need this).
2. Create the layout of the Main Activity
As I mentioned, I ‘ll try to keep it simple. Just add a SeekBar element at the very top of your layout and a TextView below, that will help help us keep track of its changes; all, under the concept of a RelativeLayout, just for demonstration.
Let’s do it by opening res/layout/activity_main.xml and navigating to the respective xml tab and paste the following.
activity_main.xml
<RelativeLayout xmlns:android="http://schemas.android.com/apk/res/android"
    xmlns:tools="http://schemas.android.com/tools"
    android:layout_width="match_parent"
    android:layout_height="match_parent"
    tools:context="com.javacodegeeks.android.seekbar.MainActivity" >

    <SeekBar
        android:id="@+id/seekBar1"
        android:layout_width="300dp"
        android:layout_height="wrap_content"
        android:layout_alignParentLeft="true"
        android:layout_alignParentTop="true"
        android:layout_marginTop="26dp"
        android:max="10"/>

    <TextView
        android:id="@+id/textView1"
        android:layout_width="wrap_content"
        android:layout_height="wrap_content"
        android:layout_alignParentLeft="true"
        android:layout_below="@+id/seekBar1"
        android:layout_marginLeft="29dp"
        android:layout_marginTop="14dp" />

</RelativeLayout>
Except from setting our SeekBar‘s maximum value to 10, there isn’t any special to explain, so let’s see the MainActivity class.
3. Code the Main Activity
Let’s first navigate to src/com.javacodegeeks.android.textviewtest/MainActivity.java. Next, complete the class like this:
MainActivity.java
package com.javacodegeeks.android.seekbar;

import android.app.Activity;
import android.os.Bundle;
import android.widget.SeekBar;
import android.widget.SeekBar.OnSeekBarChangeListener;
import android.widget.TextView;
import android.widget.Toast;

public class MainActivity extends Activity{

	 private SeekBar seekBar;
	 private TextView textView;

	 @Override
	 protected void onCreate(Bundle savedInstanceState) {

	  super.onCreate(savedInstanceState);
	  setContentView(R.layout.activity_main);
	  initializeVariables();

	  // Initialize the textview with '0'.
	  textView.setText("Covered: " + seekBar.getProgress() + "/" + seekBar.getMax());

	  seekBar.setOnSeekBarChangeListener(new OnSeekBarChangeListener() {
		  int progress = 0;

		  @Override
		  public void onProgressChanged(SeekBar seekBar, int progresValue, boolean fromUser) {
			  progress = progresValue;
			  Toast.makeText(getApplicationContext(), "Changing seekbar's progress", Toast.LENGTH_SHORT).show();
		  }

		  @Override
		  public void onStartTrackingTouch(SeekBar seekBar) {
			  Toast.makeText(getApplicationContext(), "Started tracking seekbar", Toast.LENGTH_SHORT).show();
		  }

		  @Override
		  public void onStopTrackingTouch(SeekBar seekBar) {
			  textView.setText("Covered: " + progress + "/" + seekBar.getMax());
			  Toast.makeText(getApplicationContext(), "Stopped tracking seekbar", Toast.LENGTH_SHORT).show();
		  }
	   });
	 }

	 // A private method to help us initialize our variables.
	 private void initializeVariables() {
		 seekBar = (SeekBar) findViewById(R.id.seekBar1);
		 textView = (TextView) findViewById(R.id.textView1);
	 }
}
Here are some points I believe need more in-depth explanation:

initializeVariables()is a usual technique that I use (when on Android development) to initialize all the existing xml variables.- In line 23, we used some
SeekBar‘s common methods, to initialize the displayed inTextViewprogress, to zero.
What’s next? I’m sure you ‘ve already matched the SeekBar element to more than one of your installed applications, so what is needed to get things done, when touch and move the thumb, is an ActionListener, of course. Not exactly this, but it’s important that we have the generic meaning of it.
Assuming that we don’t know even the basics of Android, the best answer, according to platform questions, can be foud in the official developer’s site. I also found myself there, concluding that the ActionListener that match our needs, was OnSeekBarChangeListener.
Basically SeekBar.OnSeekBarChangeListener is a public static interface that is used to listen the SeekBar events, so we have to conform our Activity in order to implement it. This could be done either in the class definition ( public class MainActivity extends Activity implements OnSeekBarChangeListener ) or in the way line 25 shows. Of course, both ways are acceptable and allow us to override OnSeekBarChangeListener‘s methods:
onProgressChanged: notification that the progress level has changed.onStartTrackingTouch: notification that the user has started a touch gesture.onStopTrackingTouch: notification that the user has finished a touch gesture.
So, after reading the corresponding official documentation, I was like “why not using all of these methods in my example?” and the easiest way to get this done was to just display a Toast, whenever each one happens. Lines 28-43 are your disclaimer, so let’s get today’s article finished with screenshots.
4. Run the Application
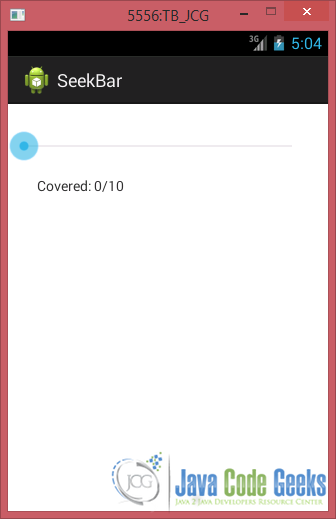
Now, let’s just touch (and keep it pressed for a while) the SeekBar element:
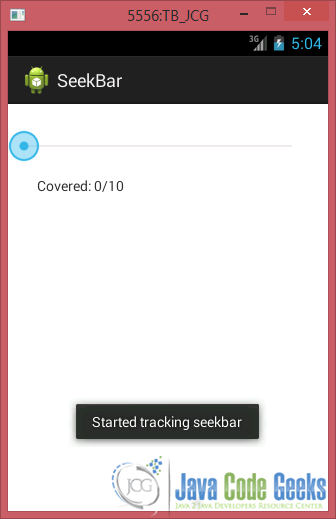
SeekBar
While moving the element, the overidded onProgressChanged method is executed:
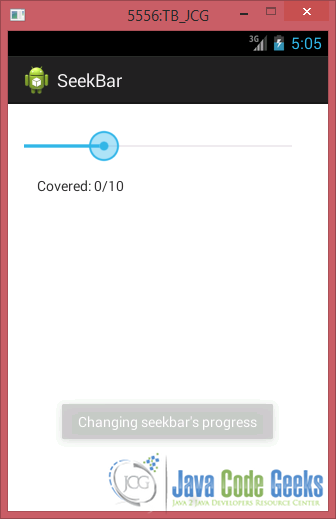
SeekBar
Finally, after deciding its final position, it’s onStopTrackingTouch sequence to be executed:
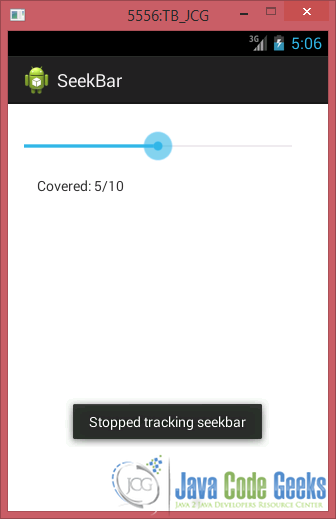
SeekBar
5. Final Words – Source Code Download
And that was it for today, simple ‘n easy, as I promised! Have a nice day!
This was an example of SeekBar in Android. You can also download the source code for this example: SeekBar.zip

Thanks