Android TableLayout Example
In Android there are may ways you can arrange the components of your Application on the screen. One of the most common layouts is the TableLayout. In this tutorial we are going to see how TableLayout works with some input components.
A very common use case of the TableLayout is, of course, when you want to present tabular data (statistics for example…) on your application. But it’s also a very quick way to position items on the screen, when you want your components to have a certain alignment and you don’t want to mess with margins or alignment on other layout methods. It works similarly to an HTML table on a web page, only here it’s much more flexible.
For this tutorial, we will use the following tools in a Windows 64-bit platform:
- JDK 1.7
- Eclipse 4.2 Juno
- Android SKD 4.2
1. Create a new Android Project
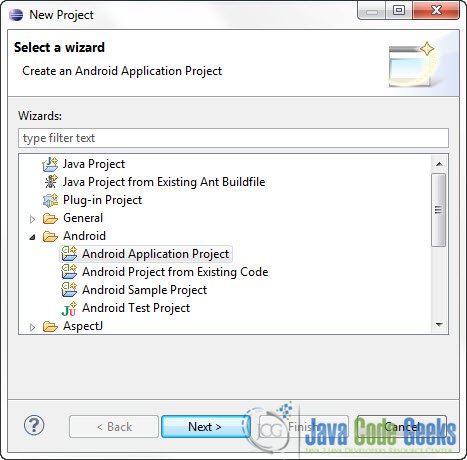
Open Eclipse IDE and go to File -> New -> Project -> Android -> Android Application Project and click Next.
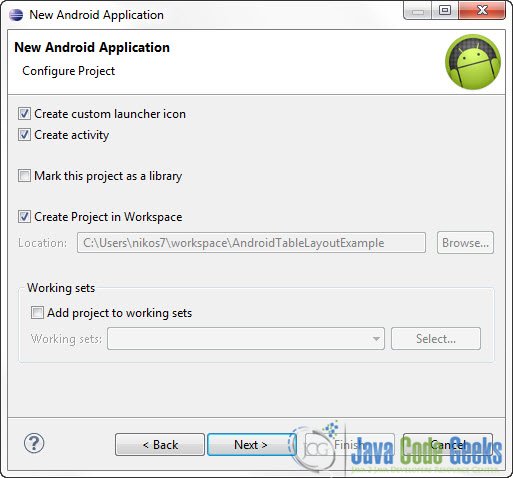
You have to specify the Application Name, the Project Name and the Package name in the appropriate text fields and then click Next.
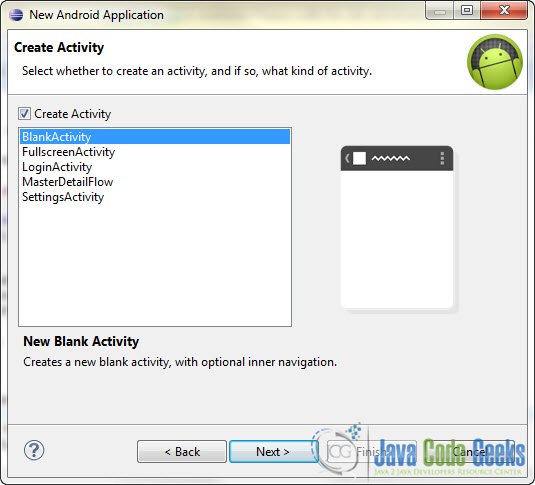
In the next window make sure the “Create activity” option is selected in order to create a new activity for your project, and click Next. This is optional as you can create a new activity after creating the project, but you can do it all in one step.
Select “BlankActivity” and click Next.
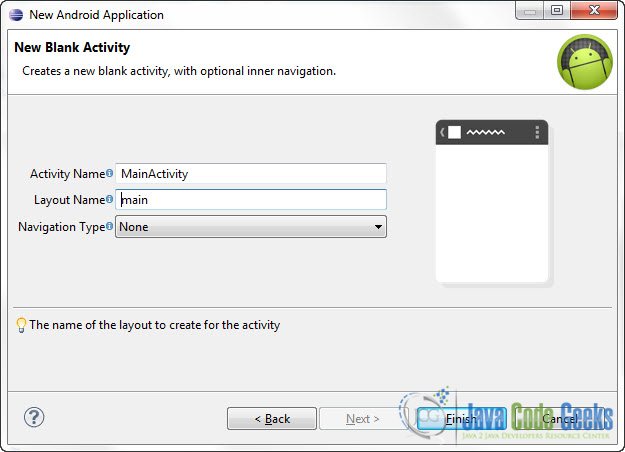
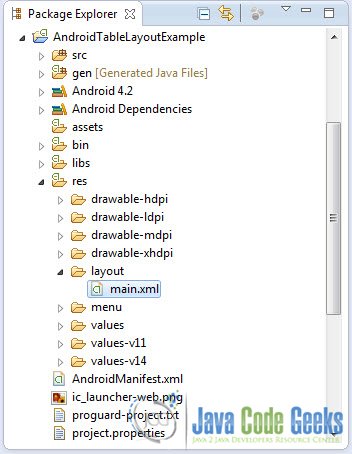
You will be asked to specify some information about the new activity. In the Layout Name text field you have to specify the name of the file that will contain the layout description of your app. In our case the file res/layout/main.xml will be created. Then, click Finish.
2. TableLayout example
Open res/layout/main.xml file :
And paste the following code :
<?xml version="1.0" encoding="utf-8"?>
<TableLayout xmlns:android="http://schemas.android.com/apk/res/android"
    android:id="@+id/tableLayout"
    android:layout_width="fill_parent"
    android:layout_height="fill_parent"
    android:shrinkColumns="*"
    android:stretchColumns="*" >

    <!-- 2 columns -->

    <TableRow
        android:id="@+id/tableRow1"
        android:layout_width="wrap_content"
        android:layout_height="wrap_content"
        android:padding="5dip" >

        <TextView
            android:id="@+id/textView1"
            android:text="Col 1"
            android:textAppearance="?android:attr/textAppearanceLarge" />

        <Button
            android:id="@+id/button1"
            android:text="Col 2" />
    </TableRow>

    <TableRow
        android:id="@+id/tableRow2"
        android:layout_width="wrap_content"
        android:layout_height="wrap_content"
        android:padding="5dip" >

        <EditText
            android:id="@+id/editText1"
            android:layout_span="2"
            android:text="Col 1 & 2" />
    </TableRow>

    <!-- red line -->

    <View
        android:layout_height="4dip"
        android:background="#FF00" />

    <!-- 4 columns -->

    <TableRow
        android:id="@+id/tableRow3"
        android:layout_width="wrap_content"
        android:layout_height="wrap_content"
        android:padding="5dip" >

        <TextView
            android:id="@+id/textView2"
            android:text="Col 1" />

        <Button
            android:id="@+id/button2"
            android:text="Col 2" />

        <Button
            android:id="@+id/button3"
            android:text="Col 3" />

        <Button
            android:id="@+id/button5"
            android:text="Col 4" />
    </TableRow>

    <TableRow
        android:id="@+id/tableRow4"
        android:layout_width="wrap_content"
        android:layout_height="wrap_content"
        android:padding="5dip" >

        <Button
            android:id="@+id/button4"
            android:layout_column="2"
            android:text="Col 3" />
    </TableRow>

    <TableRow
        android:id="@+id/tableRow5"
        android:layout_width="wrap_content"
        android:layout_height="wrap_content"
        android:padding="5dip" >

        <Button
            android:id="@+id/button6"
            android:layout_column="1"
            android:text="Col 2" />
    </TableRow>

</TableLayout>
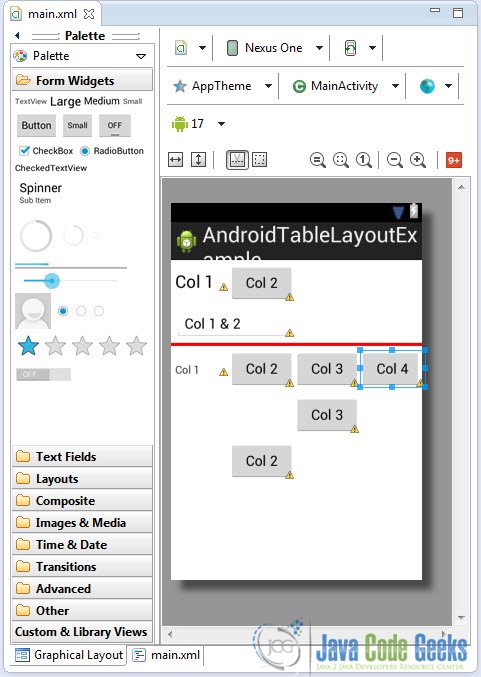
As you can see, you don’t have to specify the number of columns or rows of the table. You just add a TableRow element when you want to create a new row, and then just create as many items as you want inside that row and automatically an equal number of columns will be created for the table. You can also place your item in whichever column of the table you want, by using the android:layout_column attribute. Even if the table has 3 columns for example, you can still write android:layout_column="3" (the column count is zero based) and the layout will automatically create 4 columns and place your item in the 4th column. Another interesting attribute is android:layout_span="2". This tells the layout that this specific element will take up the space of two consecutive columns. Now let’s take a look at the Graphical Layout Editor:
When you work with TableLayout and you are in the xml mode, it is particularly useful to take a look at the Outline component of Eclipse IDE, which by default is placed on the right of the IDE Window. This will help you get a better perception of the table you’ve created:
3. Run the application
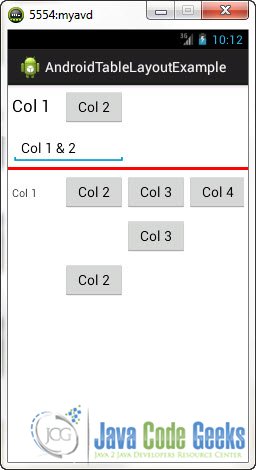
We don’t really have to write any code for this tutorial, so go ahead and run the application to see how the layout looks on your emulator:
Download Eclipse Project
This was an Android TableLayout Example. Download the Eclipse Project of this tutorial: AndroidTableLayoutExample.zip




nice tutorial , thanks