In this example we are going to see how to create MutliTouch ListView in an Android Application. In this example, every Item in the list is clickable, so you can bundle it with a ClickListener, and it contains two buttons to edit and delete items.
For this tutorial, we will use the following tools in a Windows 64-bit platform:
- JDK 1.7
- Eclipse 4.2 Juno
- Android SKD 4.2
1. Create a new Android Project
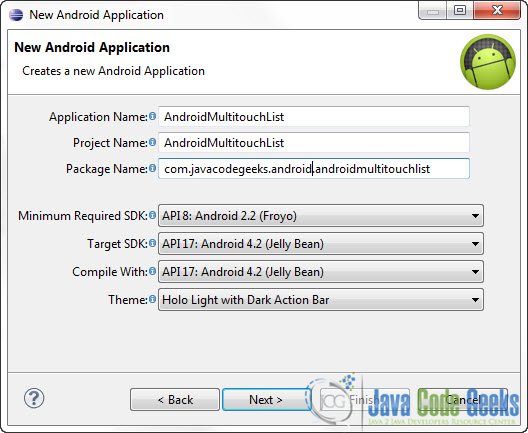
Open Eclipse IDE and go to File -> New -> Project -> Android -> Android Application Project and click Next.

You have to specify the Application Name, the Project Name and the Package name in the appropriate text fields and then click Next.
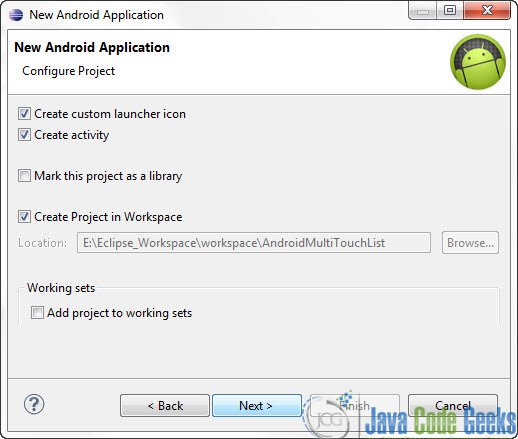
In the next window make sure the “Create activity” option is selected in order to create a new activity for your project, and click Next. This is optional as you can create a new activity after creating the project, but you can do it all in one step.
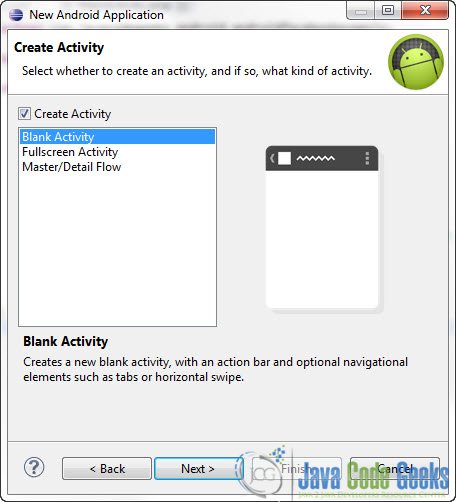
Select “BlankActivity” and click Next.
You will be asked to specify some information about the new activity. In the Layout Name text field you have to specify the name of the file that will contain the layout description of your app. In our case the file res/layout/main.xml will be created. Then, click Finish.

2. Main layout
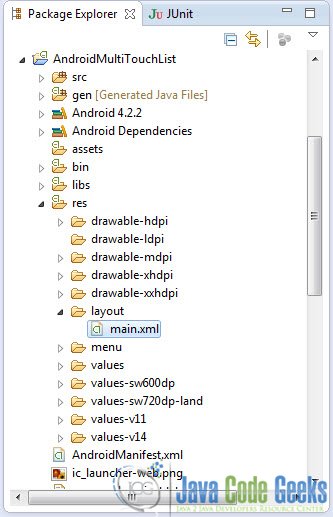
Go to the Package Explorer and open res/layout/main.xml:
And paste the following code:
<RelativeLayout xmlns:android="http://schemas.android.com/apk/res/android"
    xmlns:tools="http://schemas.android.com/tools"
    android:layout_width="match_parent"
    android:layout_height="match_parent"
    android:background="#990044"
    tools:context=".MainActivity" >

    <TextView
        android:id="@+id/listLabel"
        android:layout_width="wrap_content"
        android:layout_height="wrap_content"
        android:layout_alignParentTop="true"
        android:layout_centerHorizontal="true"
        android:text="Multi Touch List"
        android:textColor="#FFFFFF"
        android:textSize="25sp" />

    <ListView
        android:id="@+id/listView"
        android:layout_width="fill_parent"
        android:layout_height="fill_parent"
        android:layout_below="@+id/listLabel"
        android:layout_marginTop="5dp"
        android:cacheColorHint="#FFFFFF" />

</RelativeLayout>
3. Create a new xml Layout file
Now, we have to create a new XML file that will describe the layout of the items in the list.
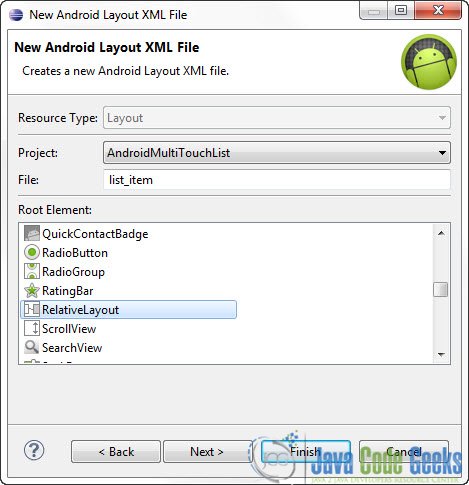
Go to the Package Explorer and right click on the res/layout folder. Select New -> Other -> Android -> Android XML Layout File. And click Next:

Then specify the name of the file and the Layout type and click Finish:
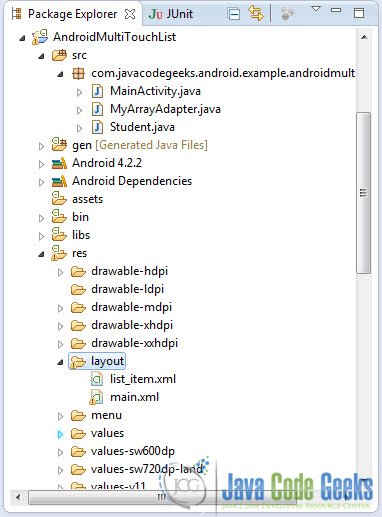
As you will see in the Package Explorer the new /res/layout/list_item.xml file has been created:
Open that file and paste the following code:
<RelativeLayout xmlns:android="http://schemas.android.com/apk/res/android"
    xmlns:tools="http://schemas.android.com/tools"
    android:layout_width="match_parent"
    android:layout_height="match_parent"
    android:padding="4dp"
    tools:context=".MainActivity" >

    <TextView
        android:id="@+id/textName"
        android:layout_width="wrap_content"
        android:layout_height="wrap_content"
        android:layout_alignParentLeft="true"
        android:layout_alignParentTop="true"
        android:text="Name:"
        android:textAppearance="?android:attr/textAppearanceLarge" />

    <TextView
        android:id="@+id/textAge"
        android:layout_width="wrap_content"
        android:layout_height="wrap_content"
        android:layout_alignParentLeft="true"
        android:layout_below="@+id/textName"
        android:layout_marginTop="5dp"
        android:text="Age:"
        android:textAppearance="?android:attr/textAppearanceLarge"
        android:textSize="16sp" />

    <Button
        android:id="@+id/btnEdit"
        android:layout_width="80dp"
        android:layout_height="40dp"
        android:layout_alignParentRight="true"
        android:layout_alignParentTop="true"
        android:background="#99CC"
        android:focusable="false"
        android:focusableInTouchMode="false"
        android:text="Edit"
        android:textColor="#FFFFFF" />

    <Button
        android:id="@+id/btnDelete"
        android:layout_width="80dp"
        android:layout_height="40dp"
        android:layout_alignParentRight="true"
        android:layout_below="@+id/btnEdit"
        android:layout_marginTop="3dp"
        android:background="#99CC"
        android:focusable="false"
        android:focusableInTouchMode="false"
        android:text="Delete"
        android:textColor="#FFFFFF" />

    <TextView
        android:id="@+id/textAddr"
        android:layout_width="wrap_content"
        android:layout_height="wrap_content"
        android:layout_alignParentLeft="true"
        android:layout_below="@+id/textAge"
        android:layout_marginTop="5dp"
        android:text="Address:" />

</RelativeLayout>
4. Create a Student class
This class will simply represent the items in the lists. Go to the Package explorer:
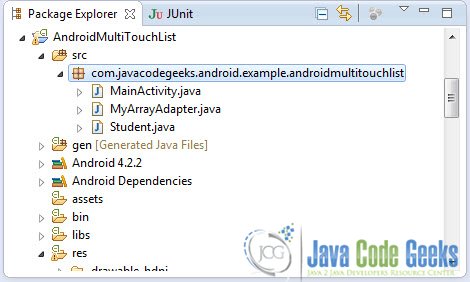
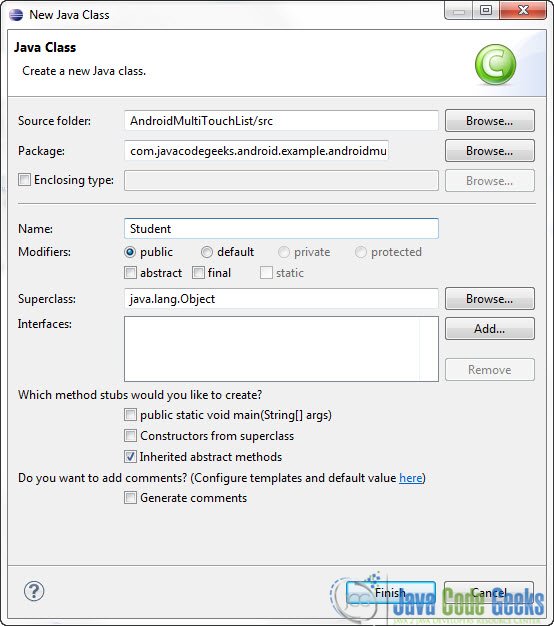
Right click on the package -> New -> Class. Fill out the name of the class, as show in the picture below:
Now open the source file of the class and paste the following code:
Student.java:
package com.javacodegeeks.android.example.androidmultitouchlist;

public class Student {
	private String name;
	private String age;
	private String address;

	public Student(String name, String age, String address) {
		super();
		this.name = name;
		this.age = age;
		this.address = address;
	}

	public String getName() {
		return name;
	}

	public void setName(String name) {
		this.name = name;
	}

	public String getAge() {
		return age;
	}

	public void setAge(String age) {
		this.age = age;
	}

	public String getAddress() {
		return address;
	}

	public void setAddress(String address) {
		this.address = address;
	}
}
5. Create a custom ArrayAdapter
To inflate the ListView with Items, we need an ArrayAdapter. So we are going to make our own custom one.
As before, go to the package explorer, right click on the package -> New -> Class. Fill out the name of the class, and the ArrayAdapter superclass, as show in the picture below:
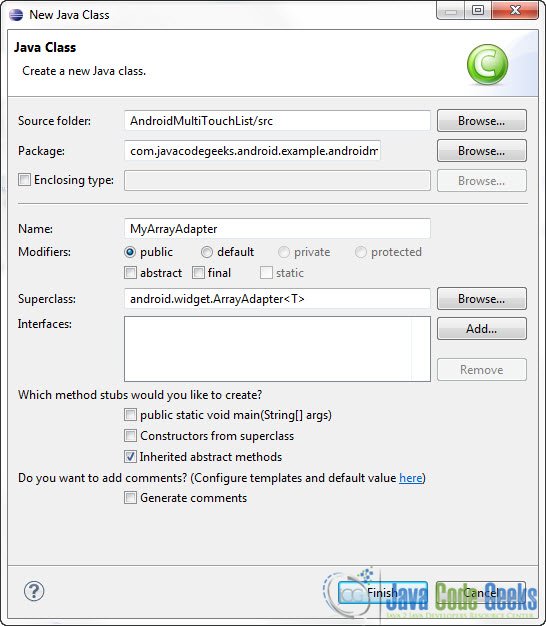
Now open the source file of the class and paste the following code:
MyArrayAdapter.java:
package com.javacodegeeks.android.example.androidmultitouchlist;

import java.util.ArrayList;

import android.app.Activity;
import android.content.Context;
import android.view.LayoutInflater;
import android.view.View;
import android.view.View.OnClickListener;
import android.view.ViewGroup;
import android.widget.ArrayAdapter;
import android.widget.Button;
import android.widget.TextView;
import android.widget.Toast;

public class MyArrayAdapter extends ArrayAdapter<Student> {

	Context context;
	int layoutResourceId;
	ArrayList<Student> students = new ArrayList<Student>();

	public MyArrayAdapter(Context context, int layoutResourceId,
			ArrayList<Student> studs) {
		super(context, layoutResourceId, studs);
		this.layoutResourceId = layoutResourceId;
		this.context = context;
		this.students = studs;
	}

	@Override
	public View getView(int position, View convertView, ViewGroup parent) {
		View item = convertView;
		StudentWrapper StudentWrapper = null;

		if (item == null) {
			LayoutInflater inflater = ((Activity) context).getLayoutInflater();
			item = inflater.inflate(layoutResourceId, parent, false);
			StudentWrapper = new StudentWrapper();
			StudentWrapper.name = (TextView) item.findViewById(R.id.textName);
			StudentWrapper.age = (TextView) item.findViewById(R.id.textAge);
			StudentWrapper.address = (TextView) item.findViewById(R.id.textAddr);
			StudentWrapper.edit = (Button) item.findViewById(R.id.btnEdit);
			StudentWrapper.delete = (Button) item.findViewById(R.id.btnDelete);
			item.setTag(StudentWrapper);
		} else {
			StudentWrapper = (StudentWrapper) item.getTag();
		}

		Student student = students.get(position);
		StudentWrapper.name.setText(student.getName());
		StudentWrapper.age.setText(student.getAge());
		StudentWrapper.address.setText(student.getAddress());

		StudentWrapper.edit.setOnClickListener(new OnClickListener() {

			@Override
			public void onClick(View v) {
				Toast.makeText(context, "Edit", Toast.LENGTH_LONG).show();
			}
		});

		StudentWrapper.delete.setOnClickListener(new OnClickListener() {

			@Override
			public void onClick(View v) {

				Toast.makeText(context, "Delete", Toast.LENGTH_LONG).show();
			}
		});

		return item;

	}

	static class StudentWrapper {
		TextView name;
		TextView age;
		TextView address;
		Button edit;
		Button delete;
	}

}
6. Main Activity code
Now open the source file of the MainActivity.java class and paste the following code:
Student.java:
package com.javacodegeeks.android.example.androidmultitouchlist;
import java.util.ArrayList;
import android.os.Bundle;
import android.app.Activity;
import android.view.View;
import android.widget.AdapterView;
import android.widget.AdapterView.OnItemClickListener;
import android.widget.ListView;
import android.widget.Toast;
public class MainActivity extends Activity {
ListView listview;
MyArrayAdapter studentArrayAdapter;
ArrayList<Student> studentArray = new ArrayList<Student>();
@Override
protected void onCreate(Bundle savedInstanceState) {
super.onCreate(savedInstanceState);
setContentView(R.layout.main);
// inflate the array list with data
studentArray.add(new Student("Nick", "18", "1st Street"));
studentArray.add(new Student("John", "18", "2st Street"));
studentArray.add(new Student("Anthony", "19", "3rd Street"));
studentArray.add(new Student("James", "20", "5th Street"));
studentArray.add(new Student("Jack", "20", "6th Street"));
studentArray.add(new Student("Jeremy", "20", "7th Street"));
studentArray.add(new Student("Long", "21", "1st Street"));
// set the array adapter to use the above array list and tell the listview to set as the adapter
// our custom adapter
studentArrayAdapter = new MyArrayAdapter(MainActivity.this, R.layout.list_item, studentArray);
listview= (ListView) findViewById(R.id.listView);
listview.setItemsCanFocus(false);
listview.setAdapter(studentArrayAdapter);
listview.setOnItemClickListener(new OnItemClickListener() {
@Override
public void onItemClick(AdapterView<?> parent, View v,
final int position, long id) {
Toast.makeText(MainActivity.this,
"List Item Clicked:" + position, Toast.LENGTH_LONG)
.show();
}
});
}
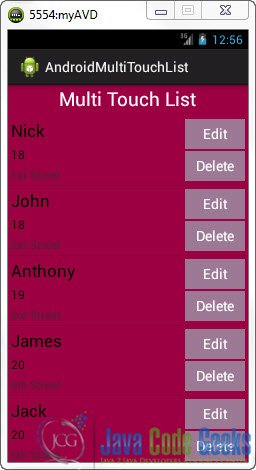
}7. Run the Application
This is the main screen of our Application:
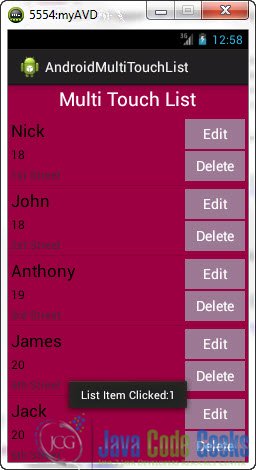
Now, when you click on an Item in the list:
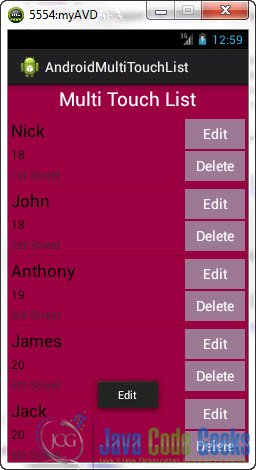
And when you click “Edit” and “Delete”:

Download Eclipse Project
This was an Android MultiTouch ListView Example. Download the Eclipse Project of this tutorial: AndroidMultiTouchList.zip

Your codes are easy to read and follow. Very good tutorial.
listview click is not working for me public class CafesActivity extends AppCompatActivity { private Button mButton; private static int listIndex = 0; @Override protected void onCreate(Bundle savedInstanceState) { super.onCreate(savedInstanceState); setContentView(R.layout.word_list); Button b = (Button)findViewById(R.id.button_change); Button b1 = (Button)findViewById(R.id.button_change); final ArrayList word = new ArrayList(); word.add(new Word(R.drawable.brewbrakes, “BrewBakes Cafe”,b)); word.add(new Word(R.drawable.rio_la, “Rio La Cafe”,b1)); word.add(new Word(R.drawable.ccd, “cafe Coffee day”)); word.add(new Word(R.drawable.cafe_blue, “Cafe Blues”)); word.add(new Word(R.drawable.noahs_cafe, “Noahs Cafe and \nBistro”)); word.add(new Word(R.drawable.akkis_burger, “Akki’s Burger and Cafe”)); word.add(new Word(R.drawable.big_bun, “Big Bun Cafe”)); final WordAdapter adapter = new WordAdapter(this, word, R.color.cafes); final ListView listView = (ListView) findViewById(R.id.list); listView.setItemsCanFocus(false); listView.setAdapter(adapter); listView.setOnItemClickListener(new AdapterView.OnItemClickListener() { @Override public… Read more »