Android Contacts Example
In this example we are going to see how to get Contact Information on your own Android Application. This is an example that demonstrates the appropriate queries (basically there are translated to SQLite queries) you should use in order to get the information you want about Contacts. Of course you can customize the display of the Contact List (here we use just a simple TextView). For example you can use ListView. Furthermore, you can query for more information, like for instance Email TYPE or even Images that you might have assigned to your contacts (this would make your ListView look very interesting). For more information on that check out the Android Contacts documentation.
For this tutorial, we will use the following tools in a Windows 64-bit platform:
- JDK 1.7
- Eclipse 4.2 Juno
- Android SKD 4.2
1. Create a new Android Project
Open Eclipse IDE and go to File -> New -> Project -> Android -> Android Application Project.
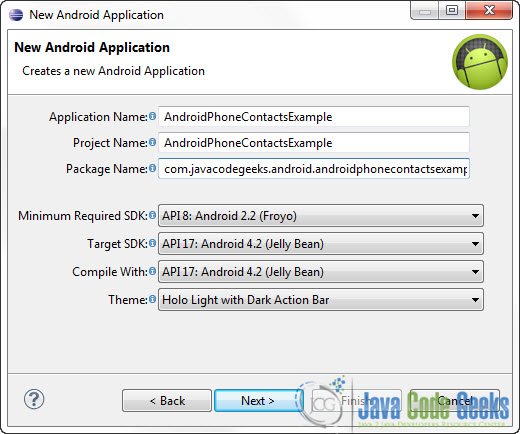
You have to specify the Application Name, the Project Name and the Package name in the appropriate text fields and then click Next.
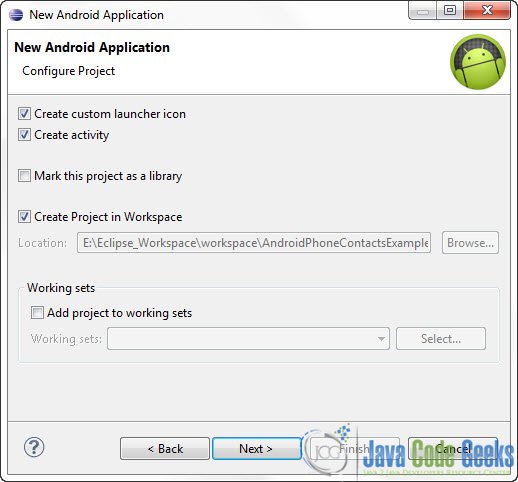
In the next window make sure the “Create activity” option is selected in order to create a new activity for your project, and click Next. This is optional as you can create a new activity after creating the project, but you can do it all in one step.
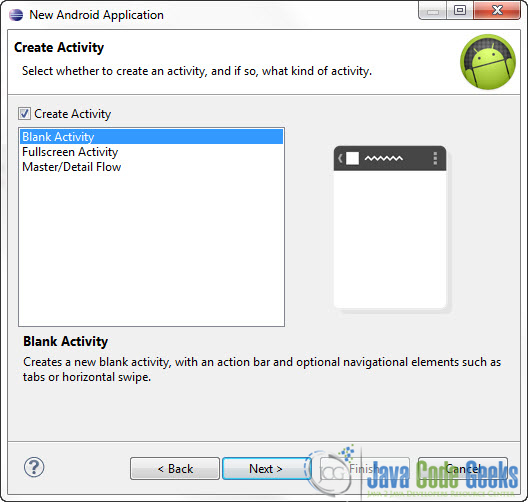
Select “BlankActivity” and click Next.
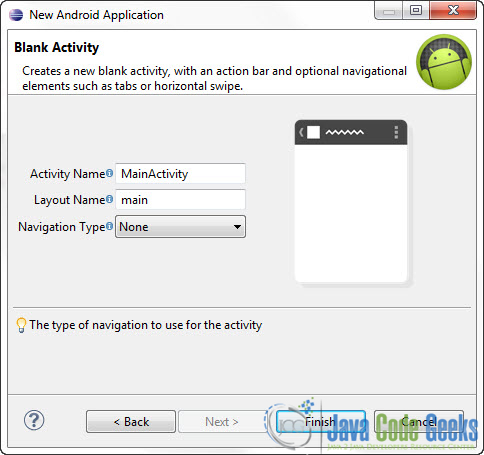
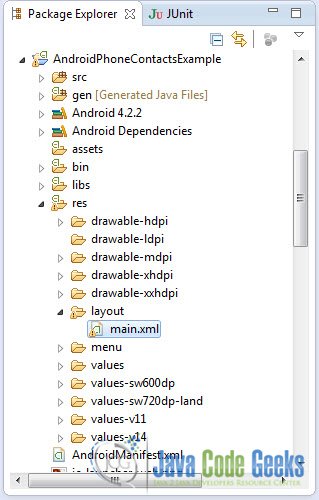
You will be asked to specify some information about the new activity. In the Layout Name text field you have to specify the name of the file that will contain the layout description of your app. In our case the file res/layout/main.xml will be created. Then, click Finish.
2. Creating the layout of the Main Activity
Open res/layout/main.xml file :
And paste the following code :
main.xml:
<RelativeLayout xmlns:android="http://schemas.android.com/apk/res/android"
    xmlns:tools="http://schemas.android.com/tools"
    android:layout_width="match_parent"
    android:layout_height="match_parent"
    tools:context=".MainActivity" >

    <TextView
        android:id="@+id/textView"
        android:layout_width="wrap_content"
        android:layout_height="wrap_content"
        android:layout_alignParentLeft="true"
        android:layout_alignParentRight="true"
        android:layout_alignParentTop="true"
        android:layout_margin="10dp"
        android:textSize="20dp"
        android:gravity="center"
        android:text="Contacts Information" />

    <TextView
        android:id="@+id/textView1"
        android:layout_width="wrap_content"
        android:layout_height="wrap_content"
        android:layout_alignLeft="@+id/textView"
        android:layout_alignRight="@+id/textView"
        android:layout_below="@+id/textView"
        android:gravity="center"
        android:text="TextView" />

    <ProgressBar
        android:id="@+id/progressBar1"
        style="?android:attr/progressBarStyleHorizontal"
        android:layout_width="wrap_content"
        android:layout_height="wrap_content"
        android:layout_above="@+id/textView1"
        android:layout_alignParentLeft="true"
        android:layout_alignParentRight="true" />

</RelativeLayout>
3. Add READ_CONTACTS permissions to AndroidManifest.xml
In order to interact with the Contacts on your phone you should add the appropriate permissions (just read permissions for our example):
<uses-permission android:name="android.permission.READ_CONTACTS" >
</uses-permission>
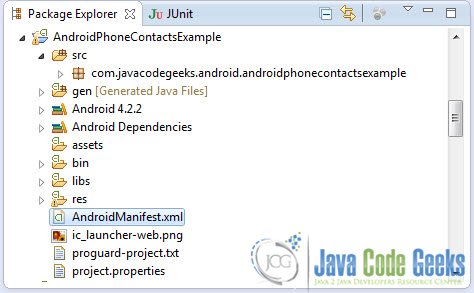
Use the Package Explorer to navigate to the Java file of AndroidManifest.xml:
AndroidManifest.xml
<?xml version="1.0" encoding="utf-8"?>
<manifest xmlns:android="http://schemas.android.com/apk/res/android"
    package="com.javacodegeeks.android.androidphonecontactsexample"
    android:versionCode="1"
    android:versionName="1.0" >

    <uses-sdk
        android:minSdkVersion="8"
        android:targetSdkVersion="17" />

    <uses-permission android:name="android.permission.READ_CONTACTS" >
    </uses-permission>

    <application
        android:allowBackup="true"
        android:icon="@drawable/ic_launcher"
        android:label="@string/app_name"
        android:theme="@style/AppTheme" >
        <activity
            android:name="com.javacodegeeks.android.androidphonecontactsexample.MainActivity"
            android:label="@string/app_name" >
            <intent-filter>
                <action android:name="android.intent.action.MAIN" />

                <category android:name="android.intent.category.LAUNCHER" />
            </intent-filter>
        </activity>
    </application>

</manifest>
5. Code the Main Activity
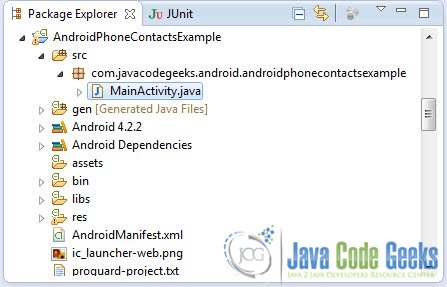
Use the Package Explorer to navigate to the Java file of the Activity you’ve created:
MainActivity.java:
package com.javacodegeeks.android.androidphonecontactsexample;

import android.app.Activity;
import android.content.ContentResolver;
import android.database.Cursor;
import android.net.Uri;
import android.os.Bundle;
import android.provider.ContactsContract;
import android.widget.TextView;

public class MainActivity extends Activity {
	public TextView outputText;

	@Override
	public void onCreate(Bundle savedInstanceState) {
		super.onCreate(savedInstanceState);
		setContentView(R.layout.main);
		outputText = (TextView) findViewById(R.id.textView1);
		fetchContacts();
	}

	public void fetchContacts() {

		String phoneNumber = null;
		String email = null;

		Uri CONTENT_URI = ContactsContract.Contacts.CONTENT_URI;
		String _ID = ContactsContract.Contacts._ID;
		String DISPLAY_NAME = ContactsContract.Contacts.DISPLAY_NAME;
		String HAS_PHONE_NUMBER = ContactsContract.Contacts.HAS_PHONE_NUMBER;

		Uri PhoneCONTENT_URI = ContactsContract.CommonDataKinds.Phone.CONTENT_URI;
		String Phone_CONTACT_ID = ContactsContract.CommonDataKinds.Phone.CONTACT_ID;
		String NUMBER = ContactsContract.CommonDataKinds.Phone.NUMBER;

		Uri EmailCONTENT_URI =  ContactsContract.CommonDataKinds.Email.CONTENT_URI;
		String EmailCONTACT_ID = ContactsContract.CommonDataKinds.Email.CONTACT_ID;
		String DATA = ContactsContract.CommonDataKinds.Email.DATA;

		StringBuffer output = new StringBuffer();

		ContentResolver contentResolver = getContentResolver();

		Cursor cursor = contentResolver.query(CONTENT_URI, null,null, null, null);

		// Loop for every contact in the phone
		if (cursor.getCount() > 0) {

			while (cursor.moveToNext()) {

				String contact_id = cursor.getString(cursor.getColumnIndex( _ID ));
				String name = cursor.getString(cursor.getColumnIndex( DISPLAY_NAME ));

				int hasPhoneNumber = Integer.parseInt(cursor.getString(cursor.getColumnIndex( HAS_PHONE_NUMBER )));

				if (hasPhoneNumber > 0) {

					output.append("\n First Name:" + name);

					// Query and loop for every phone number of the contact
					Cursor phoneCursor = contentResolver.query(PhoneCONTENT_URI, null, Phone_CONTACT_ID + " = ?", new String[] { contact_id }, null);

					while (phoneCursor.moveToNext()) {
						phoneNumber = phoneCursor.getString(phoneCursor.getColumnIndex(NUMBER));
						output.append("\n Phone number:" + phoneNumber);

					}

					phoneCursor.close();

					// Query and loop for every email of the contact
					Cursor emailCursor = contentResolver.query(EmailCONTENT_URI,	null, EmailCONTACT_ID+ " = ?", new String[] { contact_id }, null);

					while (emailCursor.moveToNext()) {

						email = emailCursor.getString(emailCursor.getColumnIndex(DATA));

						output.append("\nEmail:" + email);

					}

					emailCursor.close();
				}

				output.append("\n");
			}

			outputText.setText(output);
		}
	}

}
6. Run the application
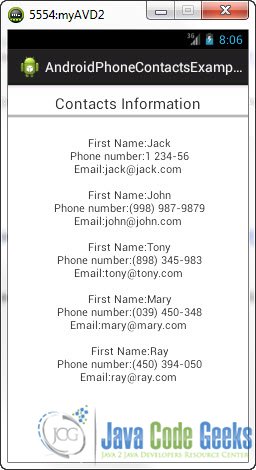
This is the main screen of our Application:
Download Eclipse Project
This was an Android Contacts Example. Download the Eclipse Project of this tutorial: AndroidPhoneContactsExample.zip


why getcount method not working for me