In this example we are going to see how to use Android SharedPreferences. You can permanently store preferences using SharedPreferences with the form of a pair : key and a value. Basically there are some ways you can store data in Android :
- Shared Preferences: Prrimitive data storage (boolean Strings, ints etc..).
- Internal Storage: Device memory storage.
- External Storage: Store public data on storage media, like SD cards.
- SQLite Database.
With SharedPreferences we talk about permanent storage about the application. That means that if you uninstall the application, all your data will be lost, so this is application specific. In contrast , SQLite stores structured data in a database, so even when you delete the application the data won’t be lost.
For this tutorial, we will use the following tools in a Windows 64-bit platform:
- JDK 1.7
- Eclipse 4.2 Juno
- Android SKD 4.2
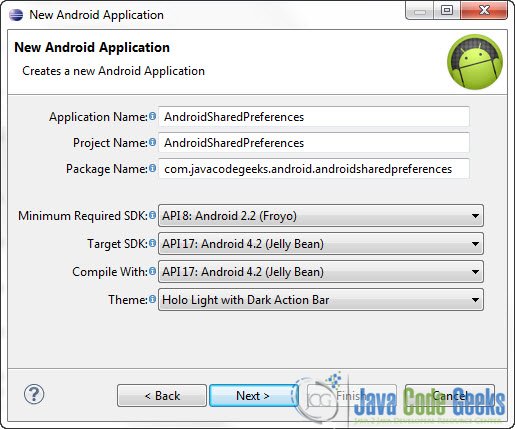
1. Create a new Android Project
Open Eclipse IDE and go to File -> New -> Project -> Android -> Android Application Project. You have to specify the Application Name, the Project Name and the Package name in the appropriate text fields and then click Next.
In the next window make sure the “Create activity” option is selected in order to create a new activity for your project, and click Next. This is optional as you can create a new activity after creating the project, but you can do it all in one step.

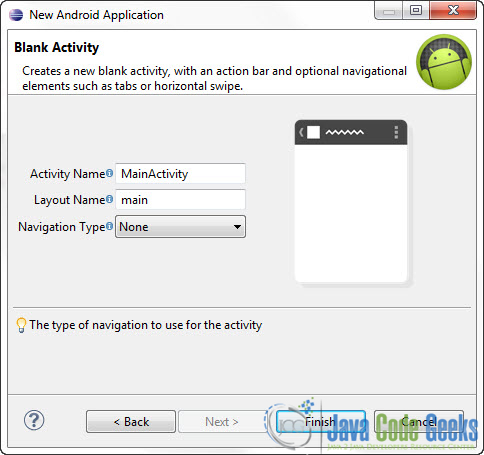
Select “BlankActivity” and click Next.

You will be asked to specify some information about the new activity. In the Layout Name text field you have to specify the name of the file that will contain the layout description of your app. In our case the file res/layout/main.xml will be created. Then, click Finish.
2. Create the main layout of the Application
Open res/layout/main.xml file :

And paste the following code :
<LinearLayout xmlns:android="http://schemas.android.com/apk/res/android"
    xmlns:tools="http://schemas.android.com/tools"
    android:layout_width="match_parent"
    android:layout_height="match_parent"
    android:orientation="vertical"
    tools:context=".MainActivity" >

    <CheckBox
        android:id="@+id/checkBox1"
        android:layout_width="wrap_content"
        android:layout_height="wrap_content"
        android:text="Check Box" />

    <EditText
        android:id="@+id/editText1"
        android:layout_width="match_parent"
        android:layout_height="wrap_content"
        android:text="Enter Your Name...">

        <requestFocus />
    </EditText>

    <Button
        android:id="@+id/button1"
        android:layout_width="wrap_content"
        android:layout_height="wrap_content"
        android:text="Save" />

</LinearLayout>
Now you may open the Graphical layout editor to preview the User Interface you created:

3. Code
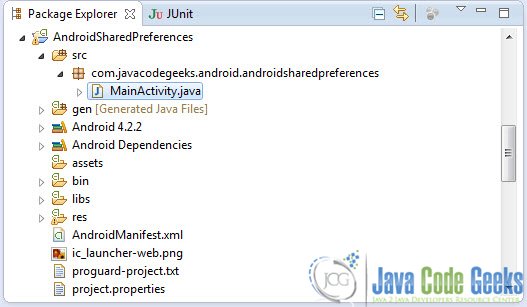
Now we have to write the code of the application. Use the Package Explorer to navigate to the Java file of the Activity you’ve created:
The code of this tutorial is very simple. Basically there are two main operations one can perform when using SharedPreferences in Android. That is store data and load data. You should:
- Create a new
SharedPreferencesobject. - Then get an
Editorinstance from that object. TheEditorobject will help you manipulate the data that you’ve stored. - Use
putString,putBooleanmethods to store a pair key/value - Use
getBoolean,getStringto get the values you want.
package com.javacodegeeks.android.androidsharedpreferences;

import android.app.Activity;
import android.content.SharedPreferences;
import android.content.SharedPreferences.Editor;
import android.os.Bundle;
import android.preference.PreferenceManager;
import android.view.View;
import android.view.View.OnClickListener;
import android.widget.Button;
import android.widget.CheckBox;
import android.widget.EditText;

public class MainActivity extends Activity implements OnClickListener {

	CheckBox checkBox;
	EditText editText;
	Button button;

	@Override
	protected void onCreate(Bundle savedInstanceState) {
		// TODO Auto-generated method stub
		super.onCreate(savedInstanceState);
		setContentView(R.layout.main);

		checkBox = (CheckBox) findViewById(R.id.checkBox1);
		editText = (EditText) findViewById(R.id.editText1);
		button = (Button) findViewById(R.id.button1);
		button.setOnClickListener(this);
		loadSavedPreferences();
	}

	private void loadSavedPreferences() {
		SharedPreferences sharedPreferences = PreferenceManager
				.getDefaultSharedPreferences(this);
		boolean checkBoxValue = sharedPreferences.getBoolean("CheckBox_Value", false);
		String name = sharedPreferences.getString("storedName", "YourName");
		if (checkBoxValue) {
			checkBox.setChecked(true);
		} else {
			checkBox.setChecked(false);
		}

		editText.setText(name);
	}

	private void savePreferences(String key, boolean value) {
		SharedPreferences sharedPreferences = PreferenceManager
				.getDefaultSharedPreferences(this);
		Editor editor = sharedPreferences.edit();
		editor.putBoolean(key, value);
		editor.commit();
	}

	private void savePreferences(String key, String value) {
		SharedPreferences sharedPreferences = PreferenceManager
				.getDefaultSharedPreferences(this);
		Editor editor = sharedPreferences.edit();
		editor.putString(key, value);
		editor.commit();
	}

	@Override
	public void onClick(View v) {
		// TODO Auto-generated method stub
		savePreferences("CheckBox_Value", checkBox.isChecked());
		if (checkBox.isChecked())
			savePreferences("storedName", editText.getText().toString());

		finish();
	}

}
4. Run the application
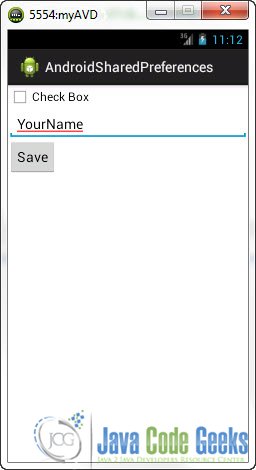
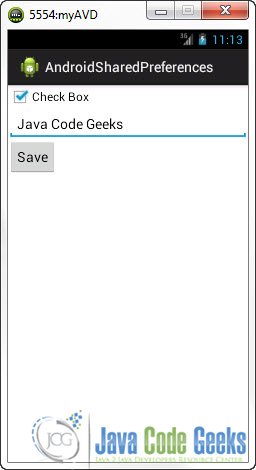
This is the main screen of our Application.
Now, you can edit your the preferences:
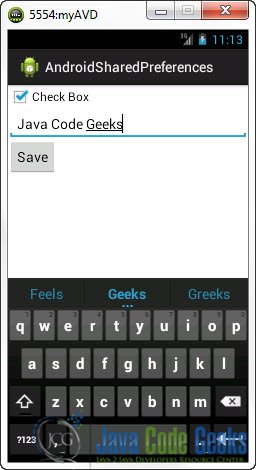
And then press save. When you press save, method finish() will be executed and the application will exit to the main screen of the emultor.
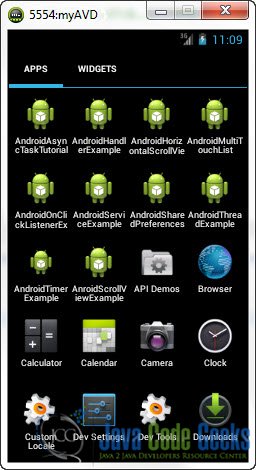
Then you can navigate to the emulator and open the application:
See your saved preferences:
Download Eclipse Project
This was an Android SavedPreferences Example. Download the Eclipse Project of this tutorial: AndroidSharedPreferences.zip

Hi,
Data still saved after you uncheck the checkbox… How to solve that?