With this tutorial we are going to see how to use Android ExpandableListView. As you might have imagined, ExpandableListView is quite like a ListView but it has 2 levels, one can say. It’s sort of like a menu with sub menus.
This is from the official documentation: “A view that shows items in a vertically scrolling two-level list. This differs from the ListView by allowing two levels: groups which can individually be expanded to show its children. The items come from the ExpandableListAdapter associated with this view.”
For this tutorial, we will use the following tools in a Windows 64-bit platform:
- JDK 1.7
- Eclipse 4.2 Juno
- Android SDK 4.2
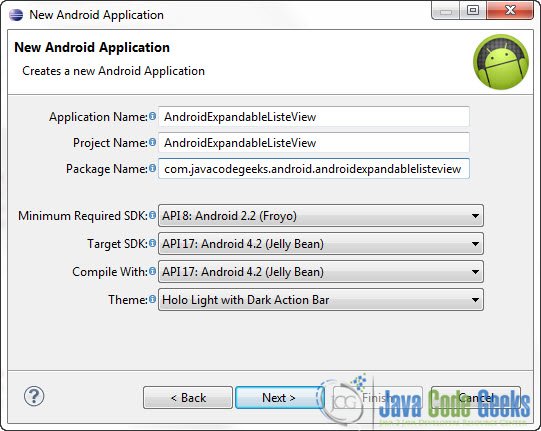
1. Create a new Android Project
Open Eclipse IDE and go to File -> New -> Project -> Android -> Android Application Project. You have to specify the Application Name, the Project Name and the Package name in the appropriate text fields and then click Next.
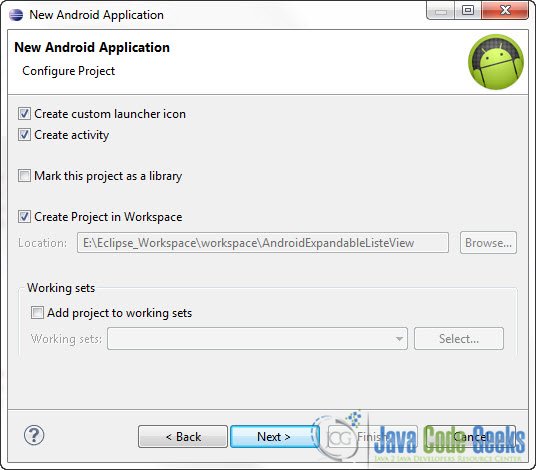
In the next window make sure the “Create activity” option is selected in order to create a new activity for your project, and click Next. This is optional as you can create a new activity after creating the project, but you can do it all in one step.
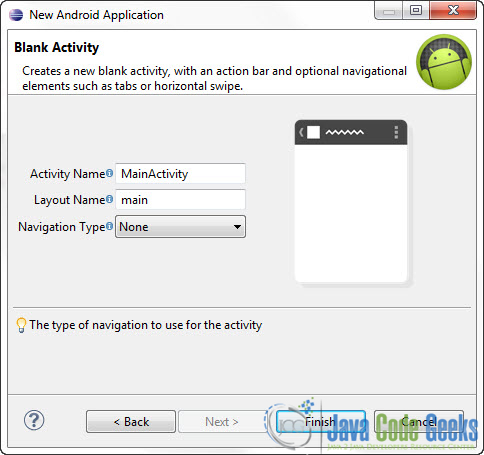
Select “BlankActivity” and click Next.

You will be asked to specify some information about the new activity. In the Layout Name text field you have to specify the name of the file that will contain the layout description of your app. In our case the file res/layout/main.xml will be created. Then, click Finish.
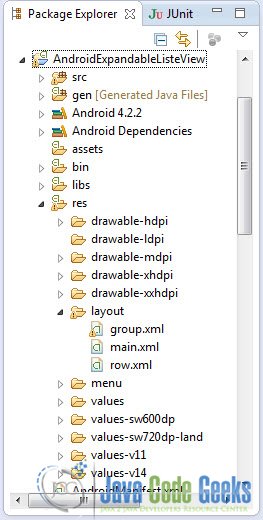
2. Create the main layout of the Application
Open res/layout/main.xml file :
And paste the following code :
main.xml:
<?xml version="1.0" encoding="utf-8"?>
<LinearLayout xmlns:android="http://schemas.android.com/apk/res/android"
    android:layout_width="fill_parent"
    android:layout_height="fill_parent"
    android:orientation="vertical" >

            <ExpandableListView
                android:id="@+id/list"
                android:layout_height="match_parent"
                android:layout_width="match_parent"
                android:groupIndicator="@null" />

</LinearLayout>
Now you may open the Graphical layout editor to preview the User Interface you created:
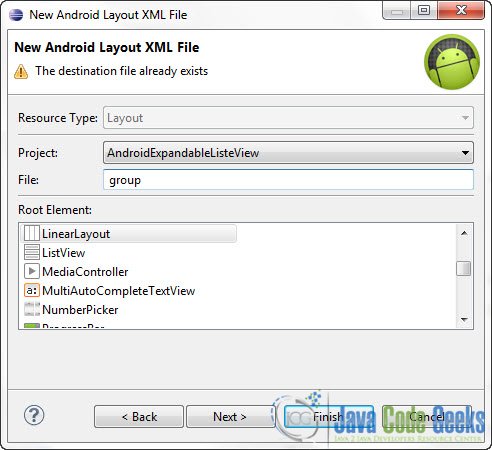
3. Create a new XML Layout file for the Parent Group elements
Now, we have to create a new Android XML Layout file for the Group (parent elements). Go to the Package Explorer an Right Click on the res/layout folder:
Go to New -> Other -> Android XML Layout File and click Next:
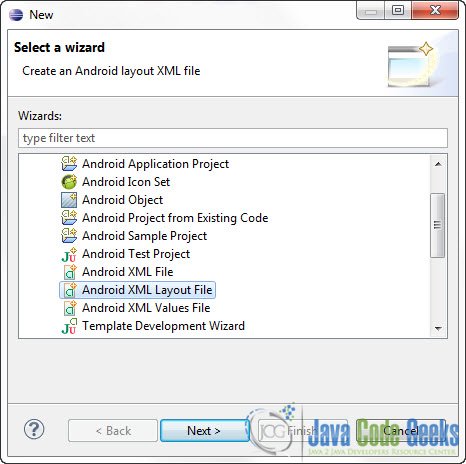
Fill out the attributes as you see in the picture bellow and press Finish.
Then open the new XML file and paste the following code:
group.xml:
<LinearLayout xmlns:android="http://schemas.android.com/apk/res/android"
    xmlns:tools="http://schemas.android.com/tools"
    android:layout_width="match_parent"
    android:layout_height="40dp"
    android:background="@android:color/black"
    android:clickable="true"
    android:orientation="vertical"
    android:paddingLeft="40dp"
    tools:context=".MainActivity" >

    <LinearLayout
        android:layout_width="match_parent"
        android:layout_height="39dp"
        android:gravity="center_vertical">

        <TextView
            android:id="@+id/textView1"
            android:layout_width="wrap_content"
            android:layout_height="wrap_content"
            android:layout_marginLeft="5dp"
            android:textIsSelectable="true"
            android:textColor="#FFFFFF"
            android:textSize="14sp"
            android:textStyle="bold" />
    </LinearLayout>

</LinearLayout>
4. Create a new XML Layout file for Child elements
As we have shown before, go ahead and create a new Android XML Layout file and paste the following code:
row.xml:
<CheckedTextView xmlns:android="http://schemas.android.com/apk/res/android"
xmlns:tools="http://schemas.android.com/tools"
android:id="@+id/textView1"
android:layout_width="wrap_content"
android:layout_height="60dp"
android:layout_marginLeft="5dp"
android:gravity="center_vertical"
android:padding="10dp"
android:textColor="#000000"
android:textSize="15sp"
android:textStyle="bold"
android:background="#CCFF99"
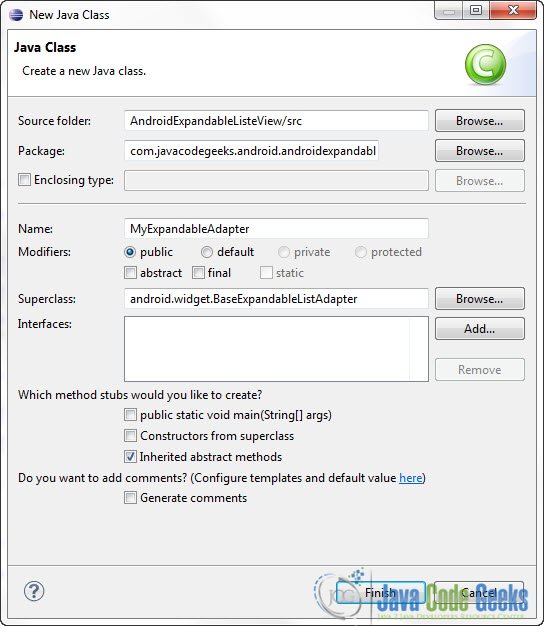
/>5. Create a custom BaseExpandableListAdapter
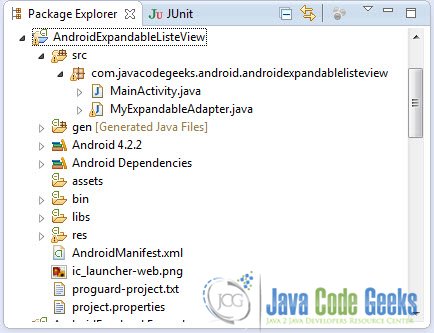
Now we have to write the code of the application. First we have to create a custom BaseExpandableListAdapter. We have to create a new class for that. Use the Package Explorer to navigate to the Package of the source files:
Right click on the package com.javacodegeeks.android.androidexpandablelistview and go to New -> Class, fill out the form as in the picture below and press Finish:
Open the source file and paste the following code:
MyExpandableAdapter.java:
package com.javacodegeeks.android.androidexpandablelisteview;

import java.util.ArrayList;

import android.app.Activity;
import android.view.LayoutInflater;
import android.view.View;
import android.view.View.OnClickListener;
import android.view.ViewGroup;
import android.widget.BaseExpandableListAdapter;
import android.widget.CheckedTextView;
import android.widget.TextView;
import android.widget.Toast;

public class MyExpandableAdapter extends BaseExpandableListAdapter {

	private Activity activity;
	private ArrayList<Object> childtems;
	private LayoutInflater inflater;
	private ArrayList<String> parentItems, child;

	public MyExpandableAdapter(ArrayList<String> parents, ArrayList<Object> childern) {
		this.parentItems = parents;
		this.childtems = childern;
	}

	public void setInflater(LayoutInflater inflater, Activity activity) {
		this.inflater = inflater;
		this.activity = activity;
	}

	@Override
	public View getChildView(int groupPosition, final int childPosition, boolean isLastChild, View convertView, ViewGroup parent) {

		child = (ArrayList<String>) childtems.get(groupPosition);

		TextView textView = null;

		if (convertView == null) {
			convertView = inflater.inflate(R.layout.group, null);
		}

		textView = (TextView) convertView.findViewById(R.id.textView1);
		textView.setText(child.get(childPosition));

		convertView.setOnClickListener(new OnClickListener() {

			@Override
			public void onClick(View view) {
				Toast.makeText(activity, child.get(childPosition),
						Toast.LENGTH_SHORT).show();
			}
		});

		return convertView;
	}

	@Override
	public View getGroupView(int groupPosition, boolean isExpanded, View convertView, ViewGroup parent) {

		if (convertView == null) {
			convertView = inflater.inflate(R.layout.row, null);
		}

		((CheckedTextView) convertView).setText(parentItems.get(groupPosition));
		((CheckedTextView) convertView).setChecked(isExpanded);

		return convertView;
	}

	@Override
	public Object getChild(int groupPosition, int childPosition) {
		return null;
	}

	@Override
	public long getChildId(int groupPosition, int childPosition) {
		return 0;
	}

	@Override
	public int getChildrenCount(int groupPosition) {
		return ((ArrayList<String>) childtems.get(groupPosition)).size();
	}

	@Override
	public Object getGroup(int groupPosition) {
		return null;
	}

	@Override
	public int getGroupCount() {
		return parentItems.size();
	}

	@Override
	public void onGroupCollapsed(int groupPosition) {
		super.onGroupCollapsed(groupPosition);
	}

	@Override
	public void onGroupExpanded(int groupPosition) {
		super.onGroupExpanded(groupPosition);
	}

	@Override
	public long getGroupId(int groupPosition) {
		return 0;
	}

	@Override
	public boolean hasStableIds() {
		return false;
	}

	@Override
	public boolean isChildSelectable(int groupPosition, int childPosition) {
		return false;
	}

}
6. Code the MainActivity
Open the source file of the main Activity and paste the following code:
MainActivity.java
package com.javacodegeeks.android.androidexpandablelisteview;

import java.util.ArrayList;

import android.app.ExpandableListActivity;
import android.content.Context;
import android.os.Bundle;
import android.view.LayoutInflater;
import android.widget.ExpandableListView;

public class MainActivity extends ExpandableListActivity{

	private ArrayList<String> parentItems = new ArrayList<String>();
	private ArrayList<Object> childItems = new ArrayList<Object>();

	@Override
	public void onCreate(Bundle savedInstanceState) {

		super.onCreate(savedInstanceState);

		// this is not really  necessary as ExpandableListActivity contains an ExpandableList
		//setContentView(R.layout.main);

		ExpandableListView expandableList = getExpandableListView(); // you can use (ExpandableListView) findViewById(R.id.list)

		expandableList.setDividerHeight(2);
		expandableList.setGroupIndicator(null);
		expandableList.setClickable(true);

		setGroupParents();
		setChildData();

		MyExpandableAdapter adapter = new MyExpandableAdapter(parentItems, childItems);

		adapter.setInflater((LayoutInflater) getSystemService(Context.LAYOUT_INFLATER_SERVICE), this);
		expandableList.setAdapter(adapter);
		expandableList.setOnChildClickListener(this);
	}

	public void setGroupParents() {
		parentItems.add("Android");
		parentItems.add("Core Java");
		parentItems.add("Desktop Java");
		parentItems.add("Enterprise Java");
	}

	public void setChildData() {

		// Android
		ArrayList<String> child = new ArrayList<String>();
		child.add("Core");
		child.add("Games");
		childItems.add(child);

		// Core Java
		child = new ArrayList<String>();
		child.add("Apache");
		child.add("Applet");
		child.add("AspectJ");
		child.add("Beans");
		child.add("Crypto");
		childItems.add(child);

		// Desktop Java
		child = new ArrayList<String>();
		child.add("Accessibility");
		child.add("AWT");
		child.add("ImageIO");
		child.add("Print");
		childItems.add(child);

		// Enterprise Java
		child = new ArrayList<String>();
		child.add("EJB3");
		child.add("GWT");
		child.add("Hibernate");
		child.add("JSP");
		childItems.add(child);
	}

}
7. Run the Application
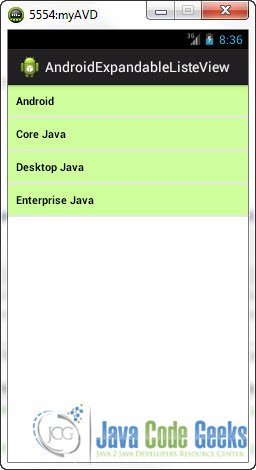
This is the main screen of our Application:
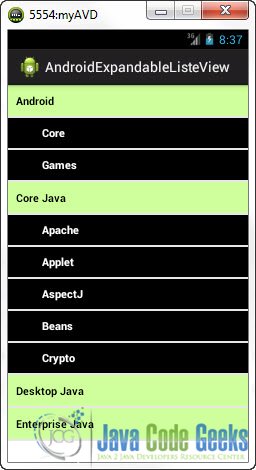
Now, when you press on the Parent elements:
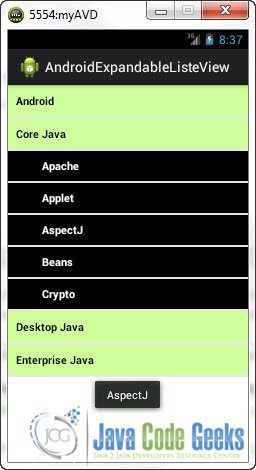
And if you click on an Item:
Download Eclipse Project
This was an Android ExpandableListview Example. Download the Eclipse Project of this tutorial: AndroidExpandableListeView.zip
