Android Service Example
In this example we are going to learn about Android Service. The Android Service is one of the most important components and building blocks in an Android System. One obvious characteristic of the Service component is that it offers no UI. It’s simply a program that runs on the background as log as it is required.
It is important to notice that Services are either Threads nor processes or Activities. You should use Android Services when you have to perform a time consuming and long task, like loading an Image, or a File, or download something for the Internet and asynchronous tasks in general. Using a Service you can let the UI Thread handle only UI tasks.
Basically, there are two types of Services:
- Unbounded : This type of Service is also called Started. This Service is completely independent for the Activity that called it and there is no communication or interaction between them. The Service simply starts (using
startService), does its job and stops(usingstopService) without the Activity noticing anything. - Bounded : This type of Service offers communication and interaction between the Service and the Activity that launched it. Using Messagers and BroadcastReceivers the Activity can at any moment monitor the status or the progress of the background task that the Service is performing. Additionally the Service can get useful feedback from the Activity.
In this example we are going to create a simple ubounded service example. For this tutorial, we will use the following tools in a Windows 64-bit platform:
- JDK 1.7
- Eclipse 4.2 Juno
- Android SKD 4.2
1. main.xml File
This is the basic UI that we are going to use. Two buttons that simply start and stop the service:
<RelativeLayout xmlns:android="http://schemas.android.com/apk/res/android"
    xmlns:tools="http://schemas.android.com/tools"
    android:layout_width="match_parent"
    android:layout_height="match_parent"
    android:paddingBottom="@dimen/activity_vertical_margin"
    android:paddingLeft="@dimen/activity_horizontal_margin"
    android:paddingRight="@dimen/activity_horizontal_margin"
    android:paddingTop="@dimen/activity_vertical_margin"
    tools:context=".MainActivity" >

    <Button
        android:id="@+id/button2"
        android:layout_width="wrap_content"
        android:layout_height="wrap_content"
        android:layout_alignBaseline="@+id/button1"
        android:layout_alignBottom="@+id/button1"
        android:layout_alignParentRight="true"
        android:onClick="stopNewService"
        android:text="Stop Service" />

    <Button
        android:id="@+id/button1"
        android:layout_width="wrap_content"
        android:layout_height="wrap_content"
        android:layout_alignParentLeft="true"
        android:layout_alignParentTop="true"
        android:layout_marginTop="23dp"
        android:onClick="startNewService"
        android:text="Start Service" />

</RelativeLayout>
2. MyService.java
To create a new Service simply create a new class that extends Service and override the appropriate methods:
package com.javacodegeeks.android.androidserviceexample;

import android.app.Service;
import android.content.Intent;
import android.os.IBinder;
import android.widget.Toast;

public class MyService extends Service {
	public MyService() {
	}

	@Override
	public IBinder onBind(Intent intent) {
		// TODO: Return the communication channel to the service.
		throw new UnsupportedOperationException("Not yet implemented");
	}

	@Override
    public void onCreate() {
        Toast.makeText(this, "The new Service was Created", Toast.LENGTH_LONG).show();

    }

    @Override
    public void onStart(Intent intent, int startId) {
    	// For time consuming an long tasks you can launch a new thread here...
        Toast.makeText(this, " Service Started", Toast.LENGTH_LONG).show();

    }

    @Override
    public void onDestroy() {
        Toast.makeText(this, "Service Destroyed", Toast.LENGTH_LONG).show();

    }
}
3. MainActivity.java
This is the main activity of our Application:
package com.javacodegeeks.android.androidserviceexample;

import android.os.Bundle;
import android.app.Activity;
import android.content.Intent;
import android.view.Menu;
import android.view.View;

public class MainActivity extends Activity {

	@Override
	protected void onCreate(Bundle savedInstanceState) {
		super.onCreate(savedInstanceState);
		setContentView(R.layout.main);
	}

	// Start the  service
	public void startNewService(View view) {

		startService(new Intent(this, MyService.class));
	}

	// Stop the  service
	public void stopNewService(View view) {

		stopService(new Intent(this, MyService.class));
	}

	@Override
	public boolean onCreateOptionsMenu(Menu menu) {
		// Inflate the menu; this adds items to the action bar if it is present.
		getMenuInflater().inflate(R.menu.main, menu);
		return true;
	}
}
4. Run the application
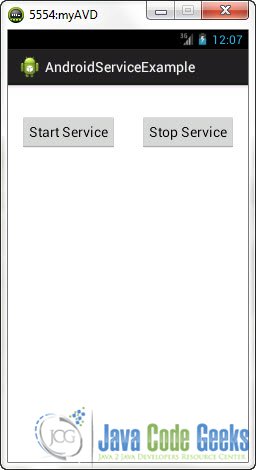
This is the main screen of our Application:
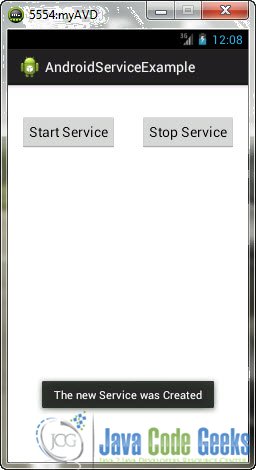
Now, when you press the “Start Service” the Service will be created:
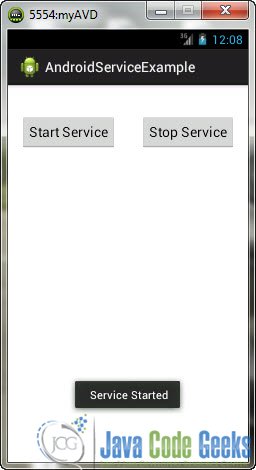
After a little bit, you will notice that the Service will start:
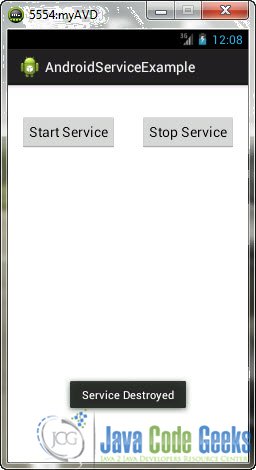
And, when you press “Stop Service” the Service will be killed:
Download Eclipse Project
This was an Android ServiceExample. Download the Eclipse Project of this tutorial: AndroidServiceExample.zip


