Android Fragment Tabs Example
As title clarifies, today we ‘re gonna see how to implement a Tab Layout using Fragments. Regarding the previous versions of Android, a Tab Layout could be implemented using TabWidget and TabHost, but now, these are deprecated, so we have to find another workaround, if we don’t want to directly use Google’s solution.
So, today, another easy example: we ‘ll create three (3) tabs (they correspond to my most-driven cars), which will contain fragments; Android Fragments must be setup using Listeners – you ‘ll see what I mean while moving on.
For the need of this example, we will use the following tools in a Windows 64-bit platform:
- JDK 1.7
- Eclipse 4.4 Luna
- Android SDK 4.4
You may skip project creation and jump directly to the beginning of the example below.
1. Creating a New Android Application Project
Open Eclipse IDE and go to File → New → Project → Android Application Project.
Fill in the name of the application, the project and the package in the appropriate fields and then click Next.
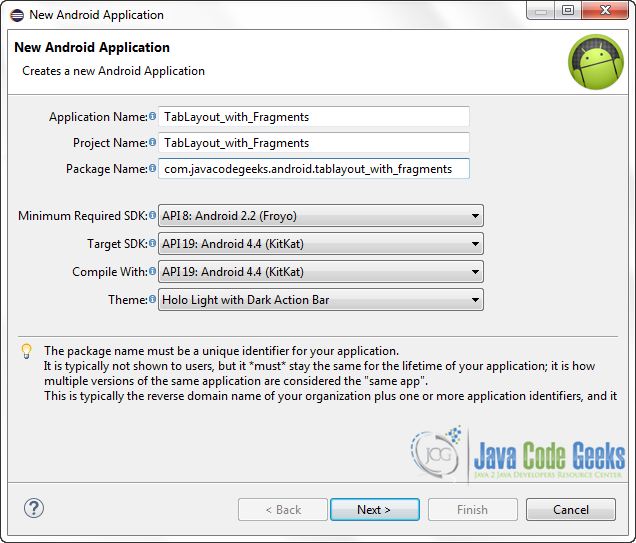
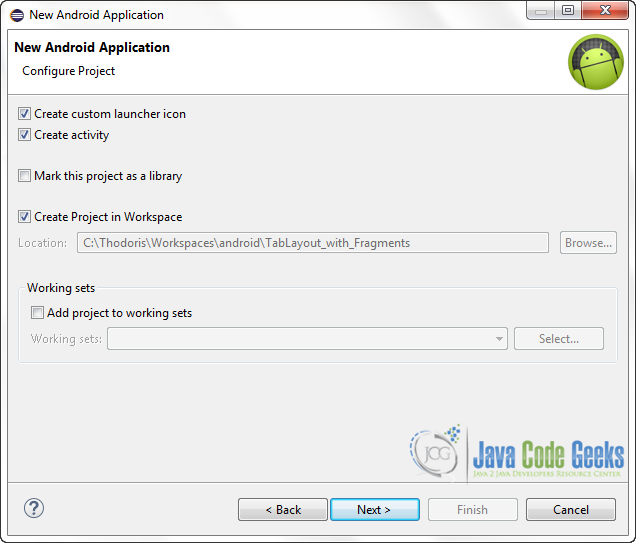
In the next window, the “Create Activity” option should be checked. The new created activity will be the main activity of your project. Then press Next button.
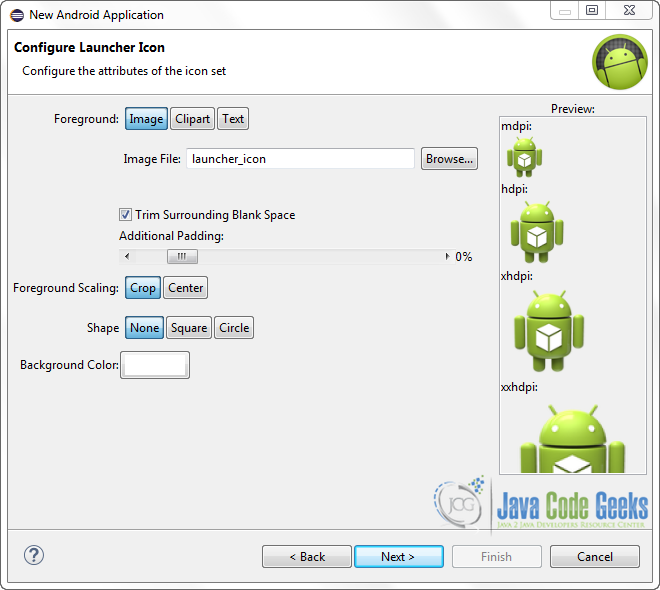
In “Configure Launcher Icon” window you should choose the icon you want to have in your app. We will use the default icon of android, so click Next button.
Select the “Blank Activity” option and press Next.
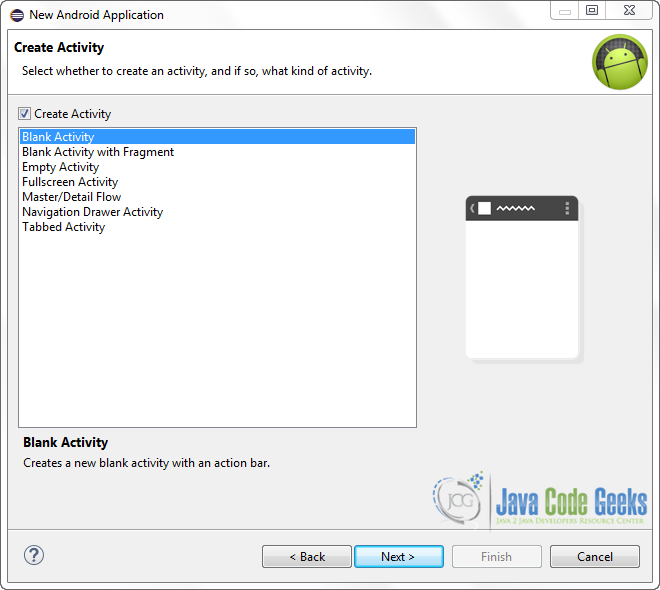
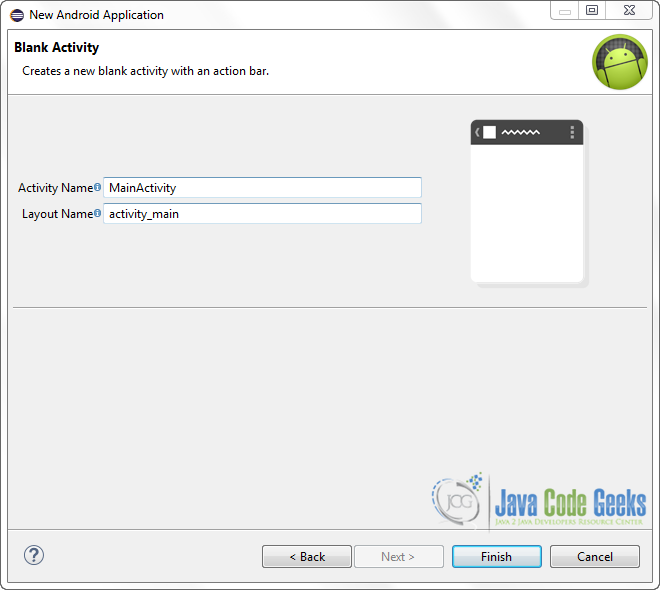
You then have to specify a name for the new Activity and a name for the layout description of your app. The .xml files for the layout will automatically be created in the res/layout folder. Finally, press Finish.
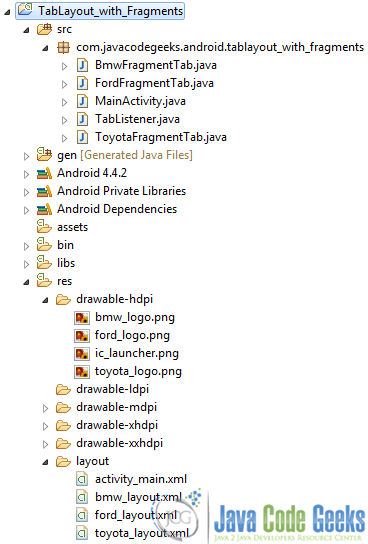
Here is the very final structure of the project, just in case you ‘ll miss something, while developing:
2. Creating the layout of the Main Activity
Let’s do it by opening res/layout/activity_main.xml and navigating to the respective xml tab and paste the following.
activity_main.xml
<?xml version="1.0" encoding="utf-8"?>
<FrameLayout xmlns:android="http://schemas.android.com/apk/res/android"
    android:id="@+id/activity_main"
    android:layout_width="match_parent"
    android:layout_height="match_parent" />
This is about the main screen that our tabs will be hosted on; there come’s the ActionListener that I fore-mentioned. Especially, we here deal with ActionBar.TabListener.
We ‘ll override its methods, but we don’t actually need the first parameter of them ( tab ), as we ‘ll use Fragment elements. Doing so, means that each time that our TabListener is called, a user action occurs (in our case, the only user action is the tabs’ transition), so we have to conform our TabListener in order to automatically change the layout, according to the selected tab.
Each tab’s content will be in a separate layout file (so, three extra in overall, one for each tab), but the actual transition will be implemented in the MainActivity, using TabListeners for each tab.
I ‘ll leave the rest of your “gaps” to be filled, while reading TabListener‘s comments; you ‘ll find this way more mind-sharpening.
But why to use a FrameLayout?
This and this will resolve this issue, too.
3. Coding the Main Activity
Let’s first navigate to src/com.javacodegeeks.android.textviewtest/MainActivity.java. Next, complete the class like this:
MainActivity.java
package com.javacodegeeks.android.tablayout_with_fragments;

import android.app.ActionBar;
import android.app.Activity;
import android.app.Fragment;
import android.os.Bundle;

public class MainActivity extends Activity {

	// Declaring our tabs and the corresponding fragments.
	ActionBar.Tab bmwTab, fordTab, toyotaTab;
	Fragment bmwFragmentTab = new BmwFragmentTab();
	Fragment toyotaFragmentTab = new ToyotaFragmentTab();
	Fragment fordFragmentTab = new FordFragmentTab();

	@Override
	protected void onCreate(Bundle savedInstanceState) {
		super.onCreate(savedInstanceState);
		setContentView(R.layout.activity_main);

		// Asking for the default ActionBar element that our platform supports.
		ActionBar actionBar = getActionBar();

        // Screen handling while hiding ActionBar icon.
        actionBar.setDisplayShowHomeEnabled(false);

        // Screen handling while hiding Actionbar title.
        actionBar.setDisplayShowTitleEnabled(false);

        // Creating ActionBar tabs.
        actionBar.setNavigationMode(ActionBar.NAVIGATION_MODE_TABS);

        // Setting custom tab icons.
        bmwTab = actionBar.newTab().setIcon(R.drawable.bmw_logo);
        toyotaTab = actionBar.newTab().setIcon(R.drawable.toyota_logo);
        fordTab = actionBar.newTab().setIcon(R.drawable.ford_logo);

        // Setting tab listeners.
        bmwTab.setTabListener(new TabListener(bmwFragmentTab));
        toyotaTab.setTabListener(new TabListener(toyotaFragmentTab));
        fordTab.setTabListener(new TabListener(fordFragmentTab));

        // Adding tabs to the ActionBar.
        actionBar.addTab(bmwTab);
        actionBar.addTab(toyotaTab);
        actionBar.addTab(fordTab);
	}
}
Let’s stick to the difficult part of it: line 11 declares three ActionBar tabs, while in lines 39-41, a TabListener is assigned to each one of them, according to the specific Fragment that it corresponds to (lines 12-14). What lines 39-41 also make clear is, that we have to code a constructor, for the TabListener class.
In addition to the fore-mentioned class, we also have to write three extra classes, as lines 12-14 clarify.
4. Coding the “extra” Classes
Let’s start by writing the TabListener class.
TabListener.java
package com.javacodegeeks.android.tablayout_with_fragments;

import android.app.ActionBar.Tab;
import android.app.Fragment;
import android.app.FragmentTransaction;
import android.app.ActionBar;

public class TabListener implements ActionBar.TabListener {

	private Fragment fragment;

	// The contructor.
	public TabListener(Fragment fragment) {
		this.fragment = fragment;
	}

	// When a tab is tapped, the FragmentTransaction replaces
	// the content of our main layout with the specified fragment;
	// that's why we declared an id for the main layout.
	@Override
	public void onTabSelected(Tab tab, FragmentTransaction ft) {
		ft.replace(R.id.activity_main, fragment);
	}

	// When a tab is unselected, we have to hide it from the user's view.
	@Override
	public void onTabUnselected(Tab tab, FragmentTransaction ft) {
		ft.remove(fragment);
	}

	// Nothing special here. Fragments already did the job.
	@Override
	public void onTabReselected(Tab tab, FragmentTransaction ft) {

	}
}
We ‘ll continue by adding the classes, that refer to the make’s FragmentTab.
BmwFragmentTab.java
package com.javacodegeeks.android.tablayout_with_fragments;

import android.os.Bundle;
import android.view.LayoutInflater;
import android.view.View;
import android.view.ViewGroup;
import android.app.Fragment;

public class BmwFragmentTab extends Fragment {
    @Override
    public View onCreateView(LayoutInflater inflater, ViewGroup container,
            Bundle savedInstanceState) {
        View rootView = inflater.inflate(R.layout.bmw_layout, container, false);
        return rootView;
    }
}
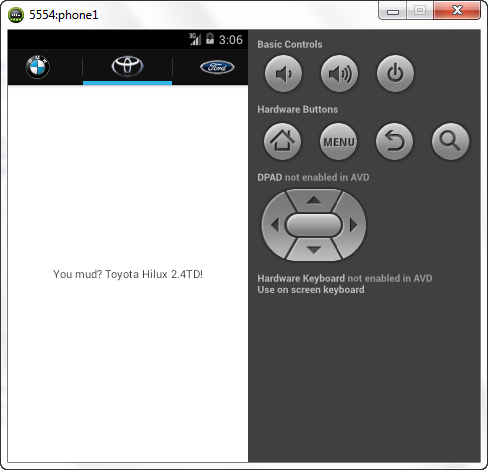
What we accomplished here is creating an independent Fragment tab (regarding our BMW category), whom’s onCreate method results to the corresponding xml layout (a simple TextView that contains my personal experience, according to the specified make).
ToyotaFragmentTab.java
package com.javacodegeeks.android.tablayout_with_fragments;

import android.os.Bundle;
import android.view.LayoutInflater;
import android.view.View;
import android.view.ViewGroup;
import android.app.Fragment;

public class ToyotaFragmentTab extends Fragment {
    @Override
    public View onCreateView(LayoutInflater inflater, ViewGroup container,
            Bundle savedInstanceState) {
        View rootView = inflater.inflate(R.layout.toyota_layout, container, false);
        return rootView;
    }
}
Continuing on the same concept with BmwFragmentTab, we here point the ToyotaFragmentTab to the toyota_layout (no need for worries till here, as this is about simple layouts, as I fore-mentioned, which we ‘ll code in the next paragraph).
FordFragmentTab.java
package com.javacodegeeks.android.tablayout_with_fragments;

import android.os.Bundle;
import android.view.LayoutInflater;
import android.view.View;
import android.view.ViewGroup;
import android.app.Fragment;

public class FordFragmentTab extends Fragment {
    @Override
    public View onCreateView(LayoutInflater inflater, ViewGroup container,
            Bundle savedInstanceState) {
        View rootView = inflater.inflate(R.layout.ford_layout, container, false);
        return rootView;
    }
}
Same here, a FragmentTab that points the layout we need.
5. Coding the “extra” layouts
What is clear from the previous paragraph, is the fact that we need three xml layouts, to host our FragmentTabs’ user interface. A simple TextView for each one, as I said.
bmw_layout.xml
<RelativeLayout xmlns:android="http://schemas.android.com/apk/res/android"
    xmlns:tools="http://schemas.android.com/tools"
    android:layout_width="match_parent"
    android:layout_height="match_parent" >

    <TextView
        android:layout_width="wrap_content"
        android:layout_height="wrap_content"
        android:layout_centerHorizontal="true"
        android:layout_centerVertical="true"
        android:text="Yes, I'm a proud E46-er!" />

</RelativeLayout>
toyota_layout.xml
<RelativeLayout xmlns:android="http://schemas.android.com/apk/res/android"
    xmlns:tools="http://schemas.android.com/tools"
    android:layout_width="match_parent"
    android:layout_height="match_parent" >

    <TextView
        android:layout_width="wrap_content"
        android:layout_height="wrap_content"
        android:layout_centerHorizontal="true"
        android:layout_centerVertical="true"
        android:text="You mud? Toyota Hilux 2.4TD!" />

</RelativeLayout>
ford_layout.xml
<RelativeLayout xmlns:android="http://schemas.android.com/apk/res/android"
    xmlns:tools="http://schemas.android.com/tools"
    android:layout_width="match_parent"
    android:layout_height="match_parent" >

    <TextView
        android:layout_width="wrap_content"
        android:layout_height="wrap_content"
        android:layout_centerHorizontal="true"
        android:layout_centerVertical="true"
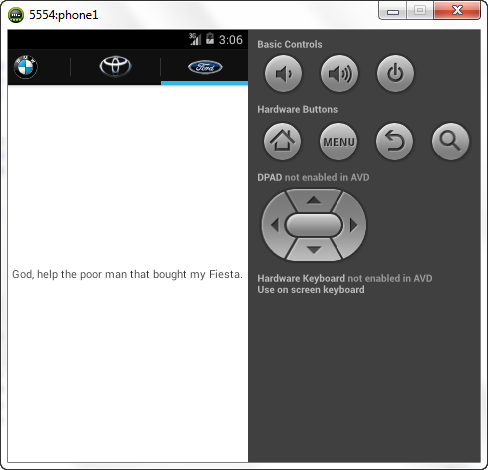
        android:text="God, help the poor man that bought my Fiesta." />

</RelativeLayout>
6. Running the application
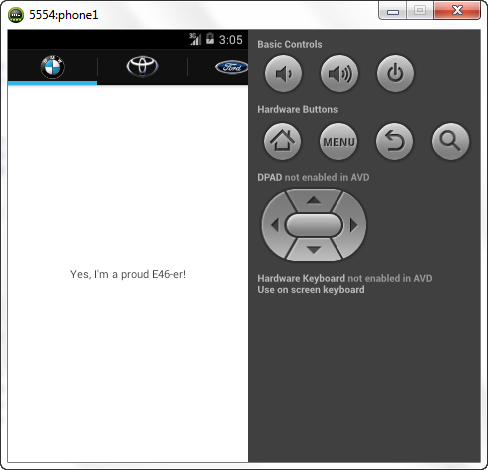
Let’s tap the other two tabs, too!
7. Source Code Download
Cheers!
This was an example of Fragment Tabs in Android. You can also download the source code for this example: TabLayout_with_Fragments.zip

