Hello readers, in this tutorial we will learn the Java System.out.println statement.
1. Introduction
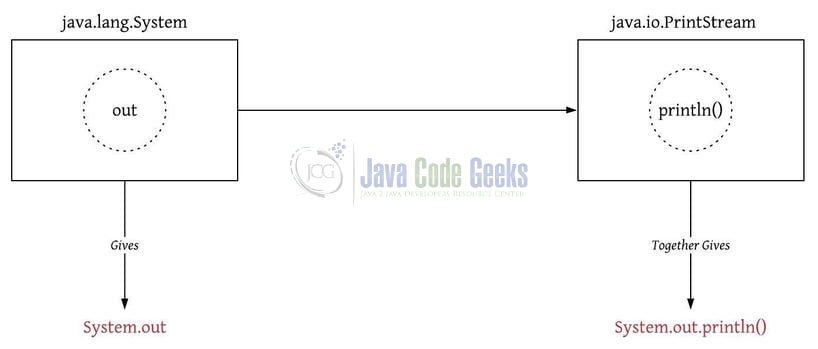
In Java, System.out.println() is a statement that prints the output to the console. In Java, this complete statement is divided into three parts:
- System is a final class in the
java.langpackage. This class is responsible to provide input/output streams, access to the environment variables etc - out is a public static final field of
PrintStreamdatatype and is automatically initialized and mapped to the host output console during the startup - println() is an overloaded method that either prints the input arguments to the console or a new line. This method is like
print()method except that it moves the cursor to the next line after printing the result
Let us understand this with a simple code snippet.
Code Snippet 1
package com.jcg.example;

public class Demo1 {

    public static void main(String[] args) {
        // Will print hello world in a single line!
        System.out.print("Hello");
        System.out.print("World!");

        // Gives a line break!
        System.out.println("");

        // Will print hello world in different lines and gives a line break!
        System.out.println("Hello");
        System.out.println("World!");
    }
}
In the snippet example, the println() method prints the input strings in two separate lines. But if developers use the print() method, the same input strings will be printed in the single line. Make note, System.out is different from System.in and System.err. System.in is used to get input from the console while System.err is used to print the input argument to a standard error output stream.
1.1 Customizing System.out.println()
The out keyword in the statement is customizable. This means developers can change its default behavior at runtime. Let us understand this with a simple code snippet where we will redirect the standard console output to a file.
Code Snippet 2
package com.jcg.example;

import java.io.FileOutputStream;
import java.io.PrintStream;

public class Demo2 {

    public static void main(String[] args) {
        try {
            // Redirect the console output to a file!
            System.setOut(new PrintStream(new FileOutputStream("Applog.log")));

            System.out.println("Output is redirected to a file!");
        } catch(Exception ex) {
            ex.printStackTrace();
        }
    }
}
1.2 Comparing System.out.println() with Other Loggers
Talking about the production environment System.out.println() is not a favorable choice among the develops due to the following reasons. Other loggers like Log4j, Log4j2 or SLF4j,
- Offers flexibility by providing different logging levels
- Offers a configuration parameter that can enable or disable the logging statements
- Offers maintainability by rolling the application logs as per the requirement
- Offers granularity where each class have a different logger and can be controlled as per the developer’s requirement
- Offers appenders to provide multiple options for logging
1.3 Alternative way of using System.out.println()
Developers understand that writing the complete System.out.println() statement is a tedious task and often results in poor code readability. To avoid such scenario developers shorten it a bit by introducing a static import. Let us understand this with a simple code snippet.
Code Snippet 1
package com.jcg.example;

// Use of static import!
import static java.lang.System.out;

public class Demo3 {

    public static void main(String[] args) {
        out.println("Hello");
        out.println("World!");
    }
}
Now, let us go ahead and understand these snippets with the help of a real-time example. For easy usage, I am using Eclipse Ide.
2. Java System.out.println Example
In this example, I have created a simple class that displays the string in two separate lines. For a better understanding, developers can execute the below code in Eclipse Ide.
Example 1
package com.jcg.example;

public class Demo4 {

    public static void main(String[] args) {
        final String name = "Alpha";

        // Will print hello world in different lines and gives a line break.
        System.out.println("Hello!");
        System.out.println("My name is= " + name + "!");
    }
}
Output
Hello!
My name is= Alpha!
That is all for this tutorial and I hope the article served you whatever you were looking for. Happy Learning and do not forget to share!
3. Performance Analysis of System.out.println()
System.out.println offers a bad performance analysis. If we take a look at the code the sequence of calls the println() is like this – println() -> print() -> write() + newLine(). Here both write() and newLine() methods contain the synchronized block and thus adding a little overhead to the printing.
4. Difference between System.out.print() and System.out.println()
print(): Prints text on the console and the cursor remains at the end of the text. The method takes at least one parameter else it will throw an error- println(): Prints text on the console and the cursor remains at the start of the next line at the console. The method may or may not take any parameter
5. Summary
In this tutorial, we had an in-depth look at the System.out.print() statement. Developers can download the sample application as an Eclipse project in the Downloads section.
6. Download the Eclipse Project
This was an example of System.out.println statement in Java.
You can download the full source code of this example here: Java System.out.println() Example
Last updated on Oct. 25th, 2022
