In this tutorial we will show you how to install the latest Java version in Windows, using the Java offline installer. The Java offline installer is an executable file that contains all necessary files required for a complete installation.
An internet connection is required, in order for the offline installer to be downloaded. Once the installer is downloaded, the computer does not need to remain connected to the Internet. Also, the downloaded installer can be copied to another computer, which it doesn’t have access to the Internet.
This tutorial applies to all Windows versions after 2000 and to Java 6.0 and 7.0 versions.
1. Download the Java offline installer
- First of all, you must visit the manual download page here.
- Find the offline installer for Windows and click on the version that corresponds to your machine’s architecture, either 32-bit or 64-bit.
- In the appearing dialog box, click
Save, in order to download the file to your local system. - Close all running applications, including the web browser.
2. Install Java
Once the download procedure is complete, we are ready to install Java in our machine. Navigate to the folder where the executable file is located and double click on it. Notice that the installation requires administration privileges in order to proceed.
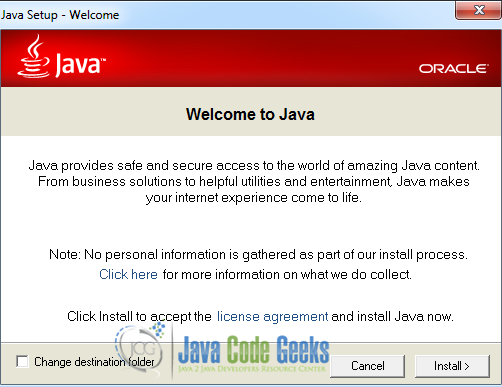
The installation process has started. In the welcome screen, click on the Install button, in order to accept the license terms and continue with the installation. Leave the Change destination folder option unchecked.
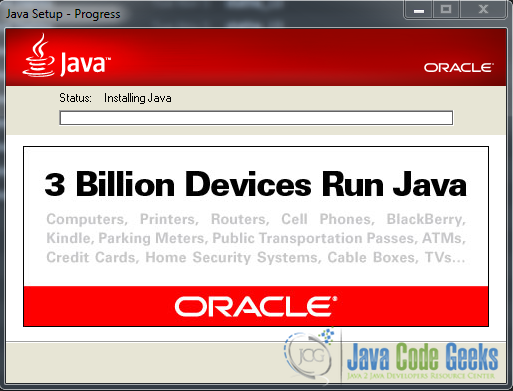
Wait for the installation to complete:
If the installation procedure is successful, you shall see the following dialog box:
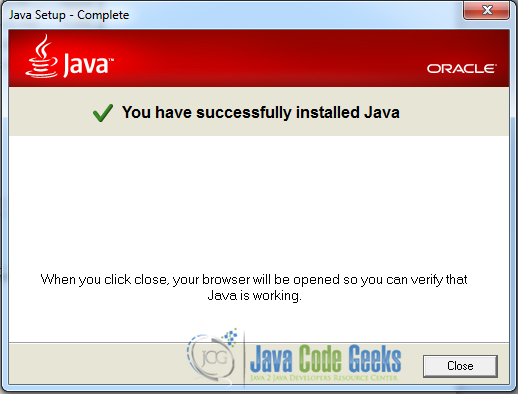
Click on the Close button to end the installation. A new tab will be opened in your web browser that aims to verify your installation:
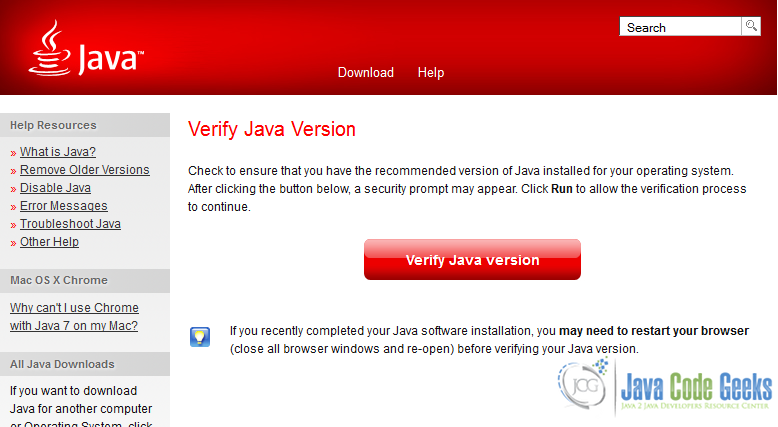
3. Verify the installation
In the opened tab of your web browser, click on the Verify Java Version button. In case you see the following error message
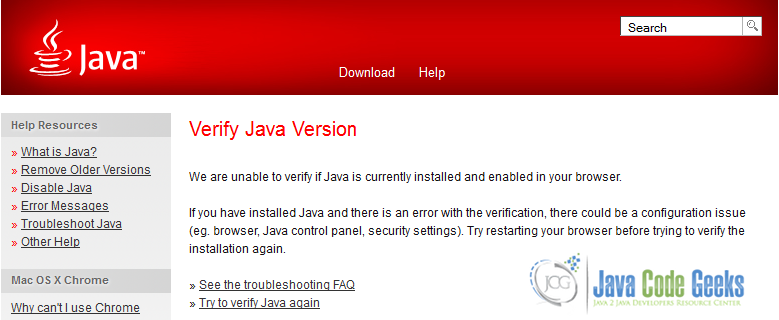
there is an error with the verification procedure. This error may be caused by a configuration issue. Try restarting your browser before trying to verify the installation again or follow the troubleshooting instructions in here.
Important: The verification error does not imply that Java has not been successfully installed in your computer.
4. Add the JAVA_HOME environment variable
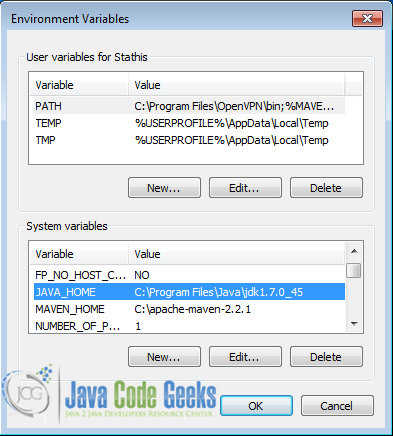
The last thing we have to do is to add a new environment variable, called JAVA_HOME and set its value to point to the Java JDK installation folder. The default installation folder of Java is C:\Program Files\Java.
In order to add a new environment variable on Windows 7, we must complete the following steps:
- Right click on the Computer icon on your Desktop and choose the
Propertiesoption. - In the System window, in the left panel, click on
Advanced system settings. - In the System Properties window, select the
Advancedtab and click on theEnvironment Variables…button, located at the bottom right of the window. - In the Environment Variables window, in the System variables section, click on the
Newbutton and fill the appropriate fields.
If the procedure has been completed successfully, a new environment variable will have been added, as highlighted:
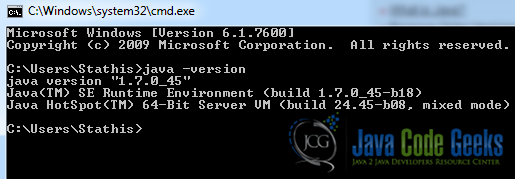
Once the JAVA_HOME environmental variable is added successfully, open the Windows command line and execute the following command:
java –version
A sample output of the command is shown below:
This was a tutorial on how to download the Java JDK offline installer and install Java in Windows.
