In this article we will briefly discuss what Xampp (Apache + MariaDB + PHP + Perl) (pronounced “shamp”) is and how to “run” a Java Servlet application from it using linux.
I use the word run in the loosest possible sense as the Servlet application will actually be driven from inside Tomcat which will be proxied to from Xampp or more specifically the Apache web server that comes bundled with Xampp.
Even though Xampp can be installed on windows, mac and linux, this article will focus on installing it on linux and using it as a proxy (reverse proxy) to Tomcat, which will be hosting the servlet application.
Table Of Contents
1. Introduction
Xampp is a free Apache software suite containing the Apache web server, MariaDB, PHP, and Perl. The Xampp package is designed to be convenient and easy to install.
It comes with a handy control panel, upon installation, that can be used for the management thereof.
As stated above it also comes bundled with a variety of services typically found together in web development making it a one stop shop for developers inclined to use the stack.
2. Technologies used
The example code in this article was built and run using:
- Java 8
- Maven 3.3.9
- STS (3.9.0.RELEASE)
- Ubuntu 16.04
- Xampp
- Tomcat 8.5.x
3. Setup
To confirm the correct version of Java:
java -version
To confirm the correct version of Maven:
mvn -version
The sample code provided for this article will only need to be built as the goal of this article is to illustrate how to install and configure Xampp to proxy requests to Tomcat, hence the focus will not be on the code used to demonstrate a working application but rather the setup itself.
3.1 Installing Xampp
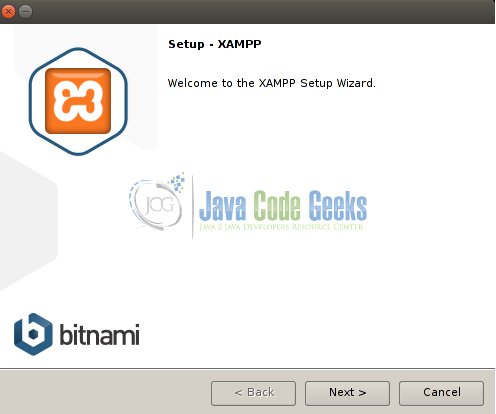
One can download Xampp for linux here. Once downloaded change the permissions of the downloaded file to allow us to execute it from the command line:
Installing Xampp
chmod a+x xampp-linux-x64-7.1.10.0-installer.run
sudo ./xampp-linux-x64-7.1.10-0-installer.run
Once executed the following sequence of screenshots showcase some of the vital steps of the install wizard which neatly guides you through the installation process.

- Ensure you select
XAMPP Core Files.
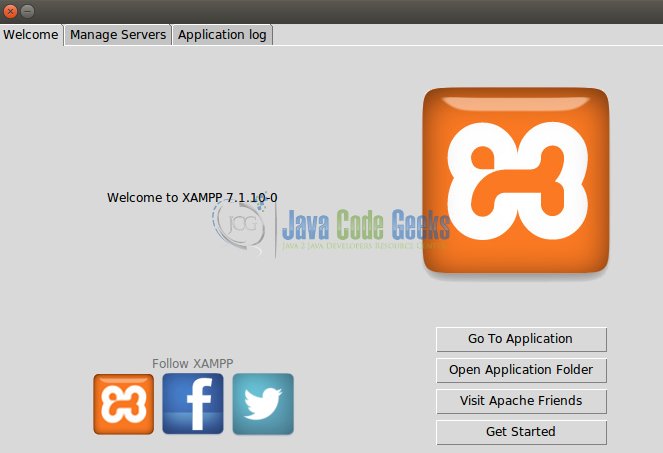
- Of importance on the launch screen is the
Manage Serverstab which will present you with a screen showing the running or at least runnable processes bundled with the suite. You will be able to manage (start / stop / configure) them from there.
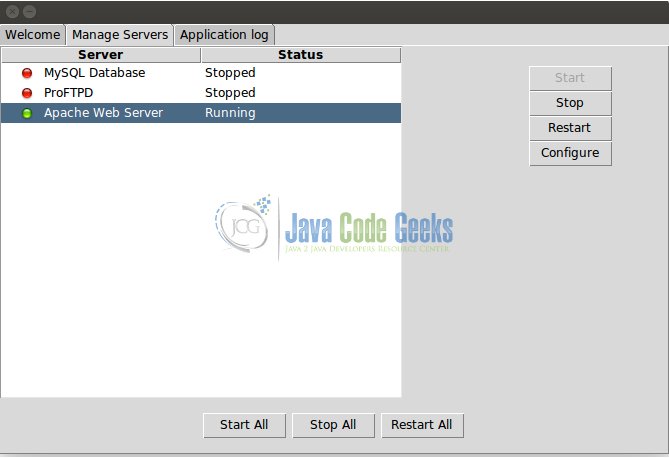
A closer inspection of the control panel reveals the following services:
- Apache
- Mysql
- ProFTPD
With other installs (windows) you will have the luxury of a Tomcat process, however we do not have such luck.
3.2 Installing Tomcat
Downloading Tomcat can be done here, the installation process is far simpler and just requires we extract it to somewhere on the file system.
4. Proxies
Before going further some clarification regarding proxies and their use.
Typically one can distinguish between two main types of proxy servers, forward proxy serversand reverse proxy servers.
A healthy explanation between the two exists here but for those not wanting to suffer the extra hyperlink click I will try to distill it in a few words below:
- A forward proxy acts as an intermediary between the client and a destination / target server where the client will request something explicitly from the destination server via the proxy. The proxy will then forward the request on to the destination server. The client has to have knowledge of the proxy in this case, and thus be configured to use it.
- A reverse proxy, however, appears to the client just like any web server and in fact the client will request something from the reverse proxy, whilst unbeknownst to the client, the reverse proxy will delegate the request on to anther server that will ultimately satisfy the request, this is in fact what we will be doing in this article.
Why go to all this trouble? They say in computer science most problems can be solved by an extra layer of indirection and a proxy is an extra layer of indirection. What this gives us is:
- The ability to load balance requests between an array of target servers behind the scenes, thus allowing us to scale in the face of high load.
- Offload certain tasks before hitting application servers, like SSL offloading (certificate negotiation).
- Extra security by being able to intercept malicious requests before hitting the application servers.
5. Configuration
5.1 Tomcat Connector
The first step is to ensure that the AJP protocol connector is enabled for Tomcat. This can be done by navigating to the tomcat install / download folder and navigating into the conffolder and editing the server.xml file and ensure the following line is present and not commented out.
Tomcat AJP connector configuration
<Connector port="8009" protocol="AJP/1.3" redirectPort="8443" />
5.2 Apache Web Server httpd conf
The next step is to ensure that the Apache web server in Xampp is configured to use the mod_proxy module and that the httpd-vhosts.conf is set to be loaded.
This can be confirmed / configured by clicking on the configure button of the Apache web server and on the Open conf filebutton. This will open the httpd.conf file located in /opt/lamp/etc/httpd.conf.
Ensure the following lines appear and are not commented out.
Apache Web server httpd.conf settings
LoadModule proxy_module modules/mod_proxy.so
LoadModule proxy_connect_module modules/mod_proxy_connect.so
LoadModule proxy_ftp_module modules/mod_proxy_ftp.so
LoadModule proxy_http_module modules/mod_proxy_http.so
LoadModule proxy_ajp_module modules/mod_proxy_ajp.so
LoadModule proxy_balancer_module modules/mod_proxy_balancer.so
LoadModule proxy_express_module modules/mod_proxy_express.so
....
# Virtual hosts
Include etc/extra/httpd-vhosts.conf
5.3 VHosts
The final step is to ensure that the virtual hosts configuration is correct for the /opt/lamp/etc/extra/httpd-vhosts.conf file.

Open the above-mentioned file for edit sudo vim /opt/lamp/etc/extra/httpd-vhosts.conf and insert the following text:
VHosts configuration
<VirtualHost *:80>
  DocumentRoot "******"
  ServerName localhost

  ProxyRequests Off
  ProxyVia Off

  ProxyPass /chat ajp://127.0.0.1:8009/chat
  ProxyPassReverse /chat ajp://127.0.0.1:8009/chat

</VirtualHost>
The above-mentioned configuration will ensure that any requests to the context path chat on the default port 80 served on localhost by Apache web server will proxy the request via AJP on port 8009 to Tomcat.
6. Running the Program
Download and extract the sample project (websocket-example) to somewhere on your file system. Navigate to the project root folder and execute: mvn clean install package.
Once complete, navigate into the target folder and copy the packaged chat.war to the webapps folder of your Tomcat installation.
6.1. Running Tomcat
Navigate into the binfolder of Tomcat and execute ./startup.sh. The following snippet illustrates this:
Starting Tomcat
jean-jay@jeanjay-SATELLITE-L750D:~/runtimes/apache-tomcat-8.5.23-xampp$ ls -al
total 128
drwxr-xr-x  9 jean-jay jean-jay  4096 Sep 28 11:31 .
drwxrwxr-x 13 jean-jay jean-jay  4096 Nov  5 20:15 ..
drwxr-xr-x  2 jean-jay jean-jay  4096 Sep 28 11:31 bin
drwxr-xr-x  3 jean-jay jean-jay  4096 Nov  6 13:06 conf
drwxr-xr-x  2 jean-jay jean-jay  4096 Sep 28 11:31 lib
-rw-r--r--  1 jean-jay jean-jay 58153 Sep 28 11:31 LICENSE
drwxr-xr-x  2 jean-jay jean-jay  4096 Nov  6 13:06 logs
-rw-r--r--  1 jean-jay jean-jay  1774 Sep 28 11:31 NOTICE
-rw-r--r--  1 jean-jay jean-jay  7241 Sep 28 11:31 RELEASE-NOTES
-rw-r--r--  1 jean-jay jean-jay 16416 Sep 28 11:31 RUNNING.txt
drwxr-xr-x  2 jean-jay jean-jay  4096 Sep 28 11:31 temp
drwxr-xr-x  8 jean-jay jean-jay  4096 Nov  6 13:11 webapps
drwxr-xr-x  3 jean-jay jean-jay  4096 Nov  6 13:06 work
jean-jay@jeanjay-SATELLITE-L750D:~/runtimes/apache-tomcat-8.5.23-xampp$ cd bin
jean-jay@jeanjay-SATELLITE-L750D:~/runtimes/apache-tomcat-8.5.23-xampp/bin$ ./startup.sh
Using CATALINA_BASE:   /home/jean-jay/runtimes/apache-tomcat-8.5.23-xampp
Using CATALINA_HOME:   /home/jean-jay/runtimes/apache-tomcat-8.5.23-xampp
Using CATALINA_TMPDIR: /home/jean-jay/runtimes/apache-tomcat-8.5.23-xampp/temp
Using JRE_HOME:        /usr
Using CLASSPATH:       /home/jean-jay/runtimes/apache-tomcat-8.5.23-xampp/bin/bootstrap.jar:/home/jean-jay/runtimes/apache-tomcat-8.5.23-xampp/bin/tomcat-juli.jar
Tomcat started.
jean-jay@jeanjay-SATELLITE-L750D:~/runtimes/apache-tomcat-8.5.23-xampp/bin$
Accordingly you can stop Tomcat by issuing the command ./shutdown.shfrom within that same binfolder to shutdown the service.
6.2. Running Apache
Starting Apache can be done from the Xampp control panel which itself can be started by executing the following on the command line: sudo /opt/lampp/manager-linux-x64.run Once up, navigate to the Manage Serverstab and start Apache.
Once both Apache and Tomcat have successfully started you can open your browser and navigate to http://localhost/chat/index.html and you will be presented with the chat dialogue screen.
In the background the request to Apache was proxied off to Tomcat for resolution via the ajp protocol on port 8009.
For more detail on how the sample chat web application works, see here, the behavior should be exactly the same even though is proxied via Apache web server in Xampp.
7. Summary
In this article we discussed what Xampp is and how to install and configure it as a proxy to Tomcat.
We also browsed to a Java Servlet application hosted on Tomcat via Xampp’s Apache web server. We discussed several of the reasons as to why this would be done as well as the details regarding the configuration used to facilitate this setup.
8. Download the Source Code
This was a Java Servlet XAMPP Tutorial.
You can download the full source code of this example here: Java Servlet XAMPP Tutorial
