In this tutorial we will show you how to generate an output jar file, containing the source code of a Maven based Java project. Apache Maven contains the Source Plugin, which is responsible for creating a jar file, containing the source files of the current project.
In this example, we use the following tools on a Windows 7 platform:
- Apache Maven 3.1.1
- Maven Source Plugin
- JDK 1.7
Please refer to this guide here, in order to verify that you know how to create a Maven based Java project.
1. Declare the Maven Source Plugin as a dependency
The first thing to do is declare the Source Plugin inside our pom.xml file. To achieve that, we add the following snippet:
<build>
   <plugins>
      <plugin>
         <groupId>org.apache.maven.plugins</groupId>
         <artifactId>maven-source-plugin</artifactId>
         <executions>
            <execution>
               <id>attach-sources</id>
               <goals>
                  <goal>jar</goal>
               </goals>
            </execution>
         </executions>
      </plugin>
   </plugins>
</build>
The final form of our pom.xml file looks like:
pom.xml:
<project xmlns="http://maven.apache.org/POM/4.0.0" xmlns:xsi="http://www.w3.org/2001/XMLSchema-instance"
xsi:schemaLocation="http://maven.apache.org/POM/4.0.0 http://maven.apache.org/xsd/maven-4.0.0.xsd">
<modelVersion>4.0.0</modelVersion>
<groupId>com.javacodegeeks</groupId>
<artifactId>SampleExample</artifactId>
<packaging>jar</packaging>
<name>SampleExample</name>
<version>1.0.0</version>

<build>
   <plugins>
      <plugin>
         <groupId>org.apache.maven.plugins</groupId>
         <artifactId>maven-compiler-plugin</artifactId>
         <version>3.1</version>
         <configuration>
            <source>1.7</source>
            <target>1.7</target>
         </configuration>
      </plugin>
      <plugin>
         <groupId>org.apache.maven.plugins</groupId>
         <artifactId>maven-source-plugin</artifactId>
         <executions>
            <execution>
               <id>attach-sources</id>
               <goals>
                  <goal>jar</goal>
               </goals>
            </execution>
         </executions>
      </plugin>
   </plugins>
</build>
</project>
Important: Notice the usage of the Maven Compiler Plugin, in order to explicitly define the JDK version that must be used for our project’s compilation phase.
2. Deploy the Project
Using the terminal (Linux or Mac) or the command prompt (Windows), we navigate to the folder where our project is located. Then, we issue the following command:
mvn install
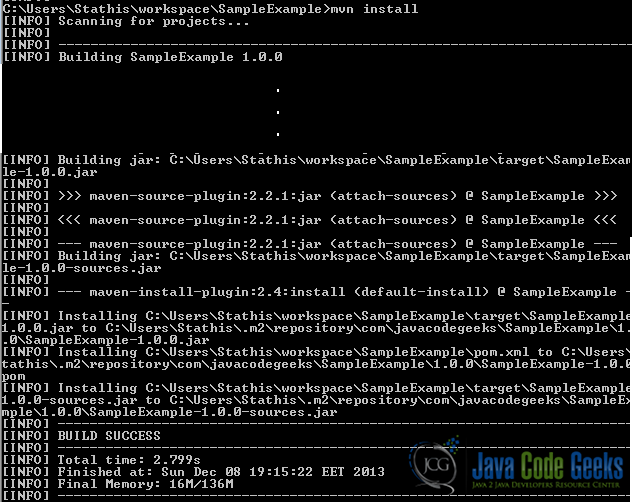
This command packages and installs our project into Maven’s Local Repository. A sample output of the command’s execution is shown below:
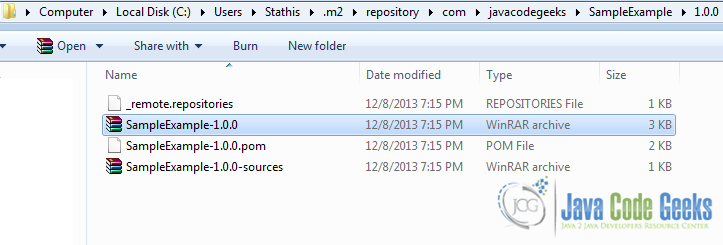
3. Verify the execution
Browse into Maven’s Local Repository and locate our newly created project. Beside the pom.xml file of our project, a couple more files have appeared. Specifically:
<project_name>-<project_version>.jar<project_name>-<project_version>-sources.jar
The first .jar file contains the class and executables of our project, while the second .jar file contains the source files of our Java project. A sample output is show below:
This was a tutorial on how to generate and package the source code of a Maven based project into a .jar file.
