1. Introduction
In this example, we will demonstrate how to add basic authentication to a JAX-WS web service and client. But before we begin, let’s get some background.
Table Of Contents
1.1 SOA
Service Oriented Architecture is a style of distributed computing, where large (sometimes called monolithic) applications are decomposed into loosely coupled services. These services have application programming interfaces (APIs) that can be implemented and deployed on different languages and/or platforms. For example, one service might be implemented in .NET and run on a Windows environment, while another might be implemented in Java and run on a UNIX environment.
1.2 Web Services
So how do these services interact with each other? The consumer of the service (client) sends a request to the provider of the service (server). For a web service, the request message is in the form of XML data or JSON data and the transport method is HTTP.
There are two types of Web Services, SOAP-based and RESTful-based. In Java, the APIs used for these types are JAX-WS and JAX-RS, respectively.
In our example, we will be using JAX-WS.
1.3 JAX-WS
Java API for XML Web Services (JAX-WS) uses XML files for configuring services and for exchanging data. JAX-WS is used for SOAP-based messaging. It supersedes the legacy JAX-RPC for developing SOAP web services and relies heavily on Java API for XML Binding (JAXB) for marshalling and unmarshalling Java objects to XML documents and visa-versa.
There are a few web services engines available that implement the JAX-WS specification. Among those are:
- Apache CXF
- Apache Axis
- Glassfish Metro
In our example, we will be using Apache CXF.
1.4 Apache CXF
Aside from providing tools for developing web services, Apache CXF provides the JAX-WS and JAX-RS runtimes. The runtime serializes and de-serializes requests to and from XML or JSON messages to Java objects. The runtime also dispatches incoming requests to the appropriate endpoint handler. Apache CXF implements many of the Web Services standards.
1.5 WS-Security
There are several web service standards. An important standard, for obvious reasons, is WS-Security. WS-Security is a message-level security.
The WS-Security standard addresses three main security issues:
- Authentication (Identity)
- Confidentiality (Encryption and Decryption)
- Integrity (XML Signature)
This article will address the authentication aspect of WS-Security.
1.5 WS-Security Authentication
The WS-Security standard offers three methods of authentication. Those methods are:
- UsernameToken Profile
- X 508 Certificates Token Profile
- SAML Token Profile
UsernameToken Profile is simple to incorporate into your web service and client. That is what we will use in our example.
1.6 UsernameToken Profile
UsernameToken represents a username and password pair in the WS-Security standard. It is included in the SOAP header of the web service request. Here is an example.
<soapenv:Header>

<wsse:Security xmlns:wsse="http://docs.oasis-open.org/wss/2004/01/oasis-200401-wss-wssecurity-secext-1.0.xsd" soapenv:mustUnderstand="1">

<wsse:UsernameToken xmlns:wsse="http://docs.oasis-open.org/wss/2004/01/oasis-200401-wss-wssecurity-secext-1.0.xsd" xmlns:wsu="http://docs.oasis-open.org/wss/2004/01/oasis-200401-wss-wssecurity-utility-1.0.xsd">

<wsse:Username xmlns:wsse="http://docs.oasis-open.org/wss/2004/01/oasis-200401-wss-wssecurity-secext-1.0.xsd">cxf</wsse:Username>

<wsse:Password xmlns:wsse="http://docs.oasis-open.org/wss/2004/01/oasis-200401-wss-wssecurity-secext-1.0.xsd" Type="http://docs.oasis-open.org/wss/2004/01/oasis-200401-wss-username-token-profile-1.0#PasswordText">cxf</wsse:Password>

</wsse:UsernameToken>

</wsse:Security>

</soapenv:Header>
There is a caveat, however, when using UsernameToken as the authentication method with the password type as PasswordText, as shown above. Since the SOAP message is sent as-is, the username and password are in plain text. In a production environment, it should only be used in association with transport-layer encryption, such as is provided by SSL.
CXF supports the use WS-SecurityPolicy or interceptors for adding the UsernameToken security header. We will use a CXF interceptor in this example.
Alright. Enough background information. Let’s get started with our example.
1.7 Tools Used in this Example
- Eclipse Oxygen
- Maven 3.2.1
- Tomcat 8.5.4
For Maven support with Eclipse, install M2Eclipse. Please visit the M2Eclipse website for more information.
To setup a Tomcat server for use in Eclipse, see “Tomcat in Eclipse: 6 popular “how to” questions.”
2. JAX-WS Basic Authentication Example
In this example, we will be creating a simple JAX-WS web service and client. We will then secure the web service with the UsernameToken Profile using a Java security Callback configured with an Apache CXF interceptor. Finally, we will configure the same components on the client side.
2.1 Create the Web Service Provider
2.1.1 Create the Web Service Project
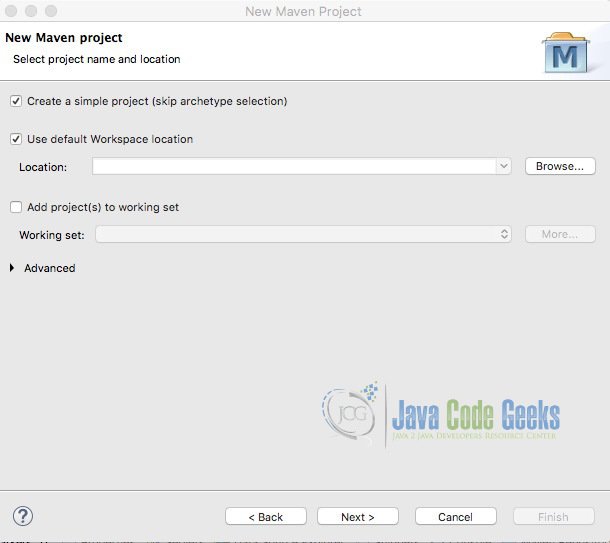
Begin by creating a Maven Project.
- Select New -> Other… Maven Project. Click Next.
- Select “Create a simple project (skip archetype selection)” and click Next.
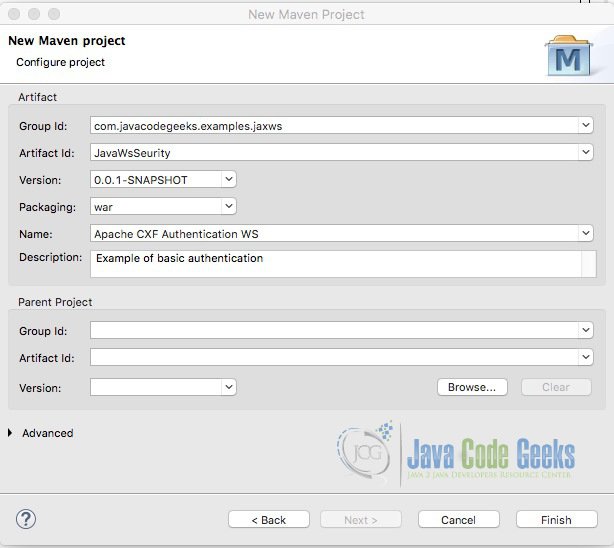
Enter a Group Id and Artifact Id. Select “war” for Packaging and Name and Description if desired. Click Finish.
At this point, you will see the following problem: “web.xml is missing and is set to true”, since you selected the packaging option as a war file. To fix this, right-click on the project, select Java EE Tools -> Generate Deployment Descriptor Stub.
Open the pom.xml and add the following Maven plugins just above the closing </project> tag:
<build>
 <pluginManagement>
   <plugins>
   <plugin>
   <groupId>org.apache.maven.plugins</groupId>
   <artifactId>maven-compiler-plugin</artifactId>
   <version>3.6.1</version>
   <configuration>
   <source>1.8</source>
   <target>1.8</target>
   </configuration>
   </plugin>
   <plugin>
   <groupId>org.apache.maven.plugins</groupId>
   <artifactId>maven-war-plugin</artifactId>
   <version>3.0.0</version>
 <configuration>
 <warSourceDirectory>src/main/webapp</warSourceDirectory>
 <webXml>src/main/webapp/WEB-INF/web.xml</webXml>
 <warName>JaxWsSecurity</warName>
 </configuration>
   </plugin>
   </plugins>
 </pluginManagement>
 </build>
The Maven compiler plugin will compile the source code and the Maven war plugin will package the application in a deployable WAR file.
Also, add the following dependencies:
 <dependencies>
   <dependency>
     <groupId>org.apache.cxf</groupId>
     <artifactId>cxf-rt-frontend-jaxws</artifactId>
     <version>3.1.11</version>
   </dependency>
   <dependency>
     <groupId>org.apache.cxf</groupId>
     <artifactId>cxf-rt-transports-http</artifactId>
     <version>3.1.11</version>
   </dependency>
   <dependency>
     <groupId>org.springframework</groupId>
     <artifactId>spring-core</artifactId>
     <version>4.3.8.RELEASE</version>
   </dependency>
   <dependency>
     <groupId>org.springframework</groupId>
     <artifactId>spring-context</artifactId>
     <version>4.3.8.RELEASE</version>
   </dependency>
   <dependency>
     <groupId>org.springframework</groupId>
     <artifactId>spring-web</artifactId>
     <version>4.3.8.RELEASE</version>
   </dependency>
 </dependencies>
The Spring dependencies are required for this example since we will be using a Spring configuration file to configure the web service.
Save the changes. At this point you will see the following error:
Project configuration is not up-to-date with pom.xml. Select: Maven->Update Project… from the project context menu or use Quick Fix.
Right-click the error and select Quick Fix and click Finish.

2.1.2 Create a Web Service
Create a Java class with the following code:
HelloWorld.java
package com.javacodegeeks.examples.jaxws.service;

import javax.jws.WebMethod;
import javax.jws.WebService;

@WebService
public class HelloWorld {

	@WebMethod
	public String sayHello(String name) {
		return "hello " + name;
	}
}
The @WebService annotation marks this class as a web service and the @WebMethod annotation marks the sayHello method as a web service operation.
2.1.3 Create the Spring Configuration File
Let’s create the cxf-servlet.xml file in the webapp/WEB-INF directory with the following content:
cxf-servlet.xml
<?xml version="1.0" encoding="UTF-8"?>
<beans xmlns="http://www.springframework.org/schema/beans"
 xmlns:xsi="http://www.w3.org/2001/XMLSchema-instance" xmlns:jaxws="http://cxf.apache.org/jaxws"
 xmlns:cxf="http://cxf.apache.org/core"
 xmlns:soap="http://cxf.apache.org/bindings/soap"
 xsi:schemaLocation="http://cxf.apache.org/core http://cxf.apache.org/schemas/core.xsd http://www.springframework.org/schema/beans http://www.springframework.org/schema/beans/spring-beans.xsd http://cxf.apache.org/bindings/soap http://cxf.apache.org/schemas/configuration/soap.xsd http://cxf.apache.org/jaxws http://cxf.apache.org/schemas/jaxws.xsd">

 <jaxws:server id="helloworld" address="/hello">
 <jaxws:serviceBean>
 <bean class="com.javacodegeeks.examples.jaxws.service.HelloWorld" />
 </jaxws:serviceBean>
 </jaxws:server>

</beans>
Notice the xmlns:jaxws="http://cxf.apache.org/jaxws" namespace in the beans element. This schema is used with Spring configurations only.
- The
<jaxws:server>element configures a JAX-WS service provider. - The
<jaxws:server>element’s address attribute specifies the web service HTTP endpoint, for example, /hello. - The
<jaxws:serviceBean>element specifies the Java class implementing the web service.
2.1.4 Configure the CXF servlet in web.xml
The last step it to configure CXFServlet in web.xml. You configure it like you would any other servlet.
Note: Remove the <welcome-file-list> section from web.xml.
web.xml
<?xml version="1.0" encoding="UTF-8"?>
<web-app xmlns:xsi="http://www.w3.org/2001/XMLSchema-instance" xmlns="http://java.sun.com/xml/ns/javaee" xsi:schemaLocation="http://java.sun.com/xml/ns/javaee http://java.sun.com/xml/ns/javaee/web-app_2_5.xsd" version="2.5">
  <display-name>JavaWs
</display-name>
 <servlet>
 <servlet-name>cxfservlet</servlet-name>
 <servlet-class>org.apache.cxf.transport.servlet.CXFServlet</servlet-class>
 <load-on-startup>1</load-on-startup>
 </servlet>
 <servlet-mapping>
 <servlet-name>cxfservlet</servlet-name>
 <url-pattern>/services/*</url-pattern>
 </servlet-mapping>
</web-app>
The CXFServlet searches for the cxf-servlet.xml by default and exposes all the endpoints configured in that file.
Notes:
- Set load-on-startup to any positive number so that CXFServlet immediately loads all the web services endpoints on server startup.
- The recommended url pattern for web services is /services/*.
Run maven clean to clear the target directory and maven install to create the WAR file. (Right-click the project and select “Run as…”. You will see these options from the list.) The generated WAR file can be deployed to the Tomcat server by copying it to the webapps directory and starting the server.
Now let’s test our web service from within Eclipse. Right click the project and select Run As -> Run on Server. Select Tomcat server and add our project to “configure”. When the application starts, we will see a 404 error in the browser since we do not have a welcome page specified in web.xml. Enter /services at the end of the URL. On this page, you will see a link to the WSDL file.

Click the link to see the WSDL file that was generated by the CXF runtime.
Note: If you are using Eclipse’s internal browser, you may see a blank page. Simply copy the URL from the address bar and open the link in an external browser.
2.2 Create the Web Service Client
We will create a stand-alone application web services client so we will first create a Java project for the client code.
2.2.1 Create the Client Project
Create a new Maven Project:
- Select New -> Other… Maven Project. Click Next.
- Select “Create a simple project (skip archetype selection)” and click Next.
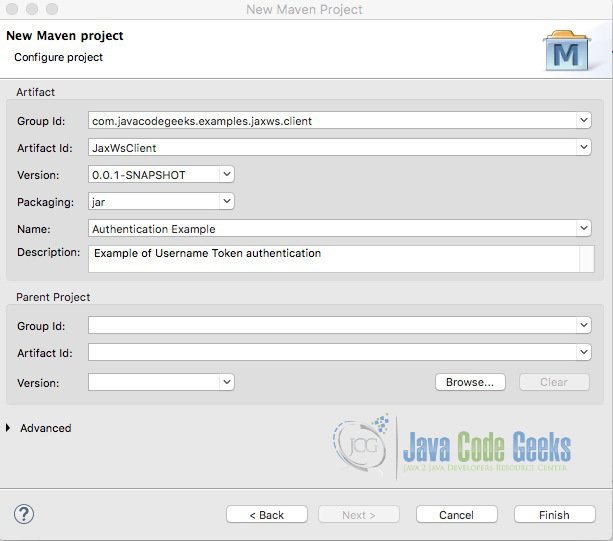
- Enter a Group Id and Artifact Id. Select “jar” for Packaging and Name and Description if desired. Click Finish.
2.2.2 Generate the web service client code
Now we will generate the web service client code:
- Copy the web service WSDL URL from your browser. It will look similar to this: http://localhost:8080/JaxWs/services/hello?wsdl.
- Open a terminal window and change to the src/main/java directory of the client Java project, for example, wssecurityClient/src/main/java.
- Run wsimport command (shown below) to generate the client code. (Replace <WSDL URL> with the one copied from your browser.) Note: The web service must be running when you run the wsimport command.
wsimport -keep -p com.javacodegeeks.examples.jaxws.client <WSDL URL>
The wsimport command-line tool is included in Java SE. The -keep option saves the generated files and the -p options specifies the Java package we want to use for the files. Running the wsimport command will generate the following files:
HelloWorld.class
HelloWorld.java
HelloWorldService.class
HelloWorldService.java
ObjectFactory.class
ObjectFactory.java
SayHello.class
SayHello.java
SayHelloResponse.class
SayHelloResponse.java
package-info.class
package-info.java
At this point, you can create a JAR file for the generated code with the maven clean and maven install commands.
2.2.3 Create the Client
Create a Java class with the following code:
HWClient.java
 public class HWClient {

 public static void main(String[] args) {
    HelloWorldService service = new HelloWorldService();
    HelloWorld hw = service.getHelloWorldPort();

    System.out.println(hw.sayHello("Java Code Geeks!"));
 }
}
First on line 4, we create a web service client. We then get the service endpoint interface (SEI) on line 5. Finally, we send the request and print out the response on line 7.
2.2.4 Test the Web Service Client
Right-click the Java class and select Run As -> Java Application. You will see a successful response in the console.
hello Java Code Geeks!
2.3 Securing the Web Service
Now that we have our server and client created and tested, we can add UsernameToken Profile authentication to our web service. Note the adding authentication does not alter our existing web service business logic code, as rudimentary as it is.
2.3.1 Add the Maven dependency
Open the pom.xml and add the following dependency:
<dependency>
  <groupId>org.apache.cxf</groupId>
  <artifactId>cxf-rt-ws-security</artifactId>
  <version>3.1.11</version>
</dependency>
Select Maven -> Update Project… from the project context menu.
2.3.2 Create the UserToken Password Callback Handler
Create a new class UTPasswordCallback that implements javax.security.auth.callback.CallbackHandler.
2.3.2.1 The CallbackHandler
Add the following code to our CallbackHandler.
UTPasswordCallback.java
public class UTPasswordCallback implements CallbackHandler {

	private Map passwords = new HashMap();

	public UTPasswordCallback() {
		passwords.put("cxf", "cxf");
	}
	@Override
	public void handle(Callback[] callbacks) throws IOException, UnsupportedCallbackException {
		for (Callback callback : callbacks) {
			WSPasswordCallback pc = (WSPasswordCallback) callback;

			String pass = passwords.get(pc.getIdentifier());
			if (pass != null) {
				pc.setPassword(pass);
				return;
			}
		}

	}

}
Let’s talk about some of these types.
- The
Callbackinterface provides a means for an application to retrieve authentication data. In our application, we retrieve the username from the Callback object. - The
CallbackHandlerinterface communicates with underlying security services. In this example, security services are managed by the CXF engine. - The
WSPasswordCallbackis a concrete class that allows us to set and get the username and password.
There is one abstract method of CallbackHandler that we must implement, handle(Callback[] callbacks). Callback objects are passed to the CallbackHandler in an array through the handle method. This is how we access the Callback’s authentication data.
When a SOAP message is received that has a UsernameToken security header, CXF will call the CallbackHandlers’s handle method and pass it an array of Callback objects. In our handle method, we iterate over the Callback array. (In our case, there is only one object in the array but we want to make our code robust.) We then cast the Callback to a WSPasswordCallback object, and get the username.
Lastly, we set the password for this user (retrieved from our data store) in the WSPasswordCallback object. (Here we are using a Map for our data store to keep the example simple but you would typically get this data from a database or directory.) The username and password then gets validated by the underlying security service (CXF) through the Callback object. CXF compares the password in the callback object with the one received in the UsernameToken security header. If authenticated, the request will be forwarded to the web services endpoint, otherwise it will return an authentication error to the client.
Wow, that was a mouthful!
The next step is to configure our web service to use our CallbackHandler. Enter the interceptor!
2.3.3 Add the CXF Security Interceptor
To configure our web service to use our CallbackHandler we add an “in” interceptor to the cxf-servlet configuration file.
First, we define a bean for our callback handler we just created.
<bean id="myPasswordCallback" class="com.javacodegeeks.examples.jaxws.service.UTPasswordCallback" />
Then we add the org.apache.cxf.ws.security.wss4j.WSS4JInInterceptor to our web service configuration.
 <jaxws:server id="helloworld" address="/hello">
   <jaxws:serviceBean>
     <bean class="com.javacodegeeks.examples.jaxws.service.HelloWorld" />
   </jaxws:serviceBean>
   <jaxws:inInterceptors>
     <bean class="org.apache.cxf.ws.security.wss4j.WSS4JInInterceptor">
       <constructor-arg>
         <map>
           <entry key="action" value="UsernameToken" />
           <entry key="passwordType" value="PasswordText" />
           <entry key="passwordCallbackRef" value-ref="myPasswordCallback" />
         </map>
       </constructor-arg>
     </bean>
   </jaxws:inInterceptors>
 </jaxws:server>
The constructor accepts a Map of key/value pairs as arguments.
| Key | Value |
|---|---|
| action | This specifies the authentication type. Typical actions include “UsernameToken, “Signature”, “Encrypt”, “Timestamp, “SAMLTokenSigned” |
| passwordType | Types are PasswordText or PasswordDigest for the UsernameToken authentication type. |
| passwordCallbackRef | The callback handler to use, in this case a reference to the bean we defined in the previous step. |
As the name implies, interceptors intercept the incoming request before it is forwarded to the web service endpoint. (Interceptors are akin to servlet filters in a web application.)
We configure the “in” interceptor to use the UsernameToken type authentication, to expect the password to be in plain text, and to use our password CallbackHandler for retrieving the password. The WSS4JInInterceptor is the CXF underlying component that validates the password.
If you run the current web service client, you will get a SOAP fault.
         ns1:SecurityError
         A security error was encountered when verifying the message
And an error similar to this.
com.sun.xml.internal.ws.fault.ServerSOAPFaultException: Client received SOAP Fault from server: A security error was encountered when verifying the message Please see the server log to find more detail regarding exact cause of the failure.
This is because our request does not have a UsernameToken in the SOAP header. Let’s fix that.
2.4 Update the Client
2.4.1 Add the Maven Dependencies
Open the pom.xml file and add the following dependencies:
<dependencies>
  <dependency>
    <groupId>org.apache.cxf</groupId>
    <artifactId>cxf-rt-frontend-jaxws</artifactId>
    <version>3.1.11</version>
  </dependency>
  <dependency>
    <groupId>org.apache.cxf</groupId>
    <artifactId>cxf-rt-transports-http</artifactId>
    <version>3.1.11</version>
  </dependency>
  <dependency>
    <groupId>org.apache.cxf</groupId>
    <artifactId>cxf-rt-ws-security</artifactId>
    <version>3.1.11</version>
  </dependency>
</dependencies>
Save the changes and select Maven… Update Project.
2.4.2 Create the UserToken Password Callback Handler
The first step is to create the password callback. The callback is very similar to the one we created on the web service provider side.
UTPasswordCallback.java
public class UTPasswordCallback implements CallbackHandler {

	public void handle(Callback[] callbacks) throws IOException, UnsupportedCallbackException {
		for (Callback callback : callbacks) {
			WSPasswordCallback wpc = (WSPasswordCallback) callback;
			if (wpc.getIdentifier().equals("cxf")) {
				wpc.setPassword("cxf");
				return;
			}
		}
	}
}
Again we implement javax.security.auth.callback.CallbackHandler. We are hard-coding the username and password but typically, you would read these values from an external source, such as a properties file.
2.4.3 Update the Client Code
Let’s update the client code.
HWClient.java
public class HWClient {

	public static void main(String[] args) {
		HelloWorldService service = new HelloWorldService();
		HelloWorld hw = service.getHelloWorldPort();

		Client client = ClientProxy.getClient(hw);
		Endpoint endpoint = client.getEndpoint();

		Map props = new HashMap();
		props.put(WSHandlerConstants.ACTION, WSHandlerConstants.USERNAME_TOKEN);
		props.put(WSHandlerConstants.PASSWORD_TYPE, WSConstants.PW_TEXT);
		props.put(WSHandlerConstants.PW_CALLBACK_CLASS, UTPasswordCallback.class.getName());
		props.put(WSHandlerConstants.USER, "cxf");

		WSS4JOutInterceptor wssOut = new WSS4JOutInterceptor(props);
		endpoint.getOutInterceptors().add(wssOut);
		System.out.println(hw.sayHello("Java Code Geeks!"));
	}
}
First, we create the CXF client object. We create this by passing the SEI to the static method ClientProxy.getClient. We then get the endpoint from the client object.
Next, we configure an “out” interceptor. We configure the properties for the WSS4JOutInterceptor so that it uses usernameToken for authentication. We also include the password type, callback class and username in the properties Map.
Map<String, Object> props = new HashMap<String, Object>();

props.put(WSHandlerConstants.ACTION, WSHandlerConstants.USERNAME_TOKEN);
props.put(WSHandlerConstants.PASSWORD_TYPE, WSConstants.PASSWORD_TEXT);
props.put(WSHandlerConstants.PW_CALLBACK_CLASS, UTPasswordCallback.class.getName());
props.put(WSHandlerConstants.USER, "cxf");
Since we are following the WS-Standard, we’ll make use of the WSConstants and WSHandlerConstants classes from the org.apache.wss4j.dom package to set some of the entry keys and values.
Note that the first three entries correspond to the arguments we passed to the WSS4JInInterceptor constructor in the cxf-servlet.xml file for our web service provider configuration.
We then create an instance of WSS4JOutInterceptor. and pass the properties to the constructor.
Finally, we add the “out” interceptor to the endpoint. The “out” interceptor is how we add the UsernameToken security header to the client request.
2.4.4 Run the client
If you run the client code with these updates, you will get a successful response.
hello Java Code Geeks!
3. Conclusion
In summary, it is a simple task to add basic authentication to both the web service and client using Apache CXF.
4. Download The Source Code
This was a JAX-WS Basic Authentication Example.

Awesome man !!!
Can you please do the same with Apache axis?
It would be really helpful.
Hi! I assume you are asking about Axis 2. I have worked with the original Axis but that is, for all intents and purposes, obsolete.
Please do a search with “apache axis 2 client basic authentication tutorial”. I saw a couple of results that may be of interest to you. Good luck!
Hello, thank you for the useful tutorial.
However, I think that the security is not working. I implemented the interceptor and updated the cxf-servlet.xml with the secure configuration, intalled, redeployed, but Iam still able to invoke the service with the client.
Hello. Please ensure that you completed all steps in section 2.3 Securing the Web Service. Also, download the source code and compare. I ran the service and tested it with SoapUI and received a Soap fault. Good luck!
tx that’s really helpful.
but my wsdl file is still the same.
how would clients know that i want UsernameToken and PasswordText in the header?
Thanks its great exemple,
i tried to change cxf-servlet to add in and out interceptors. service deployed successfully. added respective properties to client. while invoking its throwing lot of exceptions. can you please post sample encryption and decryption CXF that would be great.
Thank you for your comment. I’m glad you liked the example. I am sorry to here you are getting exceptions. Please make sure you follow all the steps provided in this example. You can download the source code to compare against your project. As for encryption/decryption, you can use HTTPS and TLS for this purpose. I wrote an article on how to do this here: https://examples.javacodegeeks.com/enterprise-java/jws/jax-ws-https-example/ The sample web service was developed using CXF. If you want to use WSS4J interceptors, see the Apache CXF WS-Security page here: http://cxf.apache.org/docs/ws-security.html. It gives a thorough explanation on what is required to configure… Read more »
Hi Gilber. Really appriciate help. It works like a charm. I want to learn how to add authentication using Basic/NTLM Authentication . Will you please help guiding me in right directions.
I am having issue below, any tips? //Thanks SEVERE: StandardWrapper.Throwable org.springframework.beans.factory.BeanCreationException: Error creating bean with name ‘helloworld’: Cannot create inner bean ‘(inner bean)#136b96aa’ of type [com.gcs.jaxws.service.HelloWorld] while setting bean property ‘serviceBean’; nested exception is org.springframework.beans.factory.CannotLoadBeanClassException: Cannot find class [com.gcs.jaxws.service.HelloWorld] for bean with name ‘(inner bean)#136b96aa’ defined in URL [file:/D:/LasVegas/Project/eclipse-workspace/.metadata/.plugins/org.eclipse.wst.server.core/tmp0/wtpwebapps/JavaWsSecurity/WEB-INF/cxf-servlet.xml]; nested exception is java.lang.ClassNotFoundException: com.gcs.jaxws.service.HelloWorld at org.springframework.beans.factory.support.BeanDefinitionValueResolver.resolveInnerBean(BeanDefinitionValueResolver.java:313) at org.springframework.beans.factory.support.BeanDefinitionValueResolver.resolveValueIfNecessary(BeanDefinitionValueResolver.java:129) at org.springframework.beans.factory.support.AbstractAutowireCapableBeanFactory.applyPropertyValues(AbstractAutowireCapableBeanFactory.java:1531) at org.springframework.beans.factory.support.AbstractAutowireCapableBeanFactory.populateBean(AbstractAutowireCapableBeanFactory.java:1276) at org.springframework.beans.factory.support.AbstractAutowireCapableBeanFactory.doCreateBean(AbstractAutowireCapableBeanFactory.java:553) at org.springframework.beans.factory.support.AbstractAutowireCapableBeanFactory.createBean(AbstractAutowireCapableBeanFactory.java:483) at org.springframework.beans.factory.support.AbstractBeanFactory$1.getObject(AbstractBeanFactory.java:306) at org.springframework.beans.factory.support.DefaultSingletonBeanRegistry.getSingleton(DefaultSingletonBeanRegistry.java:230) at org.springframework.beans.factory.support.AbstractBeanFactory.doGetBean(AbstractBeanFactory.java:302) at org.springframework.beans.factory.support.AbstractBeanFactory.getBean(AbstractBeanFactory.java:197) at org.springframework.beans.factory.support.DefaultListableBeanFactory.preInstantiateSingletons(DefaultListableBeanFactory.java:761) at org.springframework.context.support.AbstractApplicationContext.finishBeanFactoryInitialization(AbstractApplicationContext.java:866) at org.springframework.context.support.AbstractApplicationContext.refresh(AbstractApplicationContext.java:542) at org.apache.cxf.transport.servlet.CXFServlet.createSpringContext(CXFServlet.java:151) at org.apache.cxf.transport.servlet.CXFServlet.loadBus(CXFServlet.java:74) at org.apache.cxf.transport.servlet.CXFNonSpringServlet.init(CXFNonSpringServlet.java:77) at org.apache.catalina.core.StandardWrapper.initServlet(StandardWrapper.java:1183) at org.apache.catalina.core.StandardWrapper.loadServlet(StandardWrapper.java:1099) at org.apache.catalina.core.StandardWrapper.load(StandardWrapper.java:989) at org.apache.catalina.core.StandardContext.loadOnStartup(StandardContext.java:4931) at org.apache.catalina.core.StandardContext.startInternal(StandardContext.java:5241) at org.apache.catalina.util.LifecycleBase.start(LifecycleBase.java:150) at org.apache.catalina.core.ContainerBase$StartChild.call(ContainerBase.java:1419)… Read more »