In this example of Solr highlighting we will show you how to use the Solr highlighting feature. We will use jQuery along with Solr highlighting feature in this example.
Our preferred environment for this example is solr-5.0.0, Eclipse Luna, JDK 8u25, and Tomcat 8 application server. Having said that, we have tested the code against JDK 1.7 and Tomcat 7 as well.
Before you begin the Solr installation make sure you have JDK installed and Java_Home is set appropriately.
1. Install Apache Solr
To begin with lets download the latest version of Apache Solr from the following location.
http://lucene.apache.org/solr/downloads.html
Apache Solr has gone through various changes from 4.x.x to 5.0.0, so if you have different version of Solr you need to download the 5.x.x. version to follow this example.
Once the Solr zip file is downloaded unzip it into a folder. The extracted folder will look like the below.
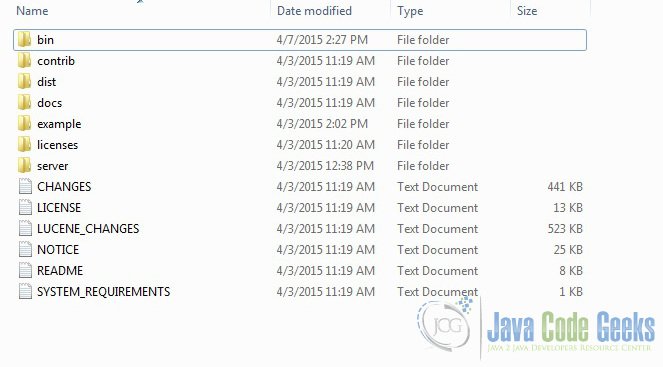
The bin folder contains the scripts to start and stop the server. The example folder contains few example files. We will be using one of them to demonstrate how Solr indexes the data. The server folder contains the logs folder where all the Solr logs are written. It will be helpful to check the logs for any error during indexing. The solr folder under server holds different collection or core. The configuration and data for each of the core/ collection are stored in the respective core/ collection folder.
Apache Solr comes with an inbuilt Jetty server. But before we start the solr instance we must validate the JAVA_HOME is set on the machine.
We can start the server using the command line script. Lets go to the bin directory from the command prompt and issue the following command
solr start
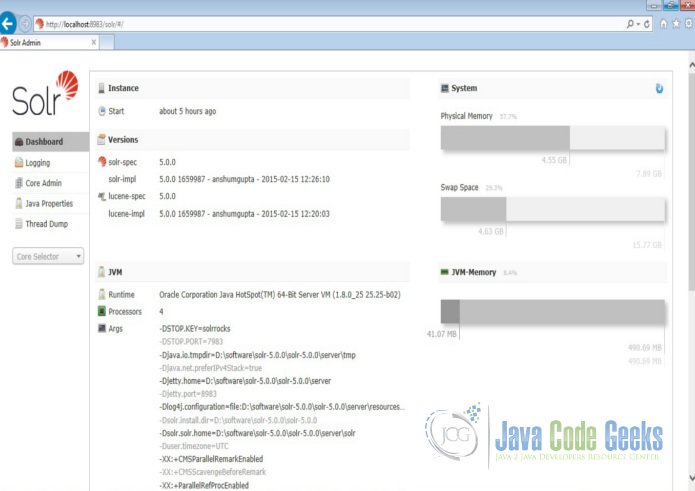
This will start the Solr server under the default port 8983.
We can now open the following URL in the browser and validate that our Solr instance is running. The specifics of solr admin tool is beyond the scope of the example.
http://localhost:8983/solr/
2. Configuring Apache Solr
In this section, we will show you how to configure the core/collection for a solr instance and how to define the fields. Apache Solr ships with an option called Schemaless mode. This option allow users to construct effective schema without manually editing the schema file. But for this example we will use the Schema configuration for understanding the internals of the Solr.
2.1 Creating a Core
When the Solr server is started in Standalone mode the configuration is called core and when it is started in SolrCloud mode the configuration is called Collection. In this example we will discuss about the standalone server and core. We will park the SolrCloud discussion for later time.
First, we need to create a Core for indexing the data. The Solr create command has the following options:
- -c <name> – Name of the core or collection to create (required).
- -d <confdir> – The configuration directory, useful in the SolrCloud mode.
- -n <configName> – The configuration name. This defaults to the same name as the core or collection.
- -p <port> – Port of a local Solr instance to send the create command to; by default the script tries to detect the port by looking for running Solr instances.
- -s <shards> – Number of shards to split a collection into, default is 1.
- -rf <replicas> – Number of copies of each document in the collection. The default is 1.
In this example we will use the -c parameter for core name and -d parameter for the configuration directory. For all other parameters we make use of default settings.
Now navigate the solr-5.0.0\bin folder in the command window and issue the following command.
solr create -c jcg -d sample_techproducts_configs
We can see the following output in the command window.
Creating new core 'jcg' using command:
http://localhost:8983/solr/admin/cores?action=CREATE&name=jcg&instanceDir=jcg{
"responseHeader":{
"status":0,
"QTime":1377},
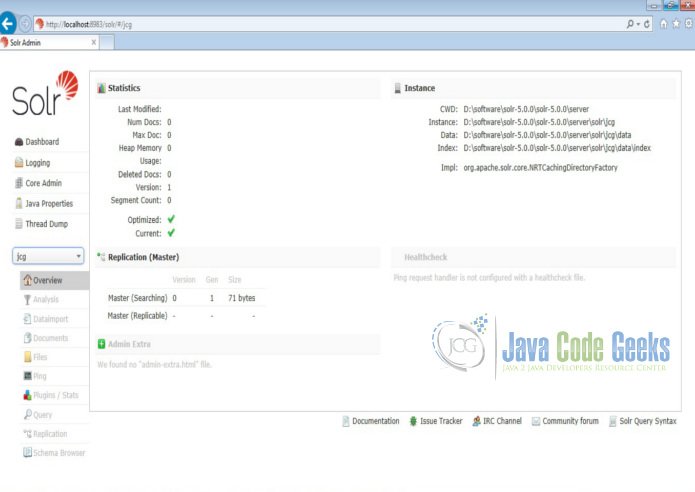
"core":"jcg"}Now we navigate to the following URL and we can see jcg core being populated in the core selector. You can also see the statistics of the core.
http://localhost:8983/solr
2.2 Highlighting configuration
Open the file solrconfig.xml under the folder server\solr\jcg\conf to understand the configuration for highlighting. In the file search for solr.HighlightComponent. This section has various various default fragmenter and formatter configuration.
Since we have created our core using the reference configuration sample_techproducts_configs all the default configuration are inherited to our core. We can also create basic core and include the highlight configuration parameters referring the solr documentation.
3. Indexing the Data
Apache Solr comes with a Standalone Java program called the SimplePostTool. This program is packaged into JAR and available with the installation under the folder example\exampledocs.
Now we navigate to the example\exampledocs folder in the command prompt and type the following command. You will see a bunch of options to use the tool.
java -jar post.jar -h
The usage format in general is as follows
Usage: java [SystemProperties] -jar post.jar [-h|-] [<file|folder|url|arg>

[<file|folder|url|arg>...]]
As we said earlier, we will index the data present in the “books.csv” file shipped with Solr installation. We will navigate to the solr-5.0.0\example\exampledocs in the command prompt and issue the following command.
java -Dtype=text/csv -Durl=http://localhost:8983/solr/jcg/update -jar post.jar books.csv
The SystemProperties used here are:
- -Dtype – the type of the data file.
- -Durl – URL for the jcg core.
The file “books.csv” will now be indexed and the command prompt will display the following output.
SimplePostTool version 5.0.0
 Posting files to [base] url http://localhost:8983/solr/jcg/update using content-type text/csv...
 POSTing file books.csv to [base]
 1 files indexed.
 COMMITting Solr index changes to http://localhost:8983/solr/jcg/update...
 Time spent: 0:00:00.604
4. Setting up the webproject
We will use the jQuery Ajax to consume the data from Solr. First, we will set up the maven project for a simple web application.
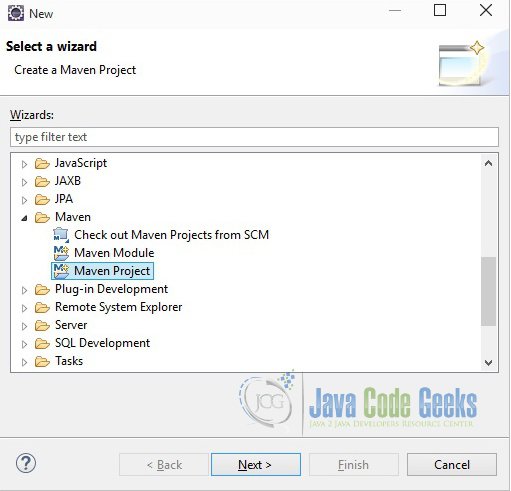
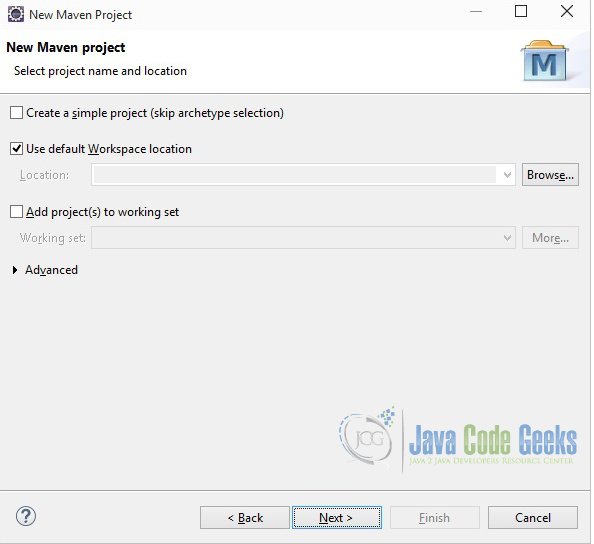
In eclipse go to File -> New->Other-> Maven Project.
In the “Select project name and location” page of the wizard, make sure that “Create a simple project (skip archetype selection)” option is unchecked, hit “Next” to continue with default values.

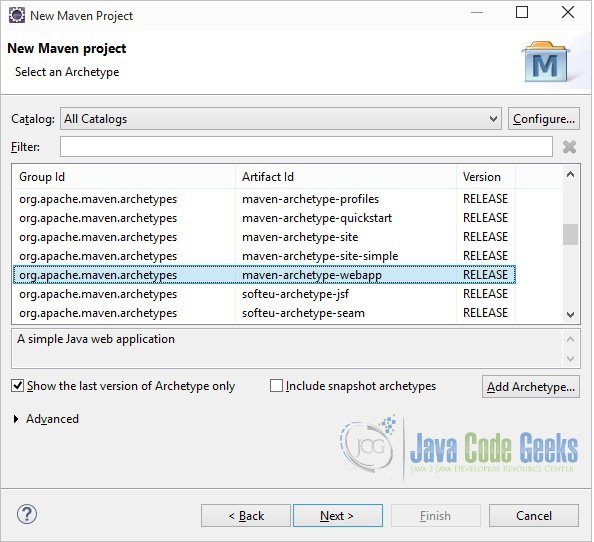
Here choose “maven-archetype-webapp” and click on Next.
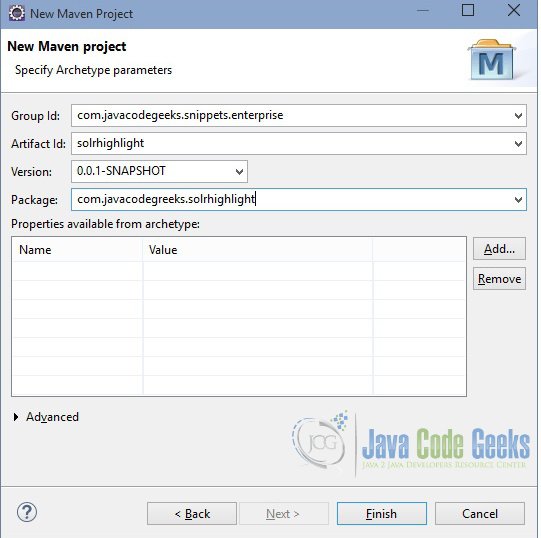
In the “Enter an artifact id” page of the wizard, you can define the name and main package of your project. Set the “Group Id” variable to "com.javacodegeeks.snippets.enterprise" and the “Artifact Id” variable to "solrhighlight". For package enter "com.javacodegreeks.solrhighlight" and hit “Finish” to exit the wizard and to create your project.
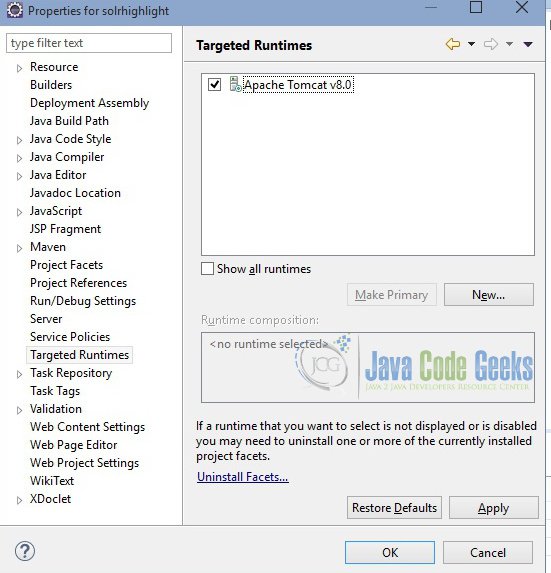
If you see any errors in the index.jsp , set target runtime for the project.
Now create a file called highlight.html in webapp folder. We are using the jQuery hosted on the cloud. We will use the jQuery AJAX to fetch the data from Solr and bind the highlighted response to the result div.
highlight.html
<!DOCTYPE html>
<html>
<head>
<meta charset="ISO-8859-1">
<title>Solr highlight</title>
<link
 href="http://code.jquery.com/ui/1.10.4/themes/ui-lightness/jquery-ui.css"
 rel="stylesheet"></link>
<script src="http://code.jquery.com/jquery-1.10.2.js"></script>
<script src="http://code.jquery.com/ui/1.10.4/jquery-ui.js"></script>
<script>
 function search() {
 var URL_PREFIX = "http://localhost:8983/solr/jcg/select?q=cat:book&hl=true&hl.q=";
 var URL_SUFFIX = "&hl.fl=*&hl.simple.pre=<strong>&hl.simple.post=</strong>&wt=json";
 var URL = URL_PREFIX + $("#searchBox").val() + URL_SUFFIX;
 $.ajax({
 url : URL,
 success : function(data) {
 var docs = JSON.stringify(data.highlighting);
 var jsonData = JSON.parse(docs);
 $("#result").html("");
 $.map(jsonData, function(value, key) {
 if (value.name === undefined) {
 //do nothing
 } else {
 var content = $("#result").html();
 $("#result").html(
 content + "<p>" + value.name[0] + "</p>");
 }
 });
 },
 dataType : 'jsonp',
 jsonp : 'json.wrf'
 });
 }
</script>
</head>
<body>
 <div>
 <p>Type The or Game or A or of and click on Search</p>
 <label for="searchBox">Tags: </label> <input id="searchBox"></input> <input
 type="button" value="Search" onclick="search();"></input>
 </div>
 <div id="result"></div>
</body>
</html>
Since Solr runs on a different port and the request (webpage) is initiated from another port, we might end up with cross domain issue. To overcome this we have to use jsonp.
Take a look at the parameters used in the Solr query of the html.
- hl – When set to true, enables highlighted snippets to be generated in the query response.
- hl.q – Specifies an overriding query term for highlighting.
- hl.fl – Specifies a list of fields to highlight.
- hl.simple.pre – Specifies the text that should appear before a highlighted term.
- hl.simple.post – Specifies the text that should appear after a highlighted term.
For the full list of parameter options refer to the Solr documentation.
Now we can create the deployment package using Run as –> Maven clean and then Run as –> Maven install. This will create a war file in the target folder. The war file produced must be placed in webapps folder of tomcat. Now we can start the server.
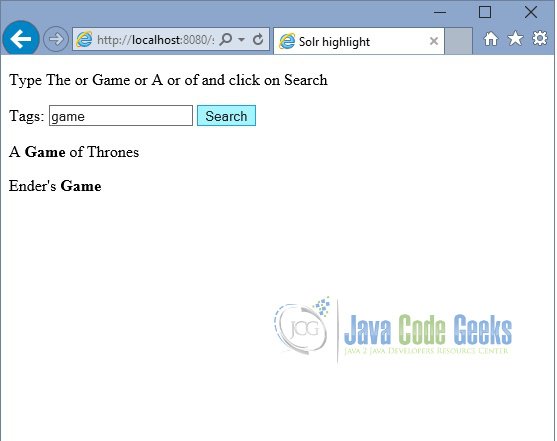
Open the following URL and type ‘game’ . This will bring results with books having title game and get highlighted.
http://localhost:8080/solrhighlight/highlight.html
5. Download the Eclipse Project
This was an example of Solr highlight.
You can download the full source code of this example here : solr highlight
