In this example of Dataimporthandler, we will discuss about how to import and index data from a database using Dataimporthandler. Also we will discuss about various configuration needed to import the data from a relational database. Many search applications store the content to be indexed in a structured data store, such as a relational database. Apart from database, the DIH can be used to index content from RSS and ATOM feeds, email repositories and structured XML.
To demonstrate the import feature from a database, we will use a sample hsql database that gets shipped with Solr server. Our preferred environment for this example is solr-5.0.0. Before you begin the Solr installation make sure you have JDK installed and Java_Home is set appropriately.
1. Install Apache Solr
To begin with, lets download the latest version of Apache Solr from the following location:
http://lucene.apache.org/solr/downloads.html
Apache Solr has gone through various changes from 4.x.x to 5.0.0, so if you have a different version of Solr you need to download the 5.x.x. version to follow this example.
Once the Solr zip file is downloaded, unzip it into a folder. The extracted folder will look like the below:
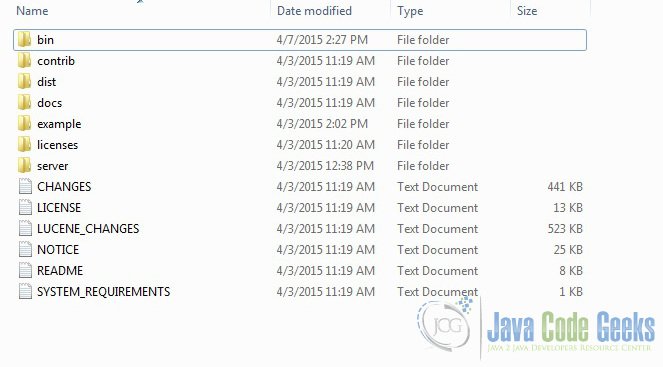
The bin folder contains the scripts to start and stop the server. The example folder contains few example files. We will be using one of them to demonstrate how Solr indexes the data. The server folder contains the logs folder where all the Solr logs are written. It will be helpful to check the logs for any error during indexing. The solr folder under server holds different collection or core. The configuration and data for each of the core/ collection are stored in the respective core/ collection folder.
Apache Solr comes with an inbuilt Jetty server. But before we start the solr instance we must validate the JAVA_HOME is set on the machine.
We can start the server using the command line script. Lets go to the bin directory from the command prompt and issue the following command:
solr start
This will start the Solr server under the default port 8983.
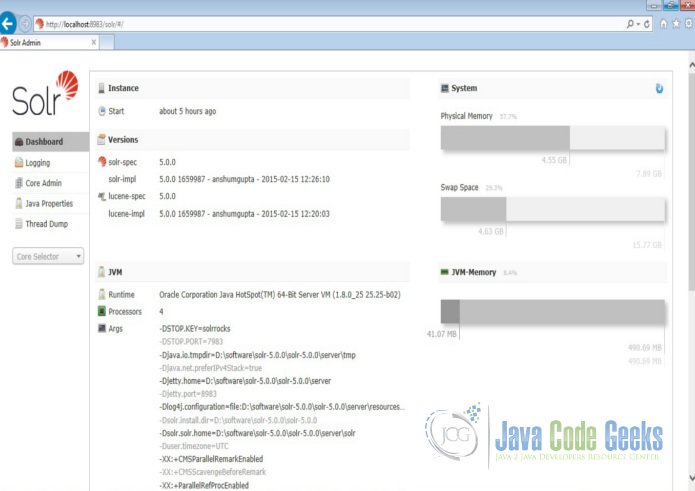
We can now open the following URL in the browser and validate that our Solr instance is running. The specifics of solr admin tool is beyond the scope of the example.
http://localhost:8983/solr/
2. Create a Solr core
When the Solr server is started in Standalone mode, the configuration is called core and when it is started in SolrCloud mode, the configuration is called Collection. In this example we will discuss about the standalone server and core. We will park the SolrCloud discussion for later time.
First, we need to create a Core for indexing the data. The Solr create command has the following options:
- -c <name> – Name of the core or collection to create (required).
- -d <confdir> – The configuration directory, useful in the SolrCloud mode.
- -n <configName> – The configuration name. This defaults to the same name as the core or collection.
- -p <port> – Port of a local Solr instance to send the create command to; by default the script tries to detect the port by looking for running Solr instances.
- -s <shards> – Number of shards to split a collection into, default is 1.
- -rf <replicas> – Number of copies of each document in the collection. The default is 1.
In this example we will use the -c parameter for core name and -d parameter for the configuration directory. For all other parameters we make use of default settings.
Now navigate the solr-5.0.0\bin folder in the command window and issue the following command:
solr create -c jcg -d basic_configs
We can see the following output in the command window.
Creating new core 'jcg' using command:
http://localhost:8983/solr/admin/cores?action=CREATE&name=jcg&instanceDir=jcg

{
 "responseHeader":{
 "status":0,
 "QTime":663},
 "core":"jcg"}
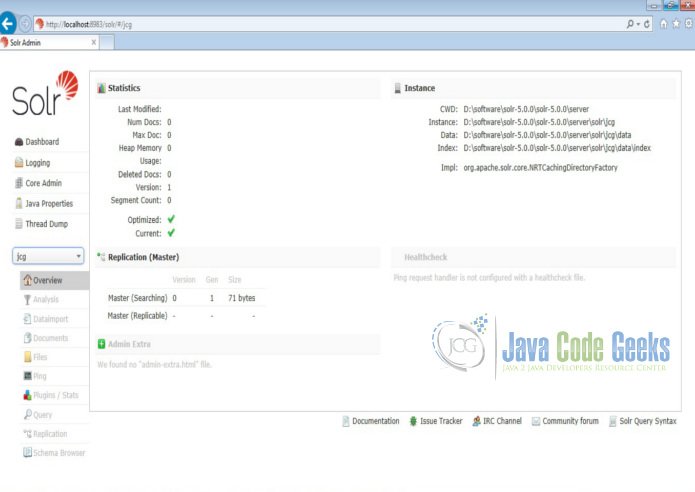
Now we navigate to the following URL and we can see jcg core being populated in the core selector. You can also see the statistics of the core.
http://localhost:8983/solr
3. Configure Dataimporthandler
There are multiple configurations we need to take care of, when using the Dataimporthandler. The configuration span across three different files
- solrconfig.xml
- db-data-config.xml
- schema.xml
We will discuss all the configuration steps here.
3.1 Configure necessary Libraries
To use the Dataimporthandler along with hsql database we need their respective libraries to be loaded first. So lets configure the solrconfig.xml under the folder server\solr\jcg\conf to load the necessary libraries. Add the following configuration to the file:
solrconfig.xml
<luceneMatchVersion>5.0.0</luceneMatchVersion>
<lib dir="${solr.install.dir:../../../..}/dist/" regex="solr-dataimporthandler-.*\.jar" />
<lib dir="${solr.install.dir:../../../..}/contrib/extraction/lib" regex=".*\.jar" />
Now, copy the hsqldb*.jar from the path example\example-DIH\solr\db\lib to contrib\extraction\lib
3.2 Configure requestHandler
The Dataimporthandler has to be registered in the solrconfig.xml by way of requestHandler tag. The only required parameter in the configuration is the config parameter which specifies the location of the DIH configuration file. The configuration file contains the specifications for the data source, how to fetch data, what data to fetch, and how to process it to generate the Solr documents to be posted to the index.
solrconfig.xml
 <requestHandler name="/dataimport" class="solr.DataImportHandler">
 <lst name="defaults">
 <str name="config">db-data-config.xml</str>
 </lst>
 </requestHandler>

 <!-- SearchHandler
3.3 Configure db-data-config.xml
Now, create a file called db-data-config.xml under the folder server\solr\jcg\conf. Populate the file with the following content.
db-data-config.xml
<dataConfig>
 <dataSource driver="org.hsqldb.jdbcDriver" url="jdbc:hsqldb:${solr.install.dir}/example/example-DIH/hsqldb/ex" user="sa" />
 <document>
 <entity name="item" query="select id, NAME, price, manu from item">
 <field column="NAME" name="name" />
 </entity>
 </document>
</dataConfig>
In the above query we have selected only id, NAME, price and manu fields for indexing from the table item. The field element can be used to rename the field from the database to a name that we want to refer in the Solr index.
3.4 Configure schema.xml
Now, we have to add the datatypes in Solr schema, in relation to the datatypes we retrieve from the hsql database of the entity item. Now edit the schema.xml file and add the following content:

schema.xml
 <!-- Only remove the "id" field if you have a very good reason to. While not strictly
 required, it is highly recommended. A <uniqueKey> is present in almost all Solr
 installations. See the <uniqueKey> declaration below where <uniqueKey> is set to "id".
 -->
 <field name="id" type="string" indexed="true" stored="true" required="true" multiValued="false" />
 <field name="name" type="text_general" indexed="true" stored="true"/>
 <field name="price" type="float" indexed="true" stored="true"/>
 <field name="manu" type="text_general" indexed="true" stored="true" omitNorms="true"/>
Since we have changed the configuration file we have to restart the Solr instance to load the new configuration. Lets issues the following commands.
solr stop -all
solr start
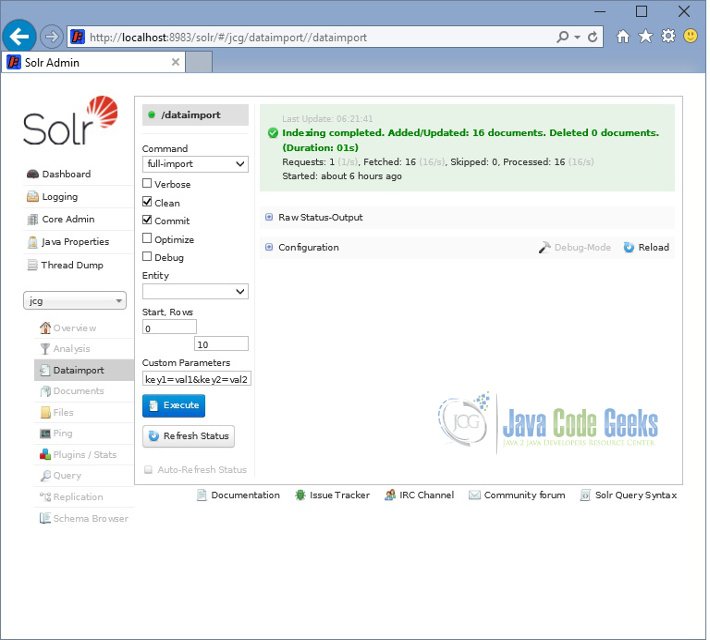
4. Full-Import through Console
Now we will launch the admin console and do a full import of the data. Open the following URL and click on the execute button.
http://localhost:8983/solr/#/jcg/dataimport//dataimport
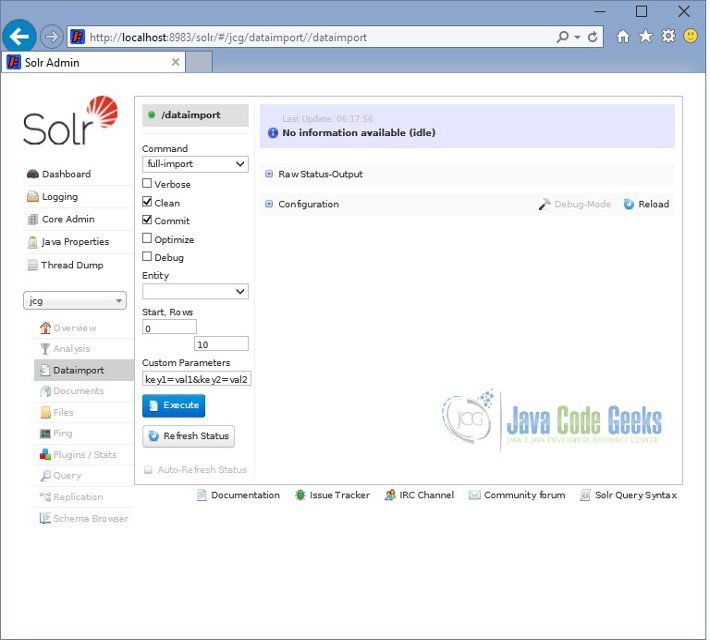
After few seconds refresh the page, we can see the index completion status.
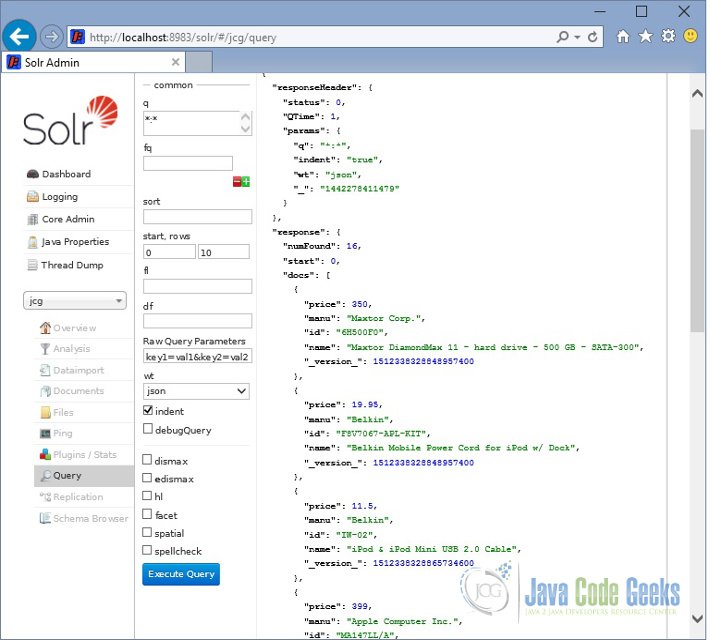
Now open the following URL and click on the Execute Query button. we can see the indexed data.
http://localhost:8983/solr/#/jcg/query
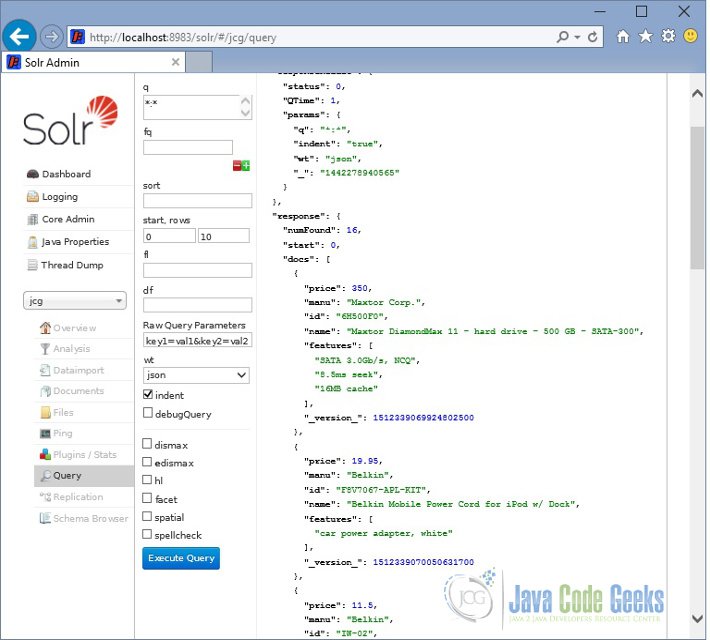
5. Add new Column to index
Now we will see how to add another column to the index. We will fetch features associated with each item. To do so, we will edit the db-data-config.xml and add the following highlighted lines.
<dataConfig>
 <dataSource driver="org.hsqldb.jdbcDriver" url="jdbc:hsqldb:${solr.install.dir}/example/example-DIH/hsqldb/ex" user="sa" />
 <document>
 <entity name="item" query="select id, NAME, price from item"
 deltaQuery="select id from item where last_modified > '${dataimporter.last_index_time}'">
 <field column="NAME" name="name" />
 <entity name="feature"
 query="select DESCRIPTION from FEATURE where ITEM_ID='${item.ID}'">
 <field name="features" column="DESCRIPTION" />
 </entity>
 </entity>
 </document>
</dataConfig>
Now modify the schema.xml to configure the newly added field.
<!-- Only remove the "id" field if you have a very good reason to. While not strictly
 required, it is highly recommended. A <uniqueKey> is present in almost all Solr
 installations. See the <uniqueKey> declaration below where <uniqueKey> is set to "id".
 -->
 <field name="id" type="string" indexed="true" stored="true" required="true" multiValued="false" />
 <field name="name" type="text_general" indexed="true" stored="true"/>
 <field name="price" type="float" indexed="true" stored="true"/>
 <field name="manu" type="text_general" indexed="true" stored="true" omitNorms="true"/>
 <field name="features" type="text_general" indexed="true" stored="true" multiValued="true"/>
Since we have changed the configuration file we have to restart the Solr instance to load the new configuration. Lets issues the following commands.
solr stop -all
solr start
Now again we do a full import. Open the following URL and click on the Execute Query button. We can see the features getting added to each of the item.
http://localhost:8983/solr/#/jcg/query
6. Download the Configuration
This was an example of Dataimporthandler.
You can download the configuration files of this example here: DIH_configuration
