1. Introduction
Apache Solr is a powerful tool for real-time enterprise search. It is a REST-API based open source tool. It’s main functionalities are indexing and searching. It’s core search functionality is built using Apache Lucene Framework and has some excellent optimization features. It is written in Java Language.
Features of Apache Solr
- Open source tool
- Advanced full text search capabilities
- Faceted navigation feature
- Supports Auto-Completion
- Supports REST Based API (JSON over HTTP)
- Supports Real-time Search and Analytics
SOLR stands for Searching On Lucene w/Replication.
2. Local installation of Apache Solr
This example works with Apache Solr version 6.5.1. The download links and steps are provided at this URL: http://www.apache.org/dyn/closer.lua/lucene/solr/6.5.1.
For this example, I will provide the steps for installation on a Windows system. (Similar steps for Linux and Mac OS are available in the documentation in above URL).
- Download the zip file solr-6.5.1.zip and extract into any location on your machine. (I unzipped it at C:\solr-6.5.1).
- Set environment variables:
SOLR_HOME= C:\solr-6.5.1PATH=${SOLR_HOME}\bin
3. Start/Stop Apache Solr Locally
First, navigate to the Solr bin folder path in local machine or work space (where the solr zip package had been unwrapped). To start the Solr server, the following command needs to be run at the command prompt:
solr start

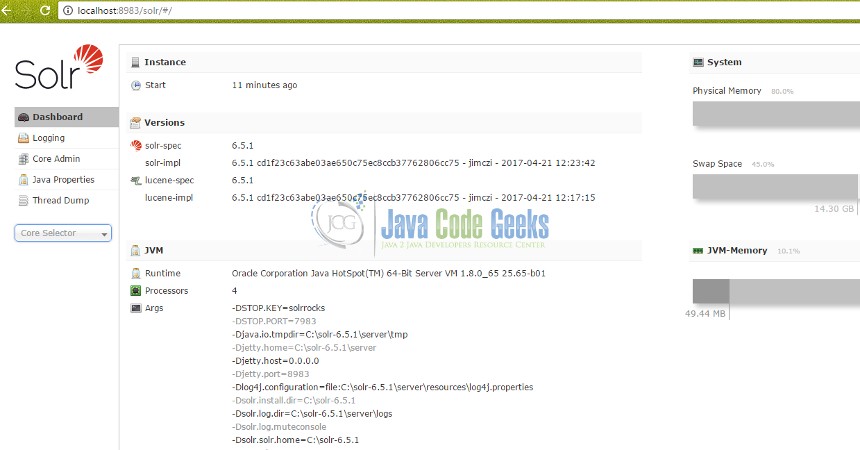
Solar server should be up and running successfully in local. After the following success messages are displayed in the command prompt, open any browser and enter the local Solr URL ( http://localhost:8983/solr/ ) as shown in Fig. 2. The Solr homepage is displayed. The Solr instance will run on the default port of 8983, unless set otherwise.

In some cases, you may need to add solr.xml to the main Solr path (if already not present or if any issues are encountered). This is one of the main configuration files to run Solr. This file provides the basic configuration details which the Solr instance needs to run locally. The sample below can be used as a default one.
solr.xml
<solr>
<solrcloud>
<str name="host">${host:}</str>
<int name="hostPort">${jetty.port:8983}</int>
<str name="hostContext">${hostContext:solr}</str>
<int name="zkClientTimeout">${zkClientTimeout:15000}</int>
<bool name="genericCoreNodeNames">${genericCoreNodeNames:true}</bool>
</solrcloud>
<shardHandlerFactory name="shardHandlerFactory"
class="HttpShardHandlerFactory">
<int name="socketTimeout">${socketTimeout:0}</int>
<int name="connTimeout">${connTimeout:0}</int>
</shardHandlerFactory>
</solr>
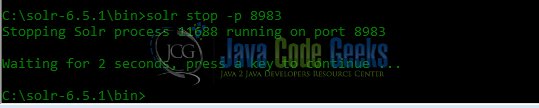
To stop the Solr instance, the command as shown in Fig. 3 needs to executed at cmd. The port number needs to be specified as part of the command. In this example, as mentioned earlier, we are using the default port for Solr – port number 8983.
solr stop -p 8983
To have the Solr instance running on a different port, the following command needs to be executed (using port number 9000):
solr start -p 9000
4. Apache Solr Terminology
For this example, we will be working with two of the basic Solr components – Apache Solr Core and Document.
Core: A Solr core is an index of texts and fields available in documents. A single Solr instance can contain multiple “cores”, which are separate from each other based on local criteria. The multiple cores may provide different search interfaces to users or they can be separated by alternating security concerns.
Document: This is the basic unit of information in Apache Solr. This is a set of data which is used to describe or map entity attributes as per use case or requirements. These contain the group of fields, the data types and their values, on which indexing and searching will be performed. The field data types allow Solr to interpret the field and decide how it can be queried. Documents are available in different formats like JSON, XML, CSV etc.
5. Create “HelloWorld” Apache Solr Core
Next, we will create a “HelloWorld” core in Solr and upload a document to it with certain attributes and different data types. Finally we will query that indexed data using parameters.
Creating a Apache Solr Core or Document can be done in one of the following ways:
- Apache Solr Comamnds
- Admin Console
- REST API
- CURL Command
In this example, we will be using Solr commands as well as the Admin console.
First, let’s create a helloWorld core project. The Apache Solr local server should be running. As done previously, we need to navigate to the bin folder of Solr local instance. Create command syntax (as shown in Fig. 4).
solr create -c <SOLR_CORENAME>
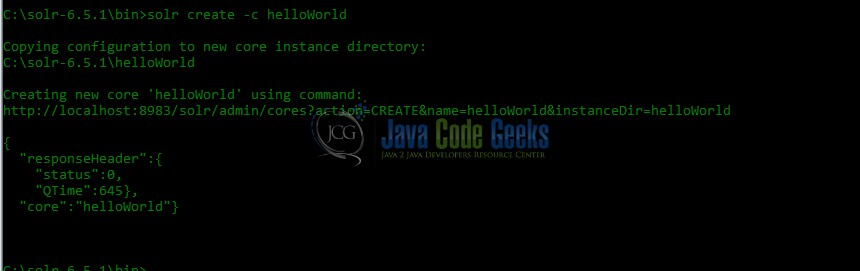
Here create command is used to create Core and -c option specifies Solr Core Name.
REST API URL in output – http://localhost:8983/solr/admin/cores?action=CREATE&name=helloWorld&instanceDir=helloWorld . This REST endpoints can be used to query Solr data or plug them in client application code.
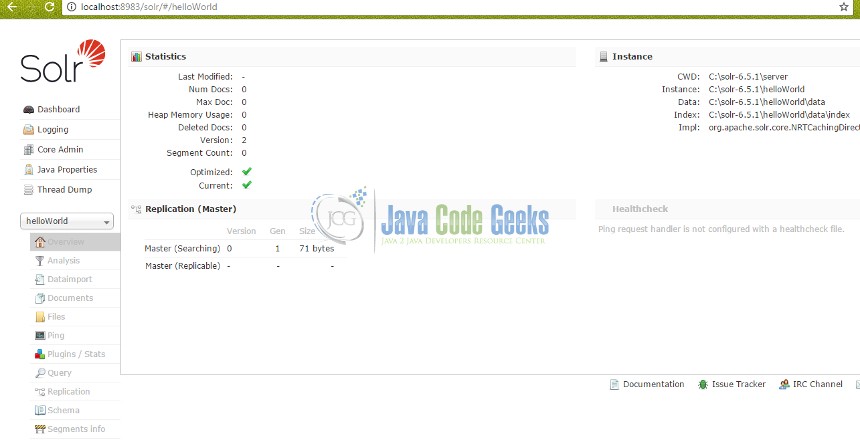
The new project will show up under the “Core Selector” option in the Admin console (Fig. 6).
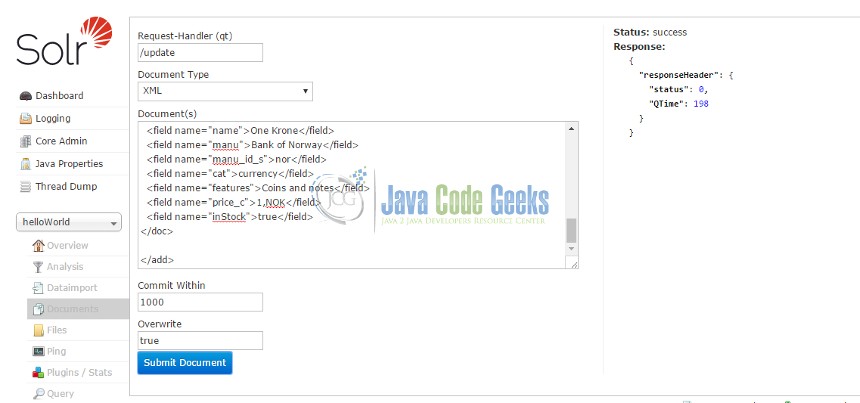
Next step – add a new Document to the Core. For this, navigate to Core Selector -> Document option. Different file types are supported to be used as documents. The file contents for a document can be directly entered into the section “Document” as shown in Fig. 7. There is an option for file upload as well.

For this example, we will be using one of the sample documents (money.xml) provided with Solr. (These are available in path ..\solr-6.5.1\example\exampledocs ). There are several other sample documents provided. These consist of different entities and attribute types.
After uploading or entering the document contents in the section specified, click on “Submit” button. Solr will throw exceptions or error messages if the uploaded entity attributes do not conform to expected data types or formats. On successful upload, the below screen (Fig. 8) is displayed.
Now the document is part of the core. It has been indexed and is ready to queried.
6. Query Documents from Core
Now, the uploaded data is indexed and available for searching. REST API or Admin Console can be used to query the Document in Apache Core. These are the 2 options provided by Solr.The REST API based option is particularly helpful when you have a client which needs to invoke or query Solr instances. (These will be covered in detail in future sections).
Different search parameters and/or conditions can be used as per use case needs. To fetch the entire set of elements present in a document, a wild card search can be performed by entering “*:*” as a query ‘q’ parameter value, as shown in Fig. 9.
Searching for ALL:

REST API for this search – http://localhost:8983/solr/helloWorld/select?indent=on&q=*:*&wt=json
Now, let’s do a simple search with specific query conditions as part of our helloWorld example. We will search for entities with the field value of “Bank of America”. Hence, in the query ‘q’ field, the search criteria is entered as manu:Bank of America (See Fig. 10). This pulls up the correct queried data (Fig. 10).
The search parameters can be modified/extended as per need. The count, sorting and other features of the queried can be easily modified as well.
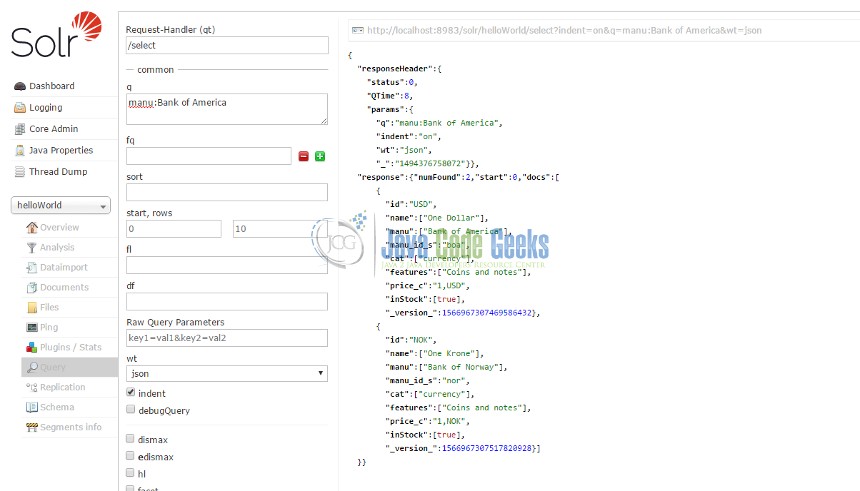
REST API for search – http://localhost:8983/solr/helloWorld/select?indent=on&q=manu:Bank%20of%20America&wt=json
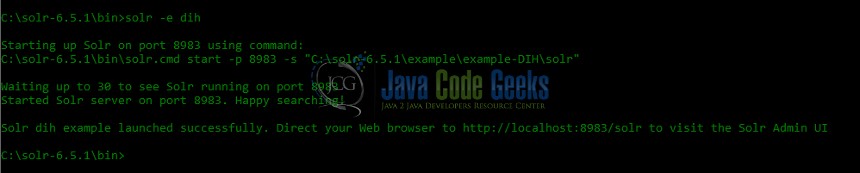
If you wish to play around with Solr, you can use the available sample cores. To run a specific example, execute:
bin/solr -e <EXAMPLE>
where <EXAMPLE> is one of:
- cloud : SolrCloud example
- dih : Data Import Handler (rdbms, mail, rss, tika)
- schemaless : Schema-less example (schema is inferred from data during indexing)
- techproducts : Kitchen sink example providing comprehensive examples of Solr features
For instance, if you want to run the Solr Data Import Handler example, do as in Fig.11:
7. Conclusion
In this example, we have learned the following:
- How to install and have Solr running in local workspace
- Create a Solr Core and setup a Solr document for indexing and searching
- Search in Solr using parameters.
This is a simple HelloWorld Solr example to go over the basic features of Solr and Solr search. Hope this helps to get things started on lighter note. Solr is an incredibly powerful tool with advanced indexing and searching capablities. It’s rich support for different interfaces, programming languages and use of standard HTTP REST APIs with XML and JSON support makes it an ideal candidate for seamless integration with enterprise applications.
