One of the main challenges for every beginner in the development world is to understand and assimilate how things works internally in a technology in order to create their own code. More than that, make this code working, flexible, standardized and functional for a project that, most of the times, is already running.
Servlets are known for their complexities regarding the way code works inside of the specification core. When it comes to manipulate data and navigate it from one place to another, this complexity can increase considerably (even more if we’re talking about JSPs, Expression Language, scopes, etc.).
Besides all that, we still have to remember that a web application, published on a server, has to deal with multiple threads/requests arriving all the time, a session management for each different user that starts a communication with the same application, a context for the whole system in order to maintain important data the container and the application itself are going to use to exchange information and keep things under control.
This article aims to facilitate part of this understanding. Specifically talking about the Java Servlet Set/Get variables. Variables help us to store data in different types of scopes and get it further in our pages, other servlets, in everywhere we have a request object in hands. Now, we’re going to see, in practice, some examples of how to best use them.
1. Servlet Scopes
There are three main servlet scopes in Java web: request, session and application (or context) scopes. Let’s see what is the difference among them:
- request: this scope exists to store data for a request object life. From the exact moment a request is sent by the browser to the time we redirect and forward the response back to the client, this scope is valid. You must use it every time you want to send any data to your Servlet that can die right after the request is finished;
- session: just like every web application, in Java web we need to create a single session for each client that started a communication with us. Sessions also save attributes and they’re going to survive until the session itself gets ended. You must save values here every time you want them during more than a single request. Don’t forget that this data is going to be erased when the session ends, so make sure your data is properly saved somewhere else if it’s important to keep it;
- application: this scope attends a specific storing, when you need to save some information for whole application lifecycle. It means that the information is the same no matter who is accessing (i.e., every request and every session can see the data, and also alter it in the same exactly place). You must use carefully, just when the variable makes sense for the whole application.
2. Java Servlet Set/Get Example
Let’s create a new web application of our Set/Get Attribute Example in Java, using the latest version of Eclipse IDE and Tomcat. Despite of being possible to create a whole web application with Maven, we’re going to simplify using the native IDE internal tools.
So, create a new project going to File > New > Dynamic Web Project. Give the project a name and select the proper target runtime configurations:
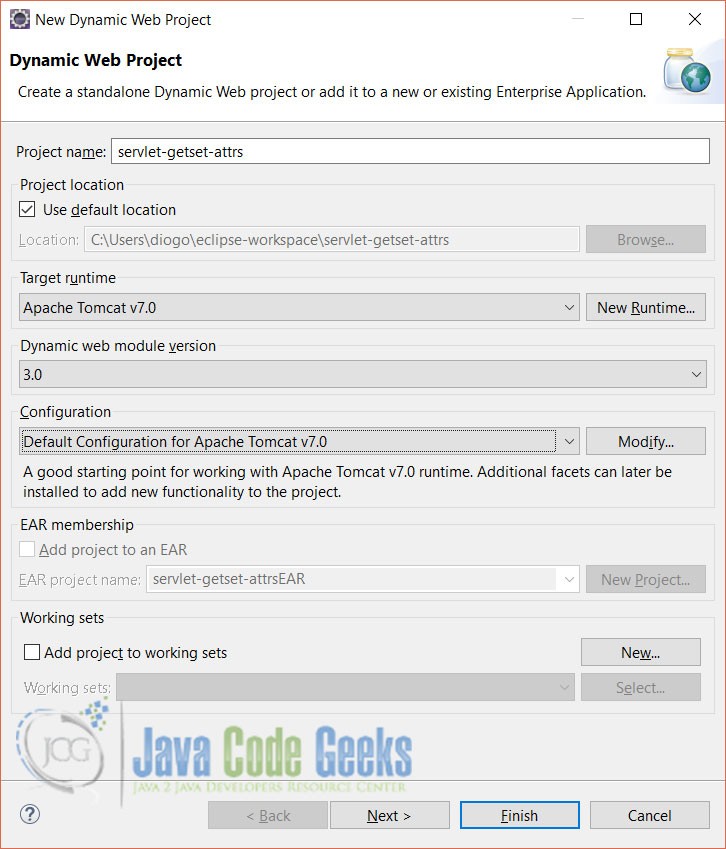
At this time, you must have already downloaded and set up Tomcat to your IDE (see the default configuration for Apache Tomcat). Click Next until the end and leave all the options with their respective default values.
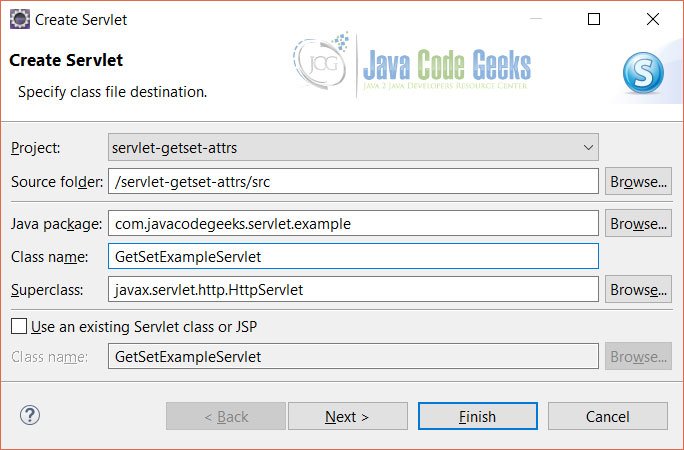
Once you finish the project setup, let’s gonna create our Servlet class in order to better understand how to set and get variables in different scopes.
Go to your project and right click it, then select New > Servlet. In the next screen, inform a package and class name for our servlet:
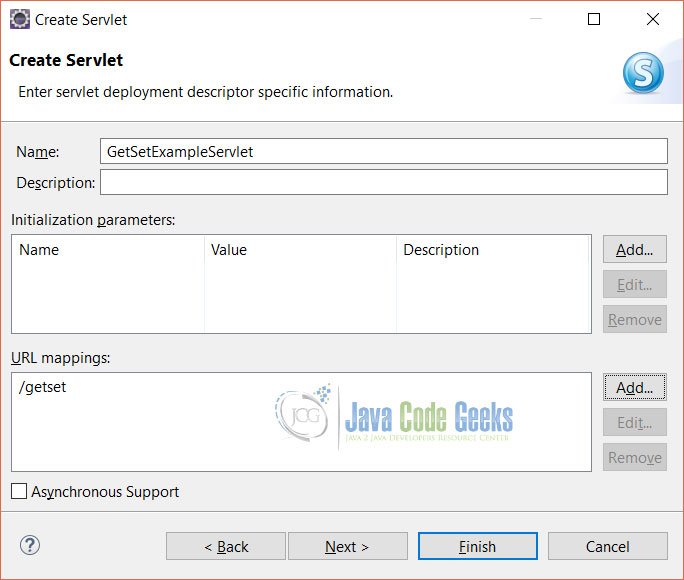
Click Next. In the next screen, you’ll be prompted to inform the description of your servlet (optional, for documentation purposes only), the initialization parameters (if you’re interested on setting up any parameter to your servlet when the container starts up) and the url pattern mappings.
The last one, specifically, is responsible for setting the routes (i.e., the servlet classes) each request that comes to your application is going to be redirected as soon as it arrives. In our case, in order to make the final URI simpler, let’s use the pattern /getset.
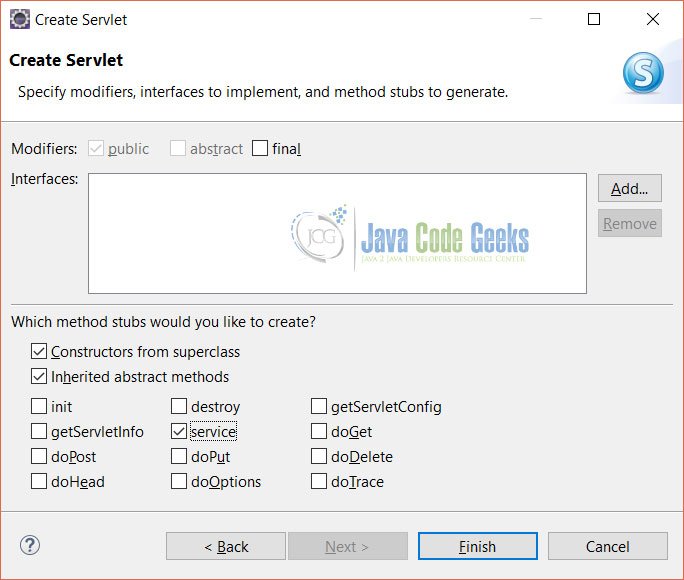
Click Next. After that, you’ll see a screen asking for the class modifiers and interfaces your servlet should implement, so just leave them as they come. Regarding the methods stubs, uncheck the doPost, doGet and check the service option. Click Finish.
2.1. Setting the attributes
Eclipse is going to create some auto generated code, including a constructor and the service method, just like we’ve selected before.
For more details about how a Servlet works, its lifecycle and a hello world example, check our Java Servlet Hello World article.
Next, update your servlet class with following code:
GetSetExampleServlet
package com.javacodegeeks.servlet.example;

import java.io.IOException;
import javax.servlet.ServletException;
import javax.servlet.annotation.WebServlet;
import javax.servlet.http.HttpServlet;
import javax.servlet.http.HttpServletRequest;
import javax.servlet.http.HttpServletResponse;

/**
 * Servlet implementation class GetSetExampleServlet
 */
@WebServlet("/getset")
public class GetSetExampleServlet extends HttpServlet {
	private static final long serialVersionUID = 1L;

    /**
     * @see HttpServlet#HttpServlet()
     */
    public GetSetExampleServlet() {
        super();
        // TODO Auto-generated constructor stub
    }

	/**
	 * @see HttpServlet#service(HttpServletRequest request, HttpServletResponse response)
	 */
	protected void service(HttpServletRequest request, HttpServletResponse response) throws ServletException, IOException {
		request.setAttribute("mySecretMessage", "I'm a request geek!");
		request.getSession().setAttribute("mySecretMessage", "I'm a session geek!");
		request.getServletContext().setAttribute("mySecretMessage", "I'm a context geek!");

		request.getRequestDispatcher("index.jsp").forward(request, response);
	}

}
Let’s notice some important things:
- All the important code of our Servlet resides in our service method. There, you can see three different types of attribute settings: the request, session and context (or application) scoped variables. Note that, for each type of setting, we always start from the request object. This is because that’s the object we receive as soon as a request is sent by the client. The Servlet architecture is prepared to fill the whole object with the proper dependencies in which it is dependent (in this case, the session and the servlet context);
- A variable must always be set informing its name (first parameter, the one we’ll use to get the variable further) and its value;
- Here, in the example, we’re purposely setting the three variables with the same values. This is for you to understand how scopes work along with JSP and other web resources, later in this article.
- In the end, we just redirect to a page (
index.jsp) that’ll create right on.
2.2. Getting the attributes
Before we can get any of the attributes we’ve just set, we need first to create a JSP (remember, every JSP is, in the end, a Servlet mixed with HTML and controled by the Java web container).
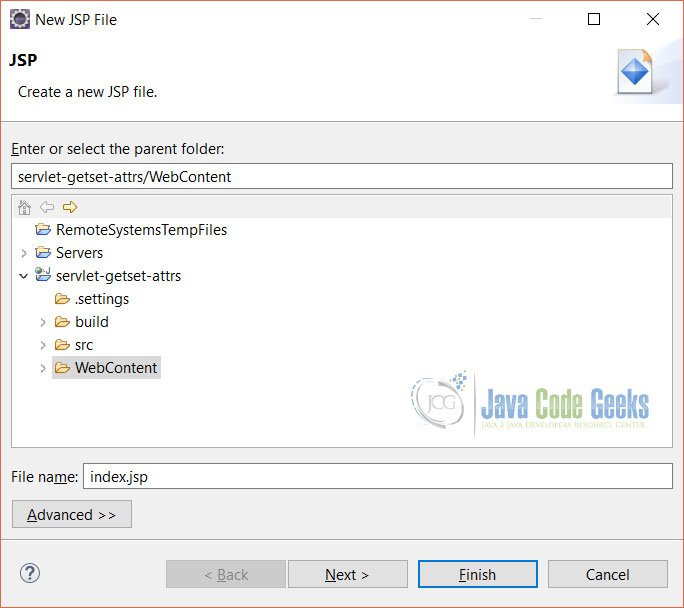
So, go to your /WebContent folder, right click it and select New > JSP File. Give it a name and click Next.
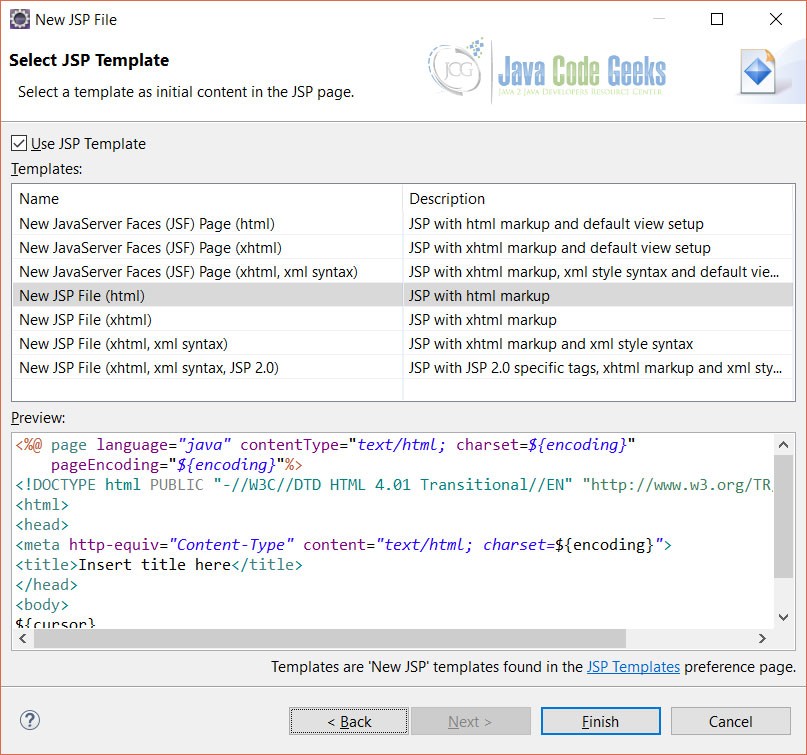
In the next screen, you’ll be asked to choose a JSP template. Select the New JSP File (html) option and click Finish.
This is going to generate the same JSP code as you see in the template view. Update the file with the following code:
index.jsp
<%@ page language="java" contentType="text/html; charset=ISO-8859-1"
    pageEncoding="ISO-8859-1"%>
<!DOCTYPE html PUBLIC "-//W3C//DTD HTML 4.01 Transitional//EN" "http://www.w3.org/TR/html4/loose.dtd">
<html>
<head>
<meta http-equiv="Content-Type" content="text/html; charset=ISO-8859-1">
<title>Get/Set Example</title>
</head>
<body>
	Message from request: <b><%= request.getAttribute("mySecretMessage") %></b>
	<br />
	Message from session: <b><%= session.getAttribute("mySecretMessage") %></b>
	<br />
	Message from context: <b><%= request.getServletContext().getAttribute("mySecretMessage") %></b>
	<br />
	Message from EL: <b>${mySecretMessage}</b>
	<br />

	<a href="home.jsp">Go Home!</a>
</body>
</html>
Let’s understand closer what’s happening here:
- We’re accessing the attributes via JSP expressions (
<%= %>). All we need to pass is the variable name set in the Servlet; - Note that, inside any JSP scriptlet, we can access the
requestandsessionobjects implicitly. This is one of the advantages the language gives to us; - The first three expressions show how to properly access an attribute in a request, session and application scope, respectively. There’s no context implicit object available for JSP expressions, that’s why we need to access it through
getServletContext()method; - In the end, we’re also getting the same attribute via Expression Language. Here, you don’t need to access any implicit object, just put the name of the variable and the EL is going to understando where to find it.
Note also that we inserted a link in the end of the page in order to redirect it to another JSP. This is because you need to see what happens with the same variable for each scope when we create a new request.
The code of the new JSP file (home.jsp) can be seen in the following code listing (it is practically the same as the first JSP):
home.jsp
<%@ page language="java" contentType="text/html; charset=ISO-8859-1"
    pageEncoding="ISO-8859-1"%>
<!DOCTYPE html PUBLIC "-//W3C//DTD HTML 4.01 Transitional//EN" "http://www.w3.org/TR/html4/loose.dtd">
<html>
<head>
<meta http-equiv="Content-Type" content="text/html; charset=ISO-8859-1">
<title>Get/Set Example</title>
</head>
<body>
	Message from request: <b><%= request.getAttribute("mySecretMessage") %></b>
	<br />
	Message from session: <b><%= session.getAttribute("mySecretMessage") %></b>
	<br />
	Message from context: <b><%= request.getServletContext().getAttribute("mySecretMessage") %></b>
	<br />
	Message from EL: <b>${mySecretMessage}</b>
</body>
</html>
3. Running the project
Now, to see our code running, import the project into your Tomcat and start it up. Then, access the following URL at your browser to see the result:
http://localhost:8080/servlet-getset-attrs/getset
If everything is fine you should get the following screen:
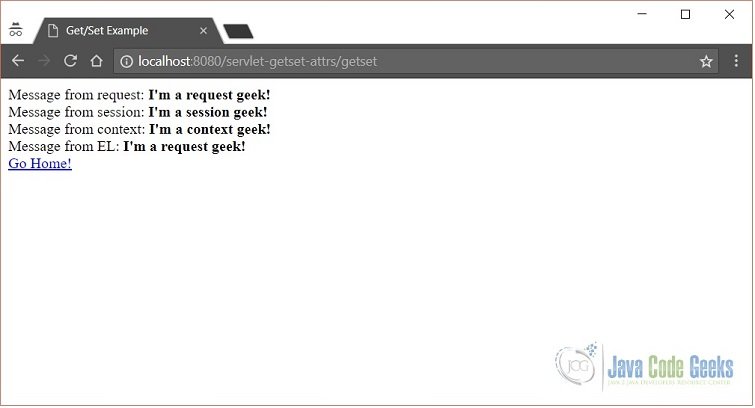
Observe that each value is properly recovered from the specific context. The EL access it first in the request scope, by default. Let’s then click on the link in the end of the page, you’ll see the following screen:
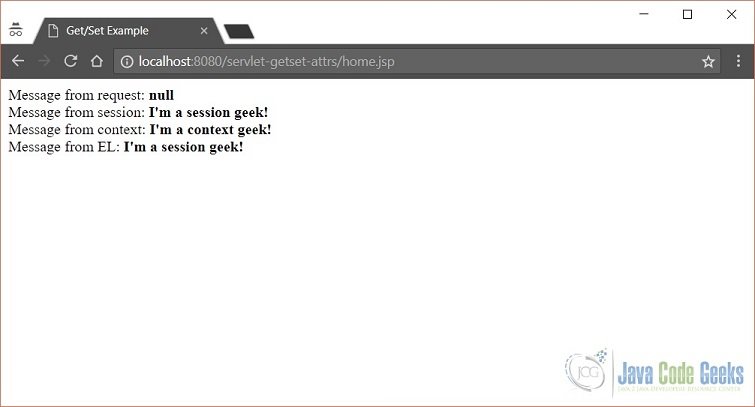
See that, now, the previous value of our request attribute does not exist anymore since we’ve redirected to a new page (and this has generated a new request object). Since we don’t have a request scope anymore, the next one EL is going to access is the session (and, finally, the context in the precedence).
4. Download the Complete Source Code
That was the Java Servlet Set/Get Example.
You can download the full source code of this example here: servlet-getset-attrs
