Servlets are modules of the Java code that run in a server application to answer the client requests. In this tutorial, we will show you how to store the user information in the cookie object and access it in the Servlet.
1. Introduction
Servlet is a Java program which exists and executes in the J2EE servers and is used to receive the HTTP protocol request, process it and send back the response to the client. Servlets make use of the Java standard extension classes in the packages javax.servlet and javax.servlet.http. Since Servlets are written in the highly portable Java language and follow a standard framework, they provide a means to create the sophisticated server extensions in a server and operating system in an independent way.
Typical uses for HTTP Servlets include:
- Processing and/or storing the data submitted by an
HTMLform - Providing dynamic content i.e. returning the results of a database query to the client
- Managing state information on top of the stateless
HTTPi.e. for an online shopping cart system which manages the shopping carts for many concurrent customers and maps every request to the right customer
As Servlet technology uses the Java language, thus web applications made using Servlet are Secured, Scalable, and Robust.
1.1 Cookies in Servlet
A Cookie is a small piece of information that is persisted between the multiple client requests. A cookie has a name, a single value, and optional attributes such as a comment, path and domain qualifiers, a maximum age, and a version number.
Some of the common usages of cookies are:
- Session authentication using cookies i.e.
HttpSessionuses theJSESSIONIDcookie to keep track of the user session - Personalized response to the client based on their preference. For e.g. Developers can set the background color as cookie in the client browser and then use it to customize the response background color, image etc
1.1.1 How Cookies Work?
By default, each request is considered as a new request. In this technique, developers add a cookie with the response object from the servlet. So the cookie is stored in the cache of the browser. After that, if the request is sent by the user, the cookie is by default added with the request object. Thus, we recognize the user as the old user.

1.1.2 Types of Cookie
There are 2 types of cookies in the Servlets:
- Non-Persistent Cookie: It is valid for a single session and is removed each time the user closes the web browser
- Persistent Cookie: It is valid for multiple sessions and is not removed each time the user closes the web browser. It is only removed if the user log-out or sign-out from the application
1.1.3 Useful methods of Cookie class
javax.servlet.http.Cookie class provides the functionality of using Cookies. Below are given some commonly used methods of the Cookie class:
| Method | Description |
|---|---|
public void setMaxAge(int expiry) | Sets the maximum age of the Cookie in seconds. |
public String getName() | Returns the name of the Cookie and the name cannot be changed after creation. |
public String getValue() | Returns the value of the Cookie. |
public void setName(String name) | Changes the name of the Cookie. |
public void setValue(String value) | Changes the value of the Cookie. |
Now, open up the Eclipse Ide and let’s see how to set the Cookies in the Servlet and send it to a browser. This example will print the Cookie information and send it as an HTML response.
2. Java Servlet Cookie Methods Example
Here is a step-by-step guide for implementing the Servlet framework in Java.
2.1 Tools Used
We are using Eclipse Kepler SR2, JDK 8 and Maven. Having said that, we have tested the code against JDK 1.7 and it works well.
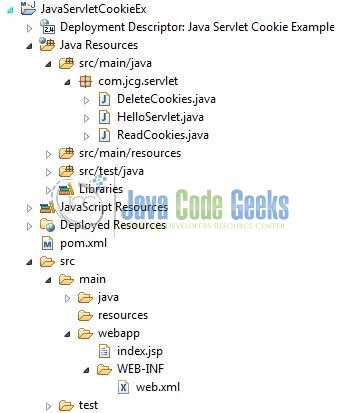
2.2 Project Structure
Firstly, let’s review the final project structure, in case you are confused about where you should create the corresponding files or folder later!
2.3 Project Creation
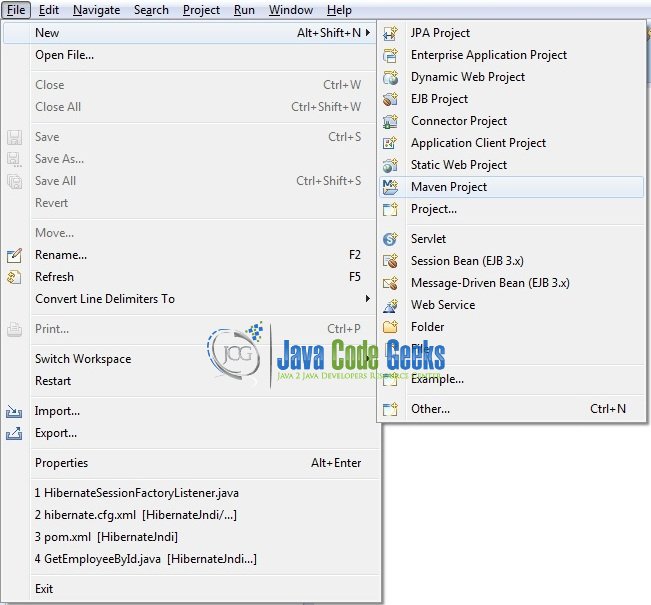
This section will demonstrate on how to create a Java-based Maven project with Eclipse. In Eclipse Ide, go to File -> New -> Maven Project.
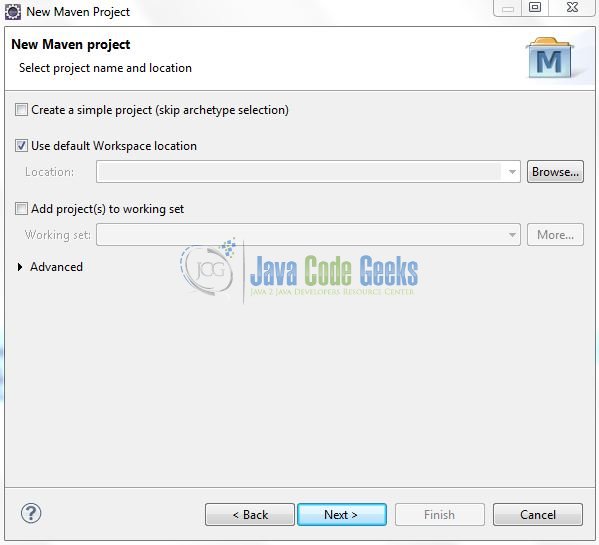
In the New Maven Project window, it will ask you to select project location. By default, ‘Use default workspace location’ will be selected. Just click on next button to proceed.
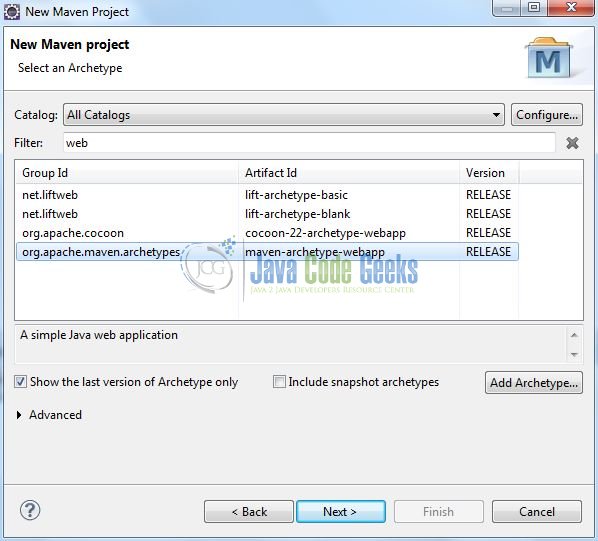
Select the ‘Maven Web App’ Archetype from the list of options and click next.
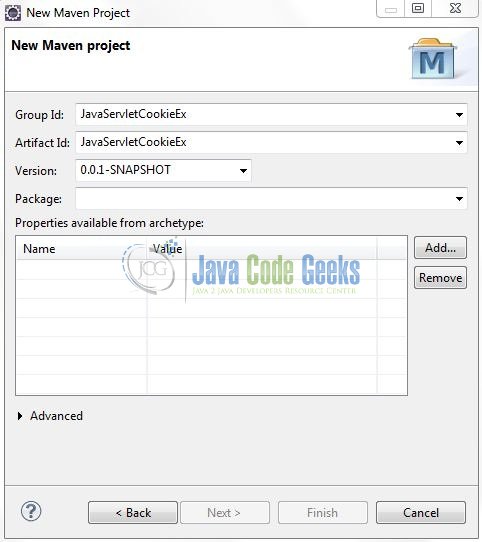
It will ask you to ‘Enter the group and the artifact id for the project’. We will input the details as shown in the below image. The version number will be by default: 0.0.1-SNAPSHOT.
Click on Finish and the creation of a maven project is completed. If you observe, it has downloaded the maven dependencies and a pom.xml file will be created. It will have the following code:
pom.xml
<project xmlns="http://maven.apache.org/POM/4.0.0" xmlns:xsi="http://www.w3.org/2001/XMLSchema-instance" xsi:schemaLocation="http://maven.apache.org/POM/4.0.0 http://maven.apache.org/xsd/maven-4.0.0.xsd">
	<modelVersion>4.0.0</modelVersion>
	<groupId>JavaServletCookieEx</groupId>
	<artifactId>JavaServletCookieEx</artifactId>
	<version>0.0.1-SNAPSHOT</version>
	<packaging>war</packaging>
</project>
We can start adding the dependencies that developers want like Servlets, Junit etc. Let’s start building the application!
3. Application Building
Below are the steps involved in developing this application.
3.1 Maven Dependencies
Here, we specify the dependencies for the Servlet API. The rest dependencies will be automatically resolved by the Maven framework and the updated file will have the following code:
pom.xml
<project xmlns="http://maven.apache.org/POM/4.0.0" xmlns:xsi="http://www.w3.org/2001/XMLSchema-instance"
	xsi:schemaLocation="http://maven.apache.org/POM/4.0.0 http://maven.apache.org/maven-v4_0_0.xsd">
	<modelVersion>4.0.0</modelVersion>
	<groupId>JavaServletCookieEx</groupId>
	<artifactId>JavaServletCookieEx</artifactId>
	<packaging>war</packaging>
	<version>0.0.1-SNAPSHOT</version>
	<name>JavaServletCookieEx Maven Webapp</name>
	<url>http://maven.apache.org</url>
	<dependencies>
		<dependency>
			<groupId>javax.servlet</groupId>
			<artifactId>javax.servlet-api</artifactId>
			<version>3.1.0</version>
		</dependency>
	</dependencies>
	<build>
		<finalName>${project.artifactId}</finalName>
	</build>
</project>
3.2 Java Class Creation
Let’s create the required Java files. Right-click on src/main/java folder, New -> Package.

A new pop window will open where we will enter the package name as: com.jcg.servlet.

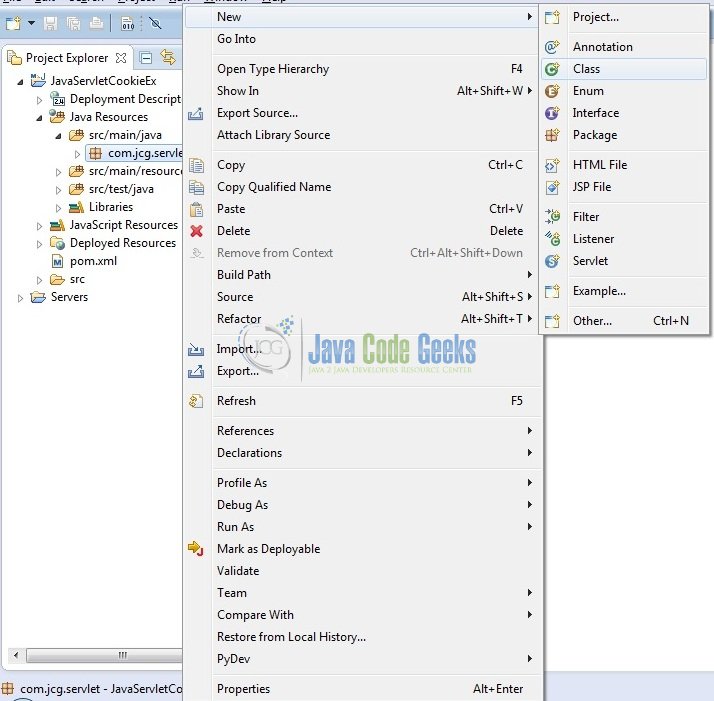
Once the package is created in the application, we will need to create the 3 different controller classes. Right-click on the newly created package: New -> Class.
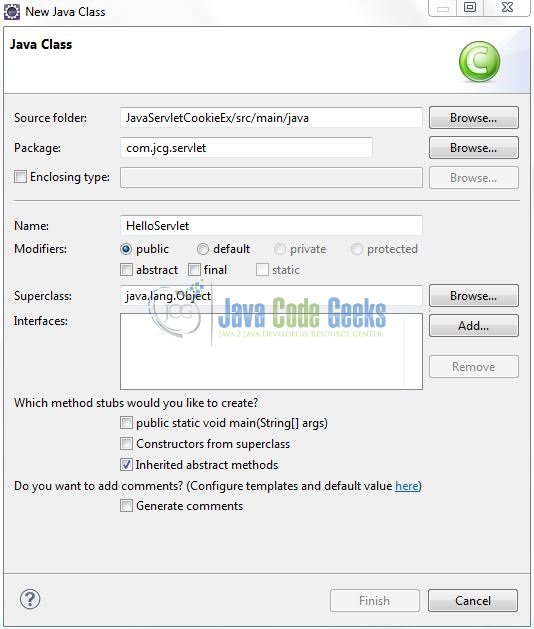
A new pop window will open and enter the file name as: HelloServlet. The servlet controller class will be created inside the package: com.jcg.servlet.
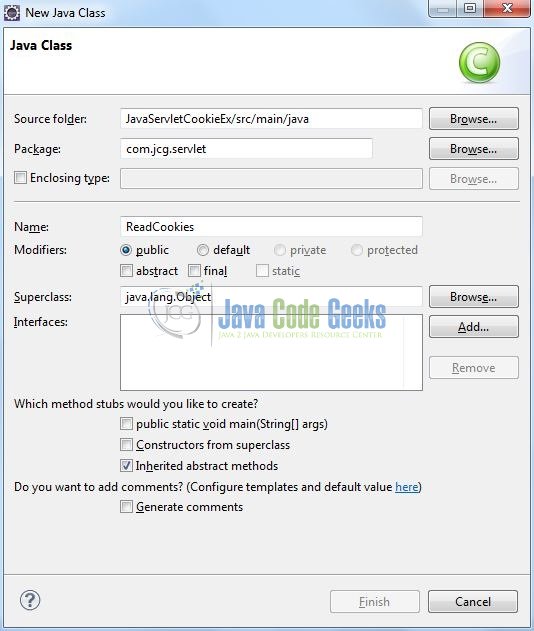
Repeat the step (i.e. Fig. 9) and enter the filename as: ReadCookies. The servlet class to read the cookies will be created inside the package: com.jcg.servlet.
Again repeat the step (i.e. Fig. 9) and enter the filename as: DeleteCookies. The servlet class to delete the cookies will be created inside the package: com.jcg.servlet.

3.2.1 Implementation of Servlet Controller Class
In the controller class, we will set the cookies for the first and the last name. Let’s see the simple code snippet that follows this implementation.
HelloServlet.java
package com.jcg.servlet;

import java.io.IOException;
import java.io.PrintWriter;

import javax.servlet.ServletException;
import javax.servlet.annotation.WebServlet;
import javax.servlet.http.Cookie;
import javax.servlet.http.HttpServlet;
import javax.servlet.http.HttpServletRequest;
import javax.servlet.http.HttpServletResponse;

@WebServlet("/helloFormServlet")
public class HelloServlet extends HttpServlet {

	private static final long serialVersionUID = 1L;

	/***** This Method Is Called By The Servlet Container To Process A 'POST' Request *****/
	public void doPost(HttpServletRequest request, HttpServletResponse response) throws IOException, ServletException {
		handleRequest(request, response);
	}

	public void handleRequest(HttpServletRequest request, HttpServletResponse response) throws IOException, ServletException {

		/***** Create 'Cookies' For First & Last Name *****/
		Cookie fname = new Cookie("first_name", request.getParameter("first_name"));
		Cookie lname = new Cookie("last_name", request.getParameter("last_name"));

		/***** Setting The Expiry Date For Both The Cookies *****/
		int expireTime = 86400;
		fname.setMaxAge(expireTime);
		lname.setMaxAge(expireTime);

		/***** Add Both The Cookies In The Response Header *****/
		response.addCookie(fname);
		response.addCookie(lname);

		/***** Set Response Content Type *****/
		response.setContentType("text/html");

		/***** Print The Response *****/
		PrintWriter out = response.getWriter();
		String title = "Java Servlet Cookie Example";
		String docType ="<!DOCTYPE html PUBLIC \"-//W3C//DTD HTML 4.01 Transitional//EN\" \"http://www.w3.org/TR/html4/loose.dtd\">\n";
		out.println(docType +
				"<html>\n" +
				"<head><title>" + title + "</title></head>\n" +
				"<body>\n" +
				"<h2 align = \"center\">" + title + "</h2>\n" +
				"<ul style='text-align: center; list-style: none;'>\n" +
				"<li><strong>First Name</strong>: "
				+ request.getParameter("first_name") + "\n" +
				"<li><strong>Last Name</strong>: "
				+ request.getParameter("last_name") + "\n" +
				"</ul>\n" +
				"<div style='padding-top: 12px; text-align: center; padding-left: 45px;'><a href='read' style='text-decoration: none; cursor: pointer;'>Read Cookies</a></div>\n" +
				"</body></html>");
		out.close();
	}
}
3.2.2 Implementation of Servlet Class to Read Cookies
To read cookies, developers need to create an array of javax.servlet.http.Cookie object by calling the getCookies() method of the HttpServletRequest. Iterate through the array and use getName() and getValue() methods to access each cookie and its associated value. Let’s see the simple code snippet that follows this implementation.
ReadCookies.java
package com.jcg.servlet;

import java.io.IOException;
import java.io.PrintWriter;

import javax.servlet.ServletException;
import javax.servlet.annotation.WebServlet;
import javax.servlet.http.Cookie;
import javax.servlet.http.HttpServlet;
import javax.servlet.http.HttpServletRequest;
import javax.servlet.http.HttpServletResponse;

@WebServlet("/readCookiesServlet")
public class ReadCookies extends HttpServlet {

	private static final long serialVersionUID = 1L;

	/***** This Method Is Called By The Servlet Container To Process A 'GET' Request *****/
	public void doGet(HttpServletRequest request, HttpServletResponse response) throws IOException, ServletException {
		handleRequest(request, response);
	}

	public void handleRequest(HttpServletRequest request, HttpServletResponse response) throws IOException, ServletException {

		Cookie cookie = null;
		Cookie[] cookies = null;
		boolean isPresent = false;

		/***** Get An Array Of Cookies Associated With This Domain *****/
		cookies = request.getCookies();

		/***** Set Response Content Type *****/
		response.setContentType("text/html");

		/***** Print The Response *****/
		PrintWriter out = response.getWriter();
		String title = "Java Servlet Cookie Example";
		String docType ="<!DOCTYPE html PUBLIC \"-//W3C//DTD HTML 4.01 Transitional//EN\" \"http://www.w3.org/TR/html4/loose.dtd\">\n";

		out.println(docType +
				"<html>\n <head><title>" + title + "</title></head>\n <body>\n" );
		if(cookies != null) {
			out.println("<h2 align = \"center\">Found Cookies Name and Value</h2>\n" +
					"<table width = \"100px\" border = \"1\" align = \"center\">\n" +
					"<tr bgcolor = \"lightgrey\">\n" +
					"<th>Cookie Name</th><th>Cookie Value(s)</th>\n"+
					"</tr>\n");

			for (int i = 0; i < cookies.length; i++) {
				cookie = cookies[i];
				if(cookie.getName( ).equals("first_name")) {
					isPresent = true;
				}
				out.println("<tr><td>" + cookie.getName( ) + "</td>\n");
				out.println("<td>" + cookie.getValue( ) + "</td></tr>\n");
			}
			out.println("</table>\n");

			if(isPresent) {
				out.println("<div style='padding-top: 63px; text-align: center; padding-left: 16px;'>"
						+ "Do you want to 'Delete' a cookie? Click <a href='delete' style='text-decoration: none; cursor: pointer;'>this</a> link.</div>\n");
			}
		} else {
			out.println("<h2 align = \"center\">No Cookies Found ....!</h2>");
		}
		out.println("</body></html>");
		out.close();
	}
}
3.2.3 Implementation of Servlet Class to Delete Cookies
To delete cookies, developers need to follow the following three steps:

- Read the already existing cookie and store it in Cookie object
- Set cookie age as
0usingsetMaxAge()method to delete an existing cookie - Add this cookie back into the
HTTPresponse header
Let’s see the simple code snippet that follows this implementation.
DeleteCookies.java
package com.jcg.servlet;

import java.io.IOException;
import java.io.PrintWriter;

import javax.servlet.ServletException;
import javax.servlet.http.Cookie;
import javax.servlet.http.HttpServlet;
import javax.servlet.http.HttpServletRequest;
import javax.servlet.http.HttpServletResponse;

public class DeleteCookies extends HttpServlet {

	private static final long serialVersionUID = 1L;

	/***** This Method Is Called By The Servlet Container To Process A 'GET' Request *****/
	public void doGet(HttpServletRequest request, HttpServletResponse response) throws IOException, ServletException {
		handleRequest(request, response);
	}

	public void handleRequest(HttpServletRequest request, HttpServletResponse response) throws IOException, ServletException {

		Cookie cookie = null;
		Cookie[] cookies = null;

		/***** Get An Array Of Cookies Associated With This Domain *****/
		cookies = request.getCookies();

		/***** Set Response Content Type *****/
		response.setContentType("text/html");

		/***** Print The Response *****/
		PrintWriter out = response.getWriter();
		String title = "Java Servlet Cookie Example";
		String docType ="<!DOCTYPE html PUBLIC \"-//W3C//DTD HTML 4.01 Transitional//EN\" \"http://www.w3.org/TR/html4/loose.dtd\">\n";

		out.println(docType +
				"<html>\n <head><title>" + title + "</title></head>\n <body>\n" );
		if(cookies != null) {
			out.println("<h2 align = \"center\">Cookies Name and Value</h2>\n<div style='text-align: center;'>");

			for (int i = 0; i < cookies.length; i++) {
				cookie = cookies[i];
				if(cookie.getName( ).compareTo("first_name") == 0) {
					cookie.setMaxAge(0);
					response.addCookie(cookie);
					out.println("Deleted Cookie Is?= " + cookie.getName( ) + "\n");
				}
			}
			out.println("</div>\n<div style='padding-top: 12px; text-align: center; padding-left: 45px;'>"
					+ "<a href='read' style='text-decoration: none; cursor: pointer;'>Read Updated Cookies</a></div>\n");
		} else {
			out.println("<h2 align = \"center\">No Cookies Found ....!</h2>");
		}
		out.println("</body></html>");
		out.close();
	}
}
3.3 Creating JSP Views
Servlet supports many types of views for different presentation technologies. These include – JSP, HTML, XML etc. So let us write a simple view in JavaServletCookieEx/src/main/webapp/ and add the following code to it:
index.jsp
<!DOCTYPE html PUBLIC "-//W3C//DTD HTML 4.01 Transitional//EN" "http://www.w3.org/TR/html4/loose.dtd">
<html>
	<head>
	    <meta http-equiv="Content-Type" content="text/html; charset=UTF-8">
	    <title>Java Servlet Cookie Example</title>
	    <style type="text/css">
	    	.paddingBtm {
	    		padding-bottom: 12px;
	    	}
	    </style>
	</head>
	<body>
	    <center>
	        <h2>Java Servlet Cookie Example</h2>
	        <form id="loginFormId" name="loginForm" method="post" action="helloFormServlet">
	            <div id="usernameDiv" class="paddingBtm">
	            	<span id="user">First Name: </span><input type="text" name="first_name" />
	            </div>
	            <div id="passwordDiv" class="paddingBtm">
	            	<span id="pass">Last Name: </span><input type="text" name="last_name" />
	            </div>
	            <div id="loginBtn">
	            	<input id="btn" type="submit" value="Submit" />
	            </div>
	        </form>
	    </center>
	</body>
</html>
4. Run the Application
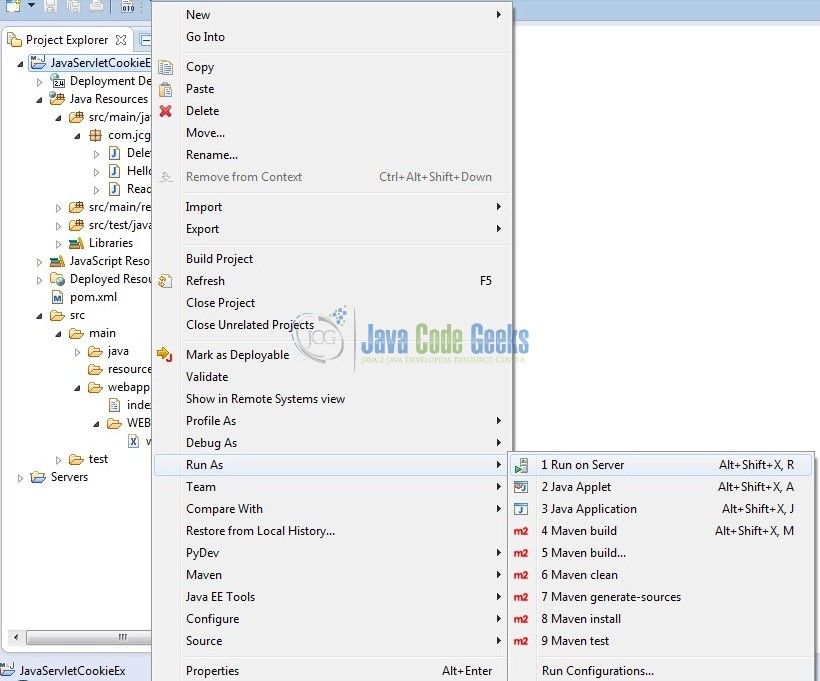
As we are ready for all the changes, let us compile the project and deploy the application on the Tomcat7 server. To deploy the application on Tomat7, right-click on the project and navigate to Run as -> Run on Server.
Tomcat will deploy the application in its web-apps folder and shall start its execution to deploy the project so that we can go ahead and test it in the browser.
5. Project Demo
Open your favorite browser and hit the following URL. The output page will be displayed.
http://localhost:8085/JavaServletCookieEx/
Server name (localhost) and port (8085) may vary as per your Tomcat configuration. Developers can debug the example and see what happens after every step. Enjoy!

Try to enter the first name and the last name and then click the submit button. This would display first name and last name on the screen and at the same time, it would set two cookies which would be passed back to the server when user press the submit button.

Click the Read Cookies link to display the below result.
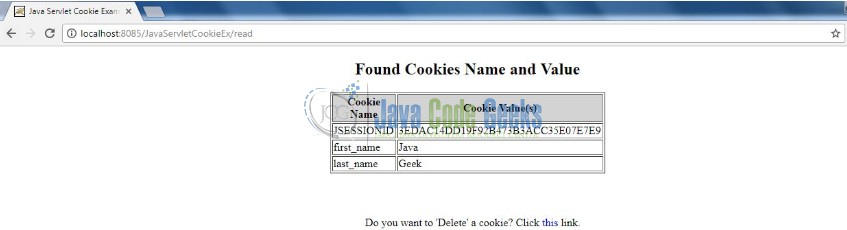
To delete a cookie, simply click the Delete Cookie link to display the below result.

Now, again click the Read Updated Cookies link and it would display the only cookie as follows.

That’s all for this post. Happy Learning!!
6. Conclusion
In this section, developers learned how to use Cookies in Java programming. Developers can download the sample application as an Eclipse project in the Downloads section. I hope this article served you with whatever developers were looking for.
7. Download the Eclipse Project
This was an example of Cookies in Servlets.
You can download the full source code of this example here: JavaServletCookieEx