In this article we will demonstrate deploying and running a simple web application via a servlet container.
In addition to demonstrating how to run the sample web application using a servlet container will also show how to run the sample web application using maven from the command line.
For this article we will make use of Tomcat 8.5.x both for the container sample and maven plugin sample. For the maven plugin sample, we will be making use of the “cargo.maven.plugin” to bootstrap a servlet container and run our web application from the command line via the command mvn cargo:run.
1. Introduction
A servlet container is the webcomponent part of a Java EE compliant application server and it implements a subset of the EE specification.
That subset is responsible for serving requested content over HTTP to a client that requests it.
What differentiates it from a typical web server is that it can not only serve static content, but also dynamic content using the Java programming language.
2. Technologies used
The example code in this article was built and run using:
- Java 8
- Maven 3.3.9
- STS (3.9.0.RELEASE)
- Ubuntu 16.04
- Apache Tomcat
- Maven cargo plugin
3. Setup
To ensure that Maven and Java are installed you can execute the following:
Confirm Java and Maven
java -version
java version "1.8.0_101"
Java(TM) SE Runtime Environment (build 1.8.0_101-b13)
Java HotSpot(TM) 64-Bit Server VM (build 25.101-b13, mixed mode)

mvn -version
Apache Maven 3.3.9
Maven home: /usr/share/maven
Java version: 1.8.0_101, vendor: Oracle Corporation
Java home: /home/jean-jay/runtimes/jdk1.8.0_101/jre
Default locale: en_ZA, platform encoding: UTF-8
OS name: "linux", version: "4.10.0-42-generic", arch: "amd64", family: "unix"
4. Digging Deeper
In most production environments a symphony of servers are responsible for satisfying a client request.
Typically a web server (Apache, Nginx etc) are responsible for static content and other tasks (SSL offloading, load balancing etc) and the request would hit one of these servers first.
Should the request be for more than just static content, then it is forwarded onto an application server (Webshpere, Jboss, Weblogic, Glassfish etc) or a servlet container (Tomcat etc) for handling.
Because this article is about servlet containers and Tomcat in particular, we will focus on Tomcat. A detailed architectural overview of Tomcat can be found here, however for the purpose of this article, we briefly discuss it here.
4.1 Architecture
In order to better understand the Tomcat architecture, the following terms should be discussed:
- Server: represents the entirety of the container
- Service: is a component encapsulated by the
serverabove and “connects” multipleconnectorinterfaces to theengineit encapsulates - Engine: represents the processing flow / pipeline of a client request from
connectorinterface - Host: associates the network name to the
server. Theenginecan contain multiple hosts - Connector: interfaces with the client via a specific protocol eg:
ajporhttp. Theclientcan be an externalclientrequest from or a forwarded request from a web server acting as proxy - Context: represents the web application, a
hostmay contain multiplecontexts
Contexts or web applications are deployed with a web descriptor or via annotations indicating relevant meta data for the container to help configure the web application upon deploy / startup.
These annotations or descriptor information are scanned upon deploy and the relevant structures (servlets, filters, context listeners, web services) are deployed to their relevant URL’s making the context available via the relevant connector.
5. Plugin Approach
With the plugin approach we use a maven plugin called cargoto bootstrap a Tomcat container when running our application form the command line.
Cargo is a wrapper that allows us to do programmatic manipulation of Containers, in our case servlet containers, in a standardized way.
The maven cargo plugin allows us to easily, and as part of the maven build process, deploy and run our application from the command line.
Below follows our maven cargo plugin configuration: (Using version 1.6.4)
Plugin Configuration
<plugin>
				<groupId>org.codehaus.cargo</groupId>
				<artifactId>cargo-maven2-plugin</artifactId>
				<configuration>
					<container>
						<containerId>tomcat8x</containerId>
						<artifactInstaller>
							<groupId>org.apache.tomcat</groupId>
							<artifactId>tomcat</artifactId>
							<version>${tomcat.version}</version>
						</artifactInstaller>
					</container>
					<configuration>
						<type>standalone</type>
						<home>
							${project.build.directory}/apache-tomcat-${tomcat.version}
						</home>
						<properties>
							<cargo.servlet.port>8080</cargo.servlet.port>
							<cargo.logging>high</cargo.logging>
						</properties>
					</configuration>
					<deployables>
						<deployable>
							<groupId>${project.groupId}</groupId>
							<artifactId>${project.artifactId}</artifactId>
							<type>war</type>
							<properties>
								<context>/chat</context>
							</properties>
						</deployable>
					</deployables>
				</configuration>
			</plugin>
To find out more about cargo see here. What follows is a brief explanation of some of the configuration above:
- lines 7-11: specifies the method in which the container is installed to our local file system. More on artifact installers here
- line 14: the
standaloneconfirguration specifies our container to run from a specific (we specify) directory on our file system - line 16: specifies that directory
- lines 23-32: specify the artifacts which are to be deployed after startup
6. Container Approach
- We will start by building the sample application using the following command,
mvn clean install package - We will start by downloading Tomcat here, once downloaded extract the archive to somewhere on your file system.
- Navigate to the
conffolder of where you downloaded Tomcat to and add the following to thetomcat-users.xmlfile (inside thetomncat-userselement).
This will allow you to access the administration page to deploy the web application
Tomcat users configuration
<role rolename="manager-gui"/>
<role rolename="manager-script"/>
<user username="admin" password="admin" roles="manager-gui, manager-script"/>
- Navigate to the
binfolder of where you downloaded Tomcat to. - Execute the following once inside the
binfolder./startup.shand confirm Tomcat has started - Navigate to
http://localhost:8080/managerand when prompted for user name and password enteradmin/admin - You will then be presented with a screen when you can among other things, deploy out sample web application
7. Browsing to the Application
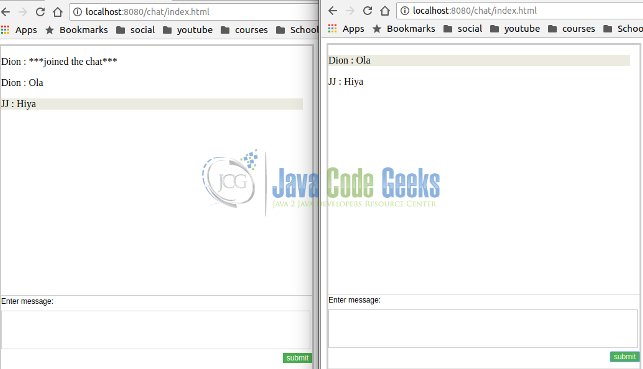
Once started, you can navigate to http:localhost:8080/chat this will relentlessly prompt you for a user name, after which it will load a very simple chat screen.
Feel free to open another window / tab to register another user to chat with. Below follows screen shots of using the chat program.

8. Summary
In this article we briefly discussed the functioning of a servlet container.
We demonstrated how to host a simple web application in a servlet container using Tomcat 8.5.x and also demonstrated how to run that same application using maven from the command line.
9. Download the Source Code
This was a Java Servlet Container Example.
