In this example of JSF Facelets Templates, we will show you how to use JSF Facelets to create templates in JSF. To provide better user experience web pages in the applications uses similar layout for all pages. In JSF we can use templates to create standard web layouts.
We will also discuss about JSF Facelets tags that are used to create the Template. Let’s begin with setting up a JSF project and do all the necessary configuration to run the application.
Our preferred environment is Eclipse. We are using Eclipse Luna SR1 with Maven Integration Plugin, JDK 8u25 (1.8.0_25) and Tomcat 8 application server. Having said that, we have tested the code against JDK 1.7 and Tomcat 7 as well.
You may skip project creation and jump directly to the beginning of the example below.
1. Create a new Maven Project
Go to File -> New->Other-> Maven Project
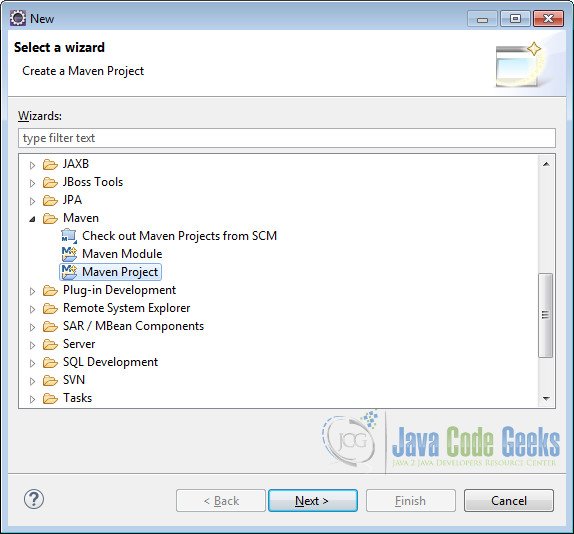
In the “Select project name and location” page of the wizard, make sure that “Create a simple project (skip archetype selection)” option is unchecked, hit “Next” to continue with default values.

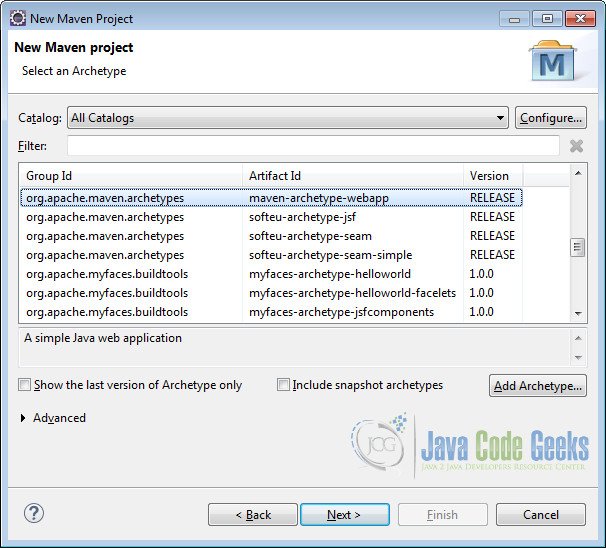
Here choose “maven-archetype-webapp” and click on Next.
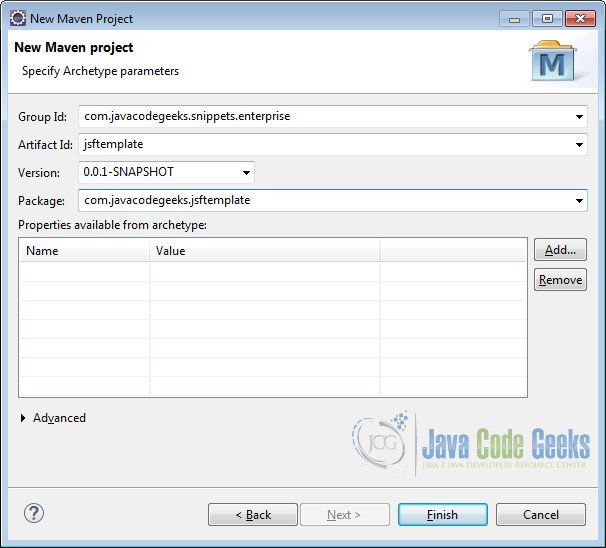
In the “Enter an artifact id” page of the wizard, you can define the name and main package of your project. Set the “Group Id” variable to "com.javacodegeeks.snippets.enterprise" and the “Artifact Id” variable to "jsftemplate". For package enter"com.javacodegreeks.jsftemplate" and hit “Finish” to exit the wizard and to create your project.
Refresh the project. Finally, the project structure will look like the below.
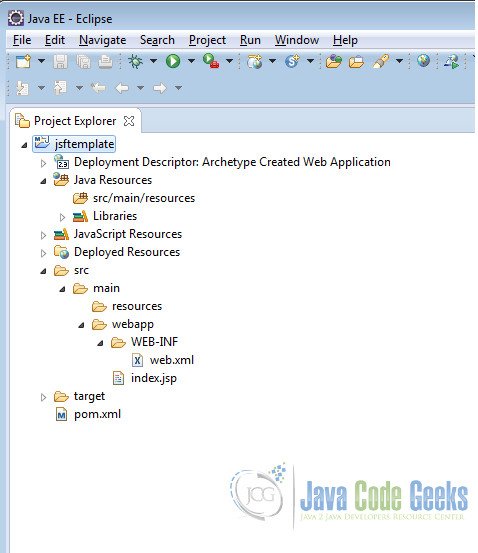
If you see any errors in the index.jsp, set target runtime for the project.

2. Modify POM to include JSF dependency
Add the dependencies in Maven’s pom.xml file, by editing it at the “Pom.xml” page of the POM editor
<project xmlns="http://maven.apache.org/POM/4.0.0" xmlns:xsi="http://www.w3.org/2001/XMLSchema-instance"
 xsi:schemaLocation="http://maven.apache.org/POM/4.0.0 http://maven.apache.org/maven-v4_0_0.xsd">
 <modelVersion>4.0.0</modelVersion>
 <groupId>com.javacodegeeks.snippets.enterprise</groupId>
 <artifactId>jsftemplate</artifactId>
 <packaging>war</packaging>
 <version>0.0.1-SNAPSHOT</version>
 <name>jsftemplate Maven Webapp</name>
 <url>http://maven.apache.org</url>
 <dependencies>
  <dependency>
   <groupId>junit</groupId>
   <artifactId>junit</artifactId>
   <version>3.8.1</version>
   <scope>test</scope>
  </dependency>
  <dependency>
   <groupId>com.sun.faces</groupId>
   <artifactId>jsf-api</artifactId>
   <version>2.2.9</version>
  </dependency>
  <dependency>
   <groupId>com.sun.faces</groupId>
   <artifactId>jsf-impl</artifactId>
   <version>2.2.9</version>
  </dependency>
 </dependencies>
 <build>
  <finalName>jsftemplate</finalName>
 </build>
</project>
3. Add Faces Servlet in web.xml
The web.xml file has to be modified to include the faces servlet configuration as below.
<web-app>
 <display-name>Archetype Created Web Application</display-name>

  <servlet>
   <servlet-name>Faces Servlet</servlet-name>
   <servlet-class>javax.faces.webapp.FacesServlet</servlet-class>
   <load-on-startup>1</load-on-startup>
  </servlet>

  <servlet-mapping>
   <servlet-name>Faces Servlet</servlet-name>
   <url-pattern>*.xhtml</url-pattern>
  </servlet-mapping>

</web-app>
4. JSF Facelets Tags
JSF provides the following facelets tags, using which we can create the template.
ui:composition– Defines the composition that optionally uses a template. JSF disregards everything outside the composition tags which allows embedding the compositions into well formed XHTML pagesui:insert– It is used to insert content into the template file.ui:include– It is very similar tojsp:includeto encapsulate and reuse content among multiple XHTML page.ui:define– It is used to define content matching theui:inserttag of the template.
5. Create a Template
Template in a web application is nothing but the layout of the webpage. We will create a simple layout with header, content and footer sections. For modularity we will create each section in a different file and include them in the template.
Create a folder called templates under webapp to place all the template files.
5.1 Create Header
In the /webapp/templates/ folder create a file called header.xhtml. We will use the facelets tag ui:composition to add the content for the page. As discussed earlier, JSF ignores everything outside the ui:compositiontag.
header.xhtml
<?xml version="1.0" encoding="ISO-8859-1" ?>
<!DOCTYPE html PUBLIC "-//W3C//DTD XHTML 1.0 Transitional//EN" "http://www.w3.org/TR/xhtml1/DTD/xhtml1-transitional.dtd">
<html xmlns="http://www.w3.org/1999/xhtml"
 xmlns:h="http://java.sun.com/jsf/html"
 xmlns:ui="http://java.sun.com/jsf/facelets">
<head>
<meta http-equiv="Content-Type" content="text/html; charset=ISO-8859-1" />
<title>Insert title here</title>
</head>
<body>
 <ui:composition>
  <h1>Header</h1>
 </ui:composition>
</body>
</html>
5.2 Create Content
In the /webapp/templates/ folder create a file called content.xhtml. We will use the ui:composition to add the content for the page.
content.xhtml
<?xml version="1.0" encoding="ISO-8859-1" ?>
<!DOCTYPE html PUBLIC "-//W3C//DTD XHTML 1.0 Transitional//EN" "http://www.w3.org/TR/xhtml1/DTD/xhtml1-transitional.dtd">
<html xmlns="http://www.w3.org/1999/xhtml"
 xmlns:h="http://java.sun.com/jsf/html"
 xmlns:ui="http://java.sun.com/jsf/facelets">
<head>
<meta http-equiv="Content-Type" content="text/html; charset=ISO-8859-1" />
<title>Insert title here</title>
</head>
<body>
 <ui:composition>
  <h1>Content goes here...</h1>
 </ui:composition>
</body>
</html>
5.3 Create Footer
In the /webapp/templates/ folder create a file called footer.xhtml. We will use the ui:composition to add the content for the page.
footer.xhtml
<?xml version="1.0" encoding="ISO-8859-1" ?>
<!DOCTYPE html PUBLIC "-//W3C//DTD XHTML 1.0 Transitional//EN" "http://www.w3.org/TR/xhtml1/DTD/xhtml1-transitional.dtd">
<html xmlns="http://www.w3.org/1999/xhtml"
 xmlns:h="http://java.sun.com/jsf/html"
 xmlns:ui="http://java.sun.com/jsf/facelets">
<head>
<meta http-equiv="Content-Type" content="text/html; charset=ISO-8859-1" />
<title>Insert title here</title>
</head>
<body>
<ui:composition>
 <h1>Footer</h1></ui:composition>
</body>
</html>
5.4 Finally the Template
In the /webapp/templates/ folder create a file called template.xhtml. We will insert the header, content and footer sections into a template file by using ui:insert. The source for the different sections is defined by the facelets tag ui:include by means of pointing the src attribute to the relevant file.

template.xhtml
<?xml version="1.0" encoding="ISO-8859-1" ?>
<!DOCTYPE html PUBLIC "-//W3C//DTD XHTML 1.0 Transitional//EN" "http://www.w3.org/TR/xhtml1/DTD/xhtml1-transitional.dtd">
<html xmlns="http://www.w3.org/1999/xhtml"
 xmlns:h="http://java.sun.com/jsf/html"
 xmlns:ui="http://java.sun.com/jsf/facelets">
<h:head>
 <meta http-equiv="Content-Type" content="text/html; charset=ISO-8859-1" />
 <title>Insert title here</title>
</h:head>
<h:body>
 <div style="height: 400px">
 <div style="border-width: 1px; border-style: solid; height: 25%">
 <ui:insert name="header">
 <ui:include src="/templates/header.xhtml"></ui:include>
 </ui:insert>
 </div>
 <div style="border-width: 1px; border-style: solid; height: 50%">
 <ui:insert name="content">
 <ui:include src="/templates/content.xhtml"></ui:include>
 </ui:insert>
 </div>
 <div style="border-width: 1px; border-style: solid; height: 25%">
 <ui:insert name="footer">
 <ui:include src="/templates/footer.xhtml"></ui:include>
 </ui:insert>
 </div>
 </div>
</h:body>
</html>
6. Default page using template
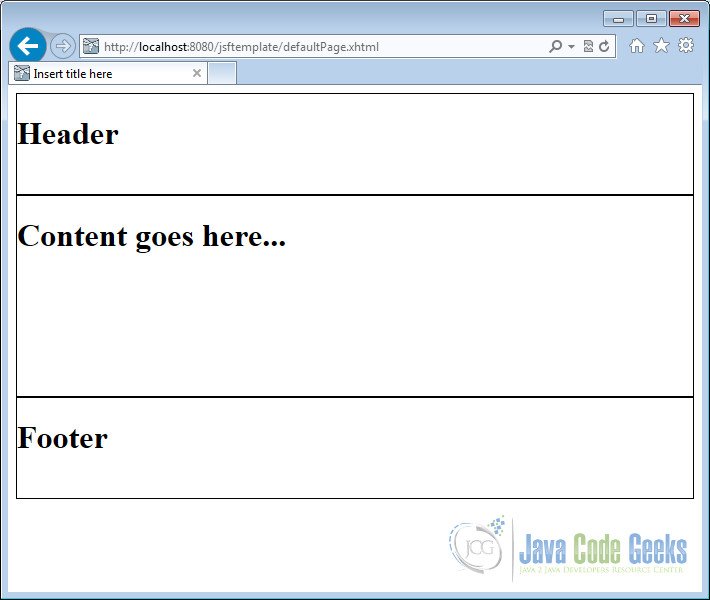
We will show you how to make a webpage using the template. In this default page, we will use the template as it is. In other words, we will not use ui:define to modify the template content.
We will create a file called defaultPage.xhtml under /webapp folder. The template attribute in the ui:composition facelets tag is used to define the template for the page. In this example we are pointing the attribute to templates/template.xhtml
defaultPage.xhtml
<?xml version="1.0" encoding="ISO-8859-1" ?>
<!DOCTYPE html PUBLIC "-//W3C//DTD XHTML 1.0 Transitional//EN" "http://www.w3.org/TR/xhtml1/DTD/xhtml1-transitional.dtd">
<html xmlns="http://www.w3.org/1999/xhtml"
 xmlns:h="http://java.sun.com/jsf/html"
 xmlns:ui="http://java.sun.com/jsf/facelets">
<head>
<meta http-equiv="Content-Type" content="text/html; charset=ISO-8859-1" />
<title>Insert title here</title>
</head>
<h:body>
 <ui:composition template="templates/template.xhtml">
 </ui:composition>
</h:body>
</html>
Now we can create the deployment package using Run as –> Maven clean and then Run as –> Maven install. This will create a war file in the target folder. The war file produced must be placed in webapps folder of tomcat. Now we can start the server.
Open the following URL in the browser
http://localhost:8080/jsftemplate/defaultPage.xhtml
7. Welcome page using template
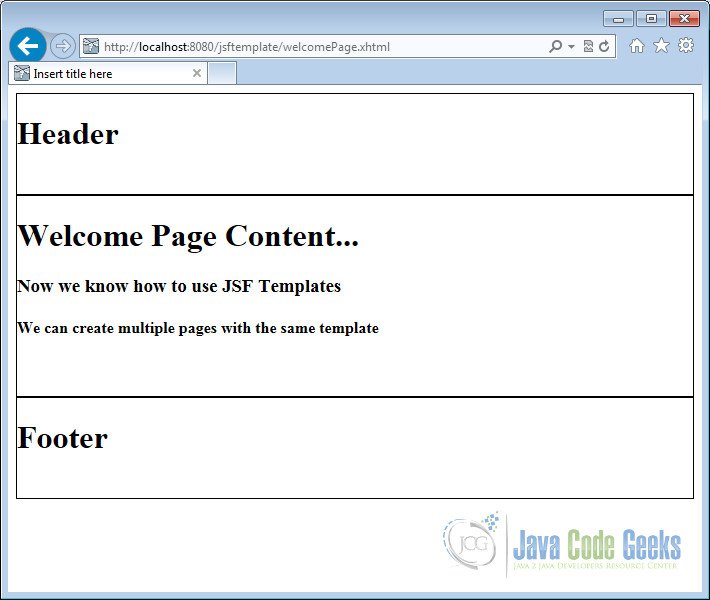
In the welcome page we will modify the content of the template using ui:define tag. Create a file called welcomePage.xhtml under /webapp folder.
We will first use ui:composition to define the template for the web page. Next, we will use the ui:define to modify the content representing the current page. Note that, the name attribute of the ui:define tag should match with the name attribute of the ui:insert specified in the template file.
welcomePage.xhtml
<?xml version="1.0" encoding="ISO-8859-1" ?>
<!DOCTYPE html PUBLIC "-//W3C//DTD XHTML 1.0 Transitional//EN" "http://www.w3.org/TR/xhtml1/DTD/xhtml1-transitional.dtd">
<html xmlns="http://www.w3.org/1999/xhtml"
 xmlns:h="http://java.sun.com/jsf/html"
 xmlns:ui="http://java.sun.com/jsf/facelets">
<head>
<meta http-equiv="Content-Type" content="text/html; charset=ISO-8859-1" />
<title>Insert title here</title>
</head>
<h:body>
 <ui:composition template="/templates/template.xhtml">
 <ui:define name="content">
 <h1>Welcome Page Content...</h1>
 <h3>Now we know how to use JSF Templates</h3>
 <h4>We can create multiple pages with the same template</h4>
 </ui:define>
 </ui:composition>
</h:body>
</html>
Now again package using maven and copy the war to the apache tomcat webapps folder. Open the following URL in the browser
http://localhost:8080/jsftemplate/welcomePage.xhtml
8. Download the Eclipse Project
This was an example for creating templates using JSF Facelets.
You can download the full source code of this example here : JSF Facelets Template
