In this example of JSF Components Listeners, we will discuss about various component listeners provided by Java Server Faces and show you different ways of using the listeners.
In a web page when the user makes changes to the input component or performs an action on the UI component, the JSF fires an event. These events can be handled by application to take necessary action. JSF provides listeners to capture the event. We can implement the listeners as classes or use the backing bean method to capture the event. Depending upon how the listener is implemented, the page can either use listener tag or listener attribute of the UI component. We will show you both the approaches here. Let’s begin with setting up a JSF project and do all the necessary configuration to run the application.
Our preferred environment is Eclipse. We are using Eclipse Luna SR1 with Maven Integration Plugin, JDK 8u25 (1.8.0_25) and Tomcat 8 application server. Having said that, we have tested the code against JDK 1.7 and Tomcat 7 as well.
You may skip project creation and jump directly to the beginning of the example below.
1. Create a new Maven Project
Go to File -> New->Other-> Maven Project
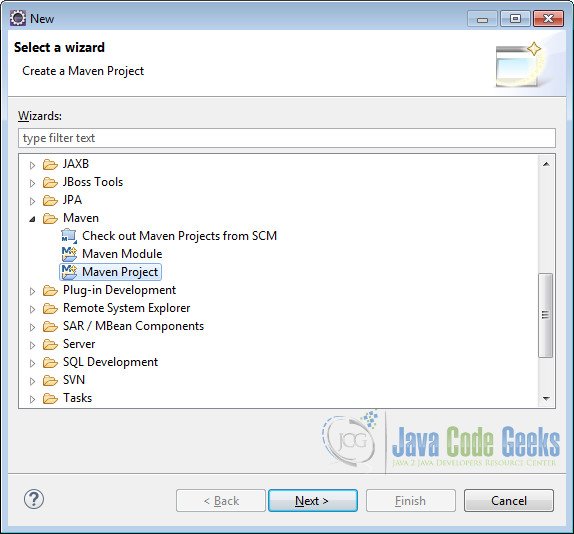
In the “Select project name and location” page of the wizard, make sure that “Create a simple project (skip archetype selection)” option is unchecked, hit “Next” to continue with default values.

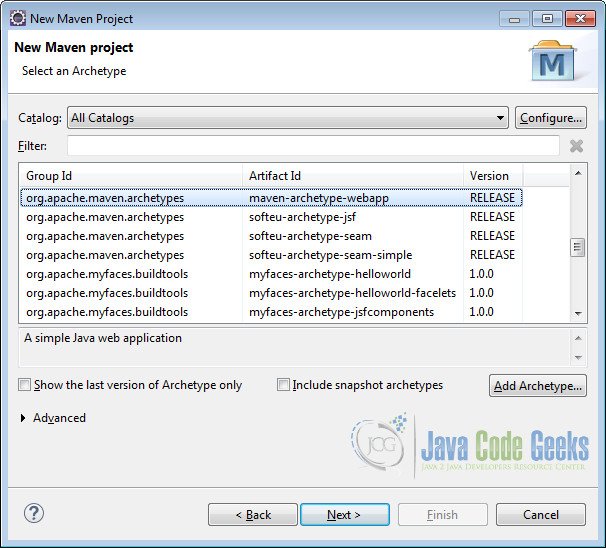
Here choose “maven-archetype-webapp” and click on Next.
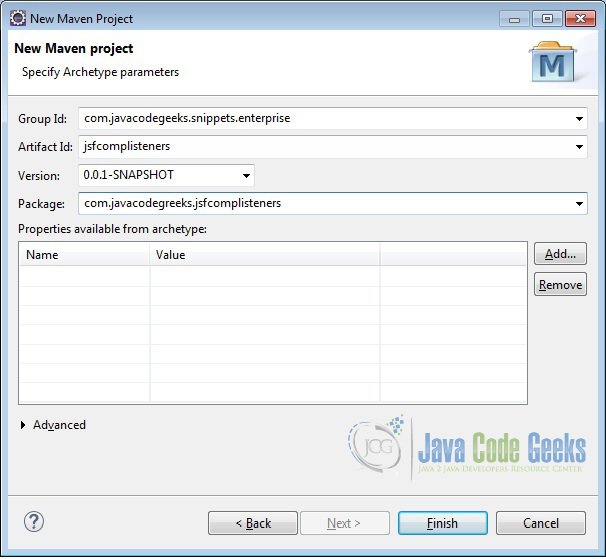
In the “Enter an artifact id” page of the wizard, you can define the name and main package of your project. Set the “Group Id” variable to "com.javacodegeeks.snippets.enterprise" and the “Artifact Id” variable to "jsfcomplisteners". For package enter "com.javacodegreeks.jsfcomplisteners" and hit “Finish” to exit the wizard and to create your project.
Now create a folder called java under src/main.
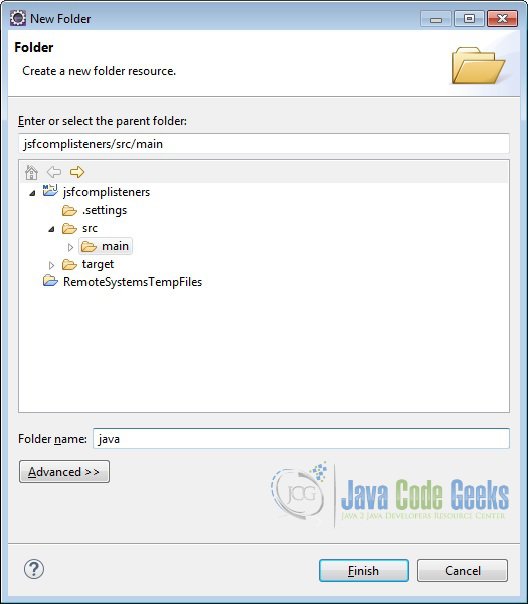
Refresh the project. Finally, the project structure will look like the below.

If you see any errors in the index.jsp, set target runtime for the project.
2. Modify POM to include JSF dependency
Add the dependencies in Maven’s pom.xml file, by editing it at the “Pom.xml” page of the POM editor.
<project xmlns="http://maven.apache.org/POM/4.0.0" xmlns:xsi="http://www.w3.org/2001/XMLSchema-instance"
 xsi:schemaLocation="http://maven.apache.org/POM/4.0.0 http://maven.apache.org/maven-v4_0_0.xsd">
 <modelVersion>4.0.0</modelVersion>
 <groupId>com.javacodegreeks.snippets.enterprise</groupId>
 <artifactId>jsfcomplisteners</artifactId>
 <packaging>war</packaging>
 <version>0.0.1-SNAPSHOT</version>
 <name>jsfcomplisteners Maven Webapp</name>
 <url>http://maven.apache.org</url>
 <dependencies>
   <dependency>
    <groupId>junit</groupId>
    <artifactId>junit</artifactId>
    <version>3.8.1</version>
    <scope>test</scope>
   </dependency>
   <dependency>
    <groupId>com.sun.faces</groupId>
    <artifactId>jsf-api</artifactId>
    <version>2.2.9</version>
   </dependency>
   <dependency>
    <groupId>com.sun.faces</groupId>
    <artifactId>jsf-impl</artifactId>
    <version>2.2.9</version>
   </dependency>
 </dependencies>
 <build>
 <finalName>jsfcomplisteners</finalName>
 </build>
</project>
3. Add Faces Servlet in web.xml
The web.xml file has to be modified to include the faces servlet configuration as below.
<!DOCTYPE web-app PUBLIC
 "-//Sun Microsystems, Inc.//DTD Web Application 2.3//EN"
 "http://java.sun.com/dtd/web-app_2_3.dtd" >

<web-app>
 <display-name>Archetype Created Web Application</display-name>
 <servlet>
   <servlet-name>Faces Servlet</servlet-name>
   <servlet-class>javax.faces.webapp.FacesServlet</servlet-class>
   <load-on-startup>1</load-on-startup>
 </servlet>
 <servlet-mapping>
   <servlet-name>Faces Servlet</servlet-name>
   <url-pattern>*.xhtml</url-pattern>
 </servlet-mapping>
</web-app>
4. Value Change Listener
JSF input components fires value-change-event when the user interacts with them. The input components such as h:inputText or h:selectOneMenu fire the value-change-event event on modifying the component values. JSF provides two mechanism for implementing the listeners. We will show you how to implement value change listener on h:selectOneMenu by using both the techniques.
First, lets create a package called com.javacodegeeks.jsfcomplisteners under the folder src/main/java. Now we create a managed bean called JavaVersion. The @ManagedBean annotation makes the POJO as managed bean. The @SessionScoped annotation on the bean makes the bean available to the entire user session. We will use java.util.LinkedHashMap to store the Java versions released along with the date of release.
JavaVersion.java
package com.javacodegeeks.jsfcomplisteners;

import java.util.LinkedHashMap;
import java.util.Map;

import javax.faces.bean.ManagedBean;
import javax.faces.bean.SessionScoped;

@ManagedBean(name = "javaVersion", eager = true)
@SessionScoped
public class JavaVersion {

 private static Map<String, String> versionData;
 private String releaseDate = "January 23, 1996";

 static {
 versionData = new LinkedHashMap<String, String>();
 versionData.put("JDK 1.0", "January 23, 1996");
 versionData.put("JDK 1.1", "February 19, 1997");
 versionData.put("J2SE 1.2", "December 8, 1998");
 versionData.put("J2SE 1.3", "May 8, 2000");
 versionData.put("J2SE 1.4", "February 6, 2002");
 versionData.put("J2SE 5.0", "September 30, 2004");
 versionData.put("Java SE 6", "December 11, 2006");
 versionData.put("Java SE 7", "July 28, 2011");
 versionData.put("Java SE 8", "March 18, 2014");
 }

 public Map<String, String> getVersionData() {
  return versionData;
 }

 public void setVersionData(Map<String, String> versionData) {
  JavaVersion.versionData = versionData;
 }

 public String getReleaseDate() {
  return releaseDate;
 }

 public void setReleaseDate(String releaseDate) {
  this.releaseDate = releaseDate;
 }

}
4.1 Using valueChangeListener attribute
To use the UI component valueChangeListener attribute technique, we need to first create a bean method. Let’s modify the JavaVersion backing bean to include the listener method.
JavaVersion.java
package com.javacodegeeks.jsfcomplisteners;

import java.util.LinkedHashMap;
import java.util.Map;

import javax.faces.bean.ManagedBean;
import javax.faces.bean.SessionScoped;
import javax.faces.event.ValueChangeEvent;

@ManagedBean(name = "javaVersion", eager = true)
@SessionScoped
public class JavaVersion {

 private static Map<String, String> versionData;
 private String releaseDate = "January 23, 1996";

 static {
 versionData = new LinkedHashMap<String, String>();
 versionData.put("JDK 1.0", "January 23, 1996");
 versionData.put("JDK 1.1", "February 19, 1997");
 versionData.put("J2SE 1.2", "December 8, 1998");
 versionData.put("J2SE 1.3", "May 8, 2000");
 versionData.put("J2SE 1.4", "February 6, 2002");
 versionData.put("J2SE 5.0", "September 30, 2004");
 versionData.put("Java SE 6", "December 11, 2006");
 versionData.put("Java SE 7", "July 28, 2011");
 versionData.put("Java SE 8", "March 18, 2014");
 }

 public Map<String, String> getVersionData() {
  return versionData;
 }

 public void setVersionData(Map<String, String> versionData) {
  JavaVersion.versionData = versionData;
 }

 public String getReleaseDate() {
  return releaseDate;
 }

 public void setReleaseDate(String releaseDate) {
  this.releaseDate = releaseDate;
 }

 public void versionChanged(ValueChangeEvent event) {
  releaseDate = event.getNewValue().toString();
 }

}
Now we will create a view called attrlistener.xhtml under /src/main/webapp. We have used h:selectOneMenu to display various Java releases and used h:outputText to display the release date. We will use the valueChangeListener attribute of h:selectOneMenu to invoke the bean method.
attrlistener.xhtml
<?xml version="1.0" encoding="ISO-8859-1" ?>
<!DOCTYPE html PUBLIC "-//W3C//DTD XHTML 1.0 Transitional//EN" "http://www.w3.org/TR/xhtml1/DTD/xhtml1-transitional.dtd">
<html xmlns="http://www.w3.org/1999/xhtml"
 xmlns:h="http://java.sun.com/jsf/html"
 xmlns:f="http://java.sun.com/jsf/core">
<head>
<meta http-equiv="Content-Type" content="text/html; charset=ISO-8859-1" />
<title>Listener Attribute</title>
</head>
<body>
 <h:form>
  <div>
   <h3>Using valueChangeListener attribute</h3>
   <div>
    <strong>Selected Version : </strong>
    <h:selectOneMenu value="#{javaVersion.releaseDate}"
    onchange="submit()"
    valueChangeListener="#{javaVersion.versionChanged}">
    <f:selectItems value="#{javaVersion.versionData}" />
    </h:selectOneMenu>
   </div>
   <br />
   <div>
    <strong>Release Date : </strong>
    <h:outputText value="#{javaVersion.releaseDate}" />
   </div>
  </div>
 </h:form>
</body>
</html>
Now we can create the deployment package using Run as –> Maven clean and then Run as –> Maven install. This will create a war file in the target folder. The war file produced must be placed in webapps folder of tomcat. Now we can start the server.
Open the following URL in the browser.
http://localhost:8080/jsfcomplisteners/attrlistener.xhtml

Modify the Java version using the drop down. The release date will get changed accordingly.
4.2 Using valueChangeListener Tag
To use the valueChangeListener Tag, we need to first create a class implementing the ValueChangeListener interface. Lets first create a class called VersionChangeListener in the package com.javacodegeeks.jsfcomplisteners and implement the processValueChange method of the interface. We will use the FacesContext to get the JavaVersion object and set the release date using the ValueChangeEvent.
VersionChangeListener.java
package com.javacodegeeks.jsfcomplisteners;
import javax.faces.context.FacesContext;
import javax.faces.event.AbortProcessingException;
import javax.faces.event.ValueChangeEvent;
import javax.faces.event.ValueChangeListener;
public class VersionChangeListener implements ValueChangeListener{
public void processValueChange(ValueChangeEvent event)
throws AbortProcessingException {
JavaVersion javaVersion= (JavaVersion) FacesContext.getCurrentInstance().
getExternalContext().getSessionMap().get("javaVersion");
javaVersion.setReleaseDate(event.getNewValue().toString());
}
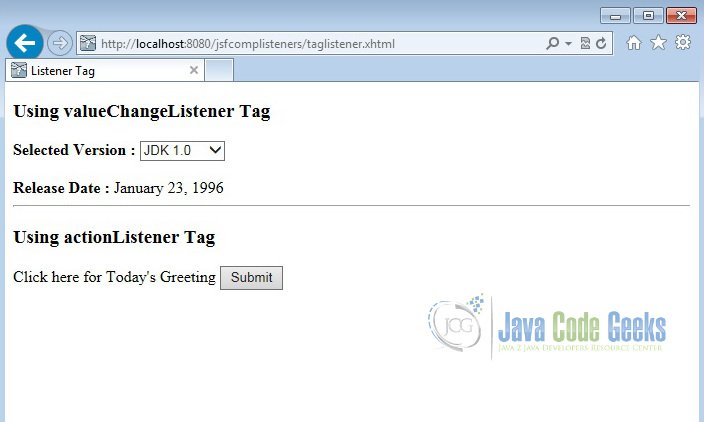
}We will create a view called taglistener.xhtml under /src/main/webapp. We have used h:selectOneMenu to display various Java releases and used h:outputText to display release date. But instead of using the valueChangeListener attribute, we are using the tag f:valueChangeListener this time. The type attribute of the tag reference to the fully qualified name of the listener which is “com.javacodegeeks.jsfcomplisteners.VersionChangeListener” in our case.
taglistener.xhtml
<?xml version="1.0" encoding="ISO-8859-1" ?>
<!DOCTYPE html PUBLIC "-//W3C//DTD XHTML 1.0 Transitional//EN" "http://www.w3.org/TR/xhtml1/DTD/xhtml1-transitional.dtd">
<html xmlns="http://www.w3.org/1999/xhtml"
 xmlns:h="http://java.sun.com/jsf/html"
 xmlns:f="http://java.sun.com/jsf/core">
<head>
<meta http-equiv="Content-Type" content="text/html; charset=ISO-8859-1" />
<title>Listener Tag</title>
</head>
<body>
 <h:form>
   <div>
    <h3>Using valueChangeListener Tag</h3>
    <div>
     <strong>Selected Version : </strong>
     <h:selectOneMenu value="#{javaVersion.releaseDate}"
      onchange="submit()">
     <f:valueChangeListener
      type="com.javacodegeeks.jsfcomplisteners.VersionChangeListener" />
     <f:selectItems value="#{javaVersion.versionData}" />
     </h:selectOneMenu>
    </div>
    <br />
    <div>
     <strong>Release Date : </strong>
     <h:outputText value="#{javaVersion.releaseDate}" />
    </div>
   </div>
 </h:form>
</body>
</html>
Now again package using maven and copy the war to the apache tomcat webapps folder. Open the following URL in the browser.
http://localhost:8080/jsfcomplisteners/taglistener.xhtml
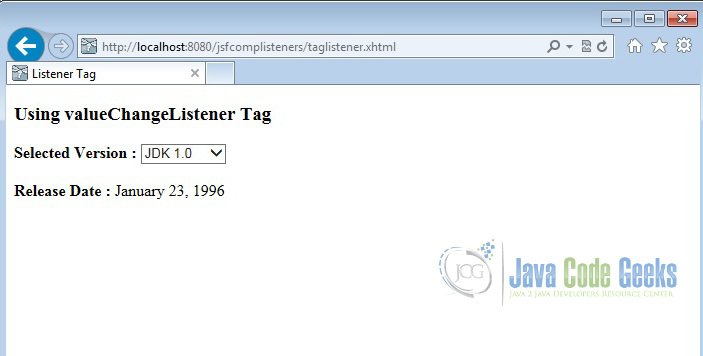

Modify the Java version using the drop down. The release date will get changed accordingly.
5. Action Listener
JSF UI components fires the action-event when the user clicks on them. The components such as h:commandButton fire the event on click of it. Similar to valueChangeListener, actionListener can also be implemented in two techniques. We will show you how to implement action listener on h:commandButton using both the techniques.
Now, we create a managed bean called UserProfile under the package com.javacodegeeks.jsfcomplisteners. The @ManagedBean annotation makes the POJO as managed bean. The@SessionScoped annotation on the bean makes the bean available to the entire user session. We will use the method updateGreeting to modify the greeting with current day. A utility method called getDayUtil is also provided to convert the day into user readable value.
UserProfile.java
package com.javacodegeeks.jsfcomplisteners;

import java.util.Calendar;

import javax.faces.bean.ManagedBean;
import javax.faces.bean.SessionScoped;
import javax.faces.event.ActionEvent;

@ManagedBean(name = "userProfile", eager = true)
@SessionScoped
public class UserProfile {

 private String label = "Click here for Today's Greeting ";
 private String greeting = "Hello, have a nice";

 public String getGreeting() {
  return greeting;
 }

 public String getLabel() {
 return label;
 }

 public void setLabel(String label) {
  this.label = label;
 }

 public void setGreeting(String greeting) {
  this.greeting = greeting;
 }

 public void updateGreeting(ActionEvent event) {
  greeting = greeting + " "
    + getDayUtil(Calendar.getInstance().get(Calendar.DAY_OF_WEEK))
    + "!!";
 }

 private String getDayUtil(int day) {
   String dayOfWeek = "Sunday";
   switch (day) {
    case 1:
     dayOfWeek = "Sunday";
     break;
    case 2:
     dayOfWeek = "Monday";
     break;
    case 3:
     dayOfWeek = "Tuesday";
     break;
    case 4:
     dayOfWeek = "Wednesday";
     break;
    case 5:
     dayOfWeek = "Thursday";
     break;
    case 6:
     dayOfWeek = "Friday";
     break;
    case 7:
     dayOfWeek = "Saturday";
     break;
  }
  return dayOfWeek;
 }

}
5.1 Using actionListener attribute
To use the UI component actionListener attribute technique, we will use the backing bean method updateGreeting of UserProfile.
Now lets modify the view attrlistener.xhtml to include h:outputText for creating label and h:commandButton for command button. The actionListener attribute of h:commandButton is used to invoke the backing bean method.
attrlistener.xhtml
<?xml version="1.0" encoding="ISO-8859-1" ?>
<!DOCTYPE html PUBLIC "-//W3C//DTD XHTML 1.0 Transitional//EN" "http://www.w3.org/TR/xhtml1/DTD/xhtml1-transitional.dtd">
<html xmlns="http://www.w3.org/1999/xhtml"
xmlns:h="http://java.sun.com/jsf/html"
xmlns:f="http://java.sun.com/jsf/core">
<head>
<meta http-equiv="Content-Type" content="text/html; charset=ISO-8859-1" />
<title>Listener Attribute</title>
</head>
<body>
<h:form>
<div>
<h3>Using valueChangeListener attribute</h3>
<div>
<strong>Selected Version : </strong>
<h:selectOneMenu value="#{javaVersion.releaseDate}"
onchange="submit()"
valueChangeListener="#{javaVersion.versionChanged}">
<f:selectItems value="#{javaVersion.versionData}" />
</h:selectOneMenu>
</div>
<br />
<div>
<strong>Release Date : </strong>
<h:outputText value="#{javaVersion.releaseDate}" />
</div>
</div>
<hr></hr>
<div>
<h3>Using actionListener attribute</h3>
<div>
<h:outputText value="#{userProfile.label}"></h:outputText>
<h:commandButton id="submit" value="Submit" action="greeting"
actionListener="#{userProfile.updateGreeting}" />
</div>
</div>
</h:form>
</body>
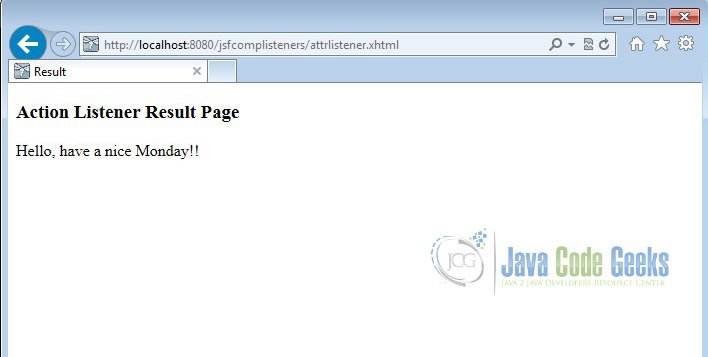
</html>Now create another view called greeting.xhtml under /src/main/webapp. By means of Implicit navigation the action value of the commandButton in attrlistener.xhtml will get resolved to greeting.xhtml. This page is a simple page to display the updated greeting.
greeting.xhtml
<?xml version="1.0" encoding="ISO-8859-1" ?>
<!DOCTYPE html PUBLIC "-//W3C//DTD XHTML 1.0 Transitional//EN" "http://www.w3.org/TR/xhtml1/DTD/xhtml1-transitional.dtd">
<html xmlns="http://www.w3.org/1999/xhtml"
xmlns:h="http://java.sun.com/jsf/html"
xmlns:f="http://java.sun.com/jsf/core">
<head>
<meta http-equiv="Content-Type" content="text/html; charset=ISO-8859-1" />
<title>Result</title>
</head>
<body>
<h:form>
<div>
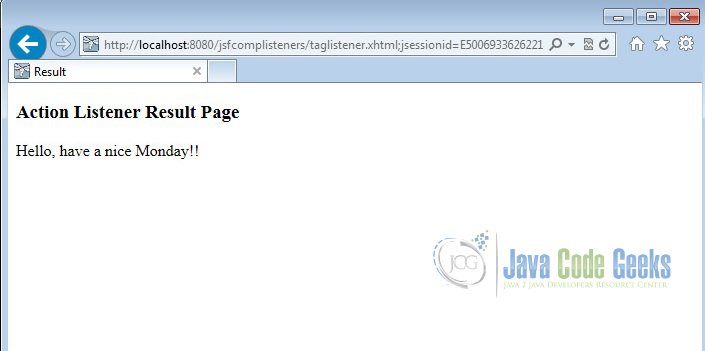
<h3>Action Listener Result Page</h3>
<div>
<h:outputText value="#{userProfile.greeting}" />
</div>
</div>
</h:form>
</body>
</html>Now again package using maven and copy the war to the apache tomcat webapps folder. Open the following URL in the browser.
http://localhost:8080/jsfcomplisteners/attrlistener.xhtml
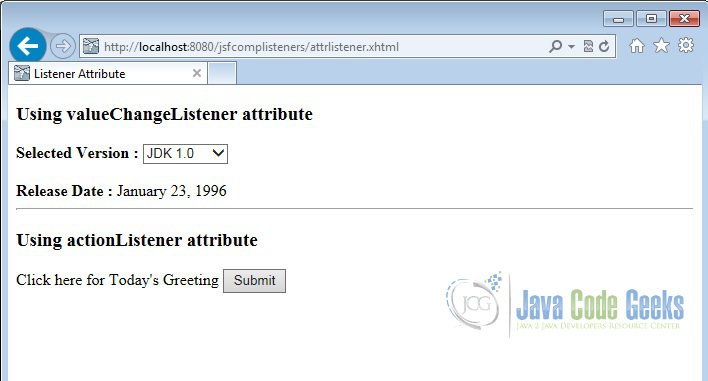
Now click on the submit button.
5.2 Using actionListener Tag
To use the actionListener Tag, we need to first create a class implementing the ActionListener interface. Lets first create a class called UserProfileActionListener in the package com.javacodegeeks.jsfcomplisteners which implement the method processAction of the interface. We will use the FacesContext to get the UserProfile object and update the greeting using ActionEvent.
UserProfileActionListener.java
package com.javacodegeeks.jsfcomplisteners;

import javax.faces.context.FacesContext;
import javax.faces.event.AbortProcessingException;
import javax.faces.event.ActionEvent;
import javax.faces.event.ActionListener;

public class UserProfileActionListener implements ActionListener {

 public void processAction(ActionEvent event)
  throws AbortProcessingException {
   UserProfile userProfile = (UserProfile) FacesContext
    .getCurrentInstance().getExternalContext().getSessionMap()
    .get("userProfile");
   userProfile.updateGreeting(event);
 }
}
Now let us modify the view taglistener.xhtml to include h:outputText for creating label and h:commandButton for command button. We will use the f:actionListener tag and reference the type attribute to the fully qualified name of the class com.javacodegeeks.jsfcomplisteners.UserProfileActionListener.
taglistener.xhtml
<?xml version="1.0" encoding="ISO-8859-1" ?>
<!DOCTYPE html PUBLIC "-//W3C//DTD XHTML 1.0 Transitional//EN" "http://www.w3.org/TR/xhtml1/DTD/xhtml1-transitional.dtd">
<html xmlns="http://www.w3.org/1999/xhtml"
 xmlns:h="http://java.sun.com/jsf/html"
 xmlns:f="http://java.sun.com/jsf/core">
<head>
<meta http-equiv="Content-Type" content="text/html; charset=ISO-8859-1" />
<title>Listener Tag</title>
</head>
<body>
 <h:form>
  <div>
   <h3>Using valueChangeListener Tag</h3>
   <div>
    <strong>Selected Version : </strong>
    <h:selectOneMenu value="#{javaVersion.releaseDate}"
     onchange="submit()">
    <f:valueChangeListener
     type="com.javacodegeeks.jsfcomplisteners.VersionChangeListener" />
    <f:selectItems value="#{javaVersion.versionData}" />
    </h:selectOneMenu>
   </div>
   <br />
   <div>
    <strong>Release Date : </strong>
    <h:outputText value="#{javaVersion.releaseDate}" />
   </div>
  </div>
  <hr></hr>
  <div>
   <h3>Using actionListener Tag</h3>
   <div>
    <h:outputText value="#{userProfile.label}"></h:outputText>
    <h:commandButton id="submit" value="Submit" action="greeting">
    <f:actionListener
     type="com.javacodegeeks.jsfcomplisteners.UserProfileActionListener" />
    </h:commandButton>
  </div>
 </div>
 </h:form>
</body>
</html>
Now again package using maven and copy the war to the apache tomcat webapps folder. Open the following URL in the browser
http://localhost:8080/jsfcomplisteners/taglistener.xhtml
Now Click on the Submit button.
6. Download the Eclipse Project
This was an example of how to use Java Server Faces Component Listeners.
You can download the full source code of this example here : JSF Components Listeners
