1. Introduction
The Enterprise Java Beans (EJB) is a specification for deployable server-side components in Java. It is an agreement between components and application servers that enable any component to run in any application server. EJB components (called enterprise beans) are deployable, and can be imported and loaded into an application server, which hosts those components to develop secured, robust and scalable distributed applications.
To run EJB application, you need an application server (EJB Container) such as Jboss, Glassfish, Weblogic, Websphere etc. It performs:
- Life Cycle Management
- Security
- Transaction Management
- Load Balancing
- Persistence Mechanism
- Exception Handling
- Object Pooling
EJB application is deployed on the server, so it is called server side component also. We’ll be discussing EJB 3.0 in this tutorial.
2. Types of Enterprise Java Beans
EJB defines three different kinds of enterprise beans.
- Session beans: Session bean contains business logic that can be invoked by local, remote or webservice client. The bean class typically contains business-process related logic, such as logic to compute prices, transfer funds between bank accounts, or perform order entry.Session bean are of 3 types:
- Stateless Session Bean: A stateless session bean doesn’t maintain state of a client between multiple method calls. When a client invokes the methods of a stateless bean, the bean’s instance variables may contain a state specific to that client but only for the duration of the invocation. When the method is finished, the client-specific state should not be retained.
- Stateful Session Bean: A stateful session bean maintain state of a client across multiple requests. In a stateful session bean, the instance variables represent the state of a unique client/bean session. This state is often called the conversational state as the client interacts with its bean,.
- Singelton Session Bean: A singleton session bean is instantiated once per application and exists for the lifecycle of the application. Singleton session beans are designed for circumstances in which a single enterprise bean instance is shared across and concurrently accessed by clients.
- Entity beans: Entity beans encapsulates the state that can be persisted in the database. User data can be saved to database via entity beans and later on can be retrieved from the database in the entity bean. The bean class contains data-related logic such as logic to reduce balance of bank account or modify customer details.
- Message-driven beans: Message-driven beans are similar to session beans in their actions. It contains the business logic but it is invoked by passing message. The difference is that you can call message driven beans only by sending messages to those beans. These message-driven beans might call other enterprise beans as well.
Tip
You may skip project creation and jump directly to the beginning of the example below.
3. Create EJB Module
In example below, We’ll create a ejb module project named BasicOperationsEJBModule using NetBeans.
Open NetBeans IDE, choose File > New Project.
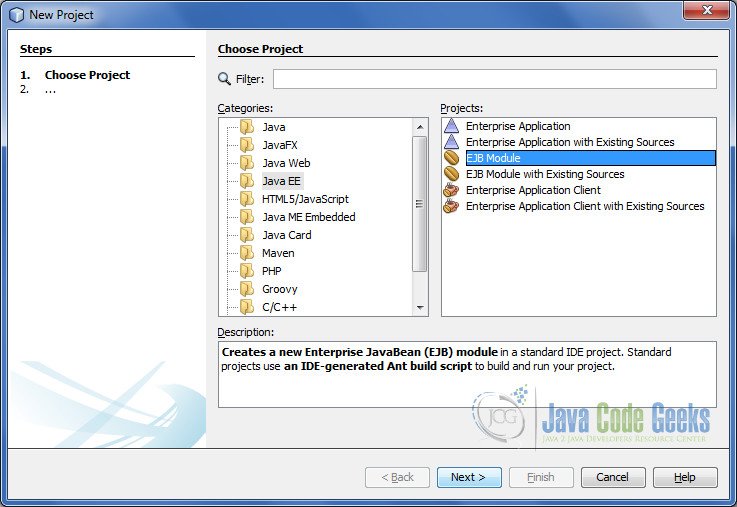
In the New Project wizard, expand the Java EE category and select EJB Module as shown in the figure below. Then click Next.
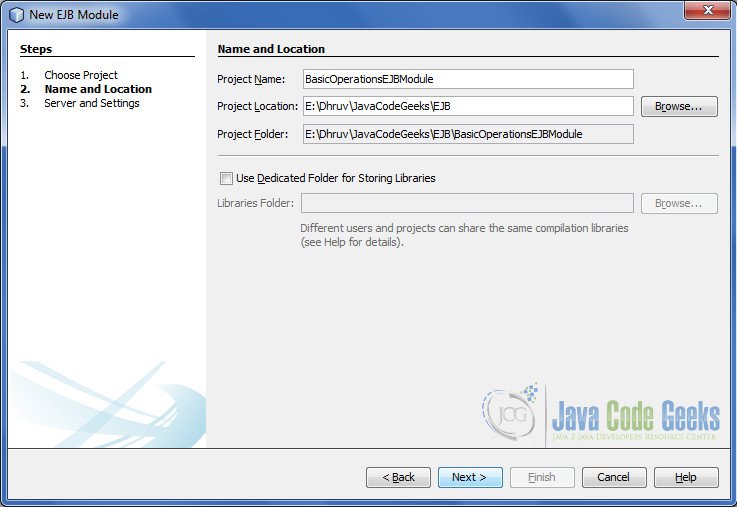
You have to specify the Project Name and the Project Location in the appropriate text fields and then click Next.
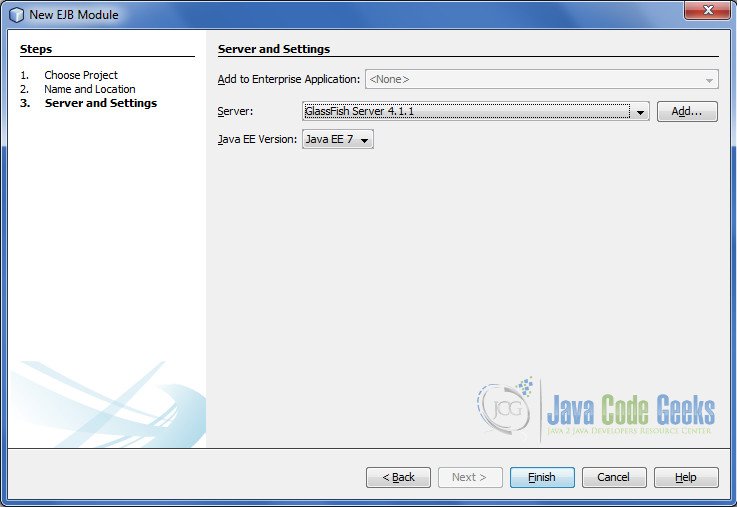
In the next window, add the Server and select the Java EE version and click Finish.
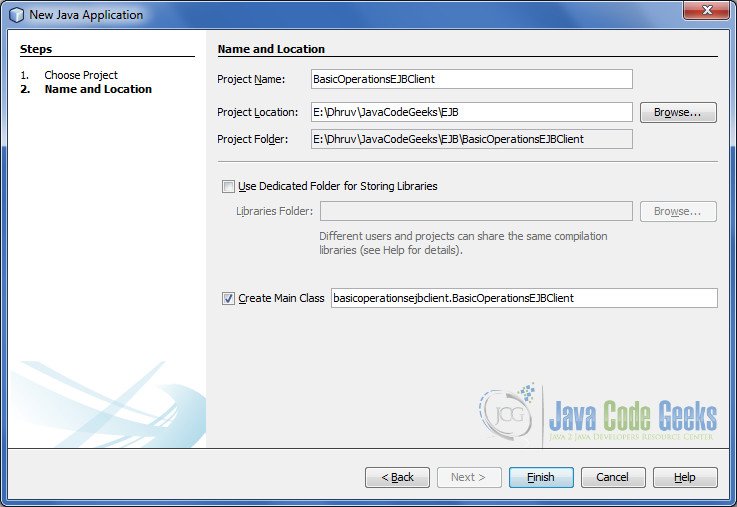
4. Create a new Application Class Project
In this section you will create an application class library project for EJB remote interface and entity class.
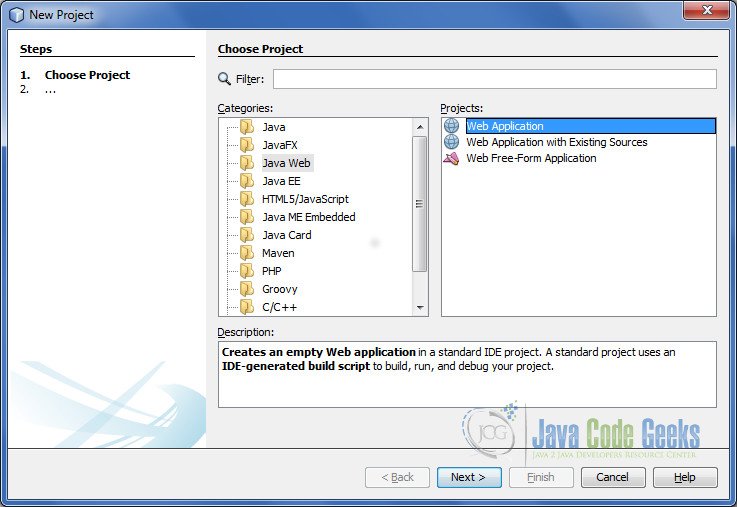
Open NetBeans IDE, choose File > New Project.
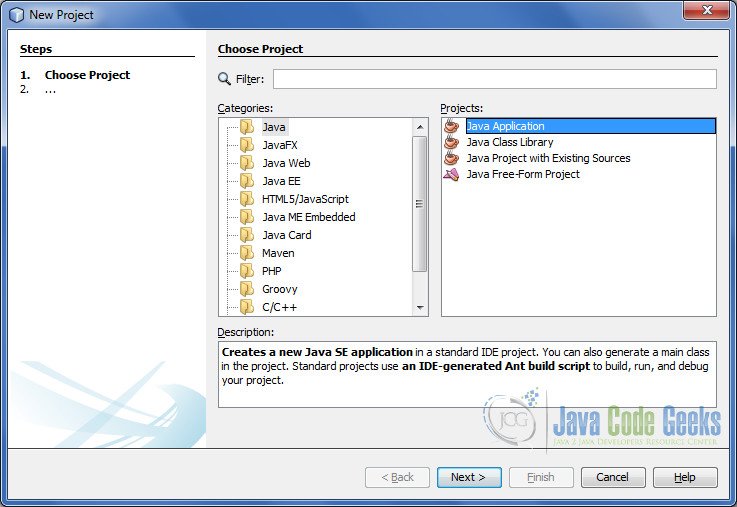
In the New Project wizard, expand the Java category and select Java Class Library as shown in the figure below. Then click Next.
You have to specify the Project Name and the Project Location in the appropriate text fields and then click Next.
5. Create Session Bean
The EJB 3.1 specification introduces @Stateless annotation that enables you to easily create stateless session beans. A stateless session bean as per its name does not have any associated client state, but it may preserve its instance state. EJB Container normally creates a pool of few stateless bean’s objects and use these objects to process client’s request.
To create the stateless session bean, perform the following steps.
- Right-click the EJB module and choose New > Other to open the New File wizard.
- Select Session Bean in the Enterprise JavaBeans category. Click Next.
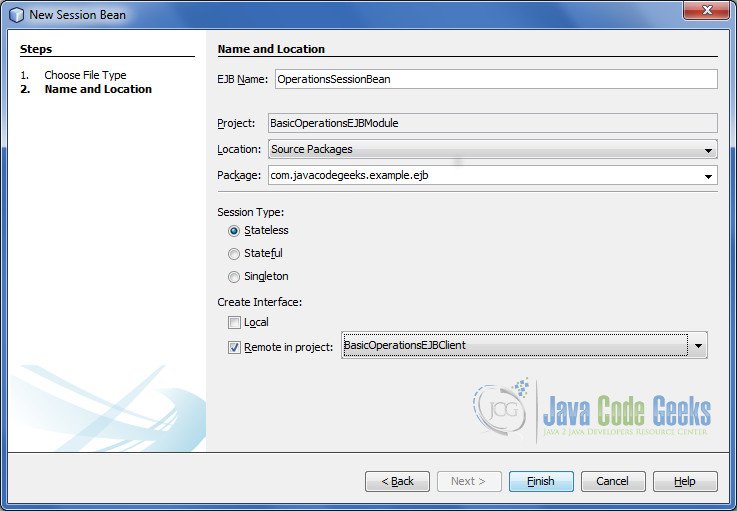
- Type OperationsSessionBean for the EJB Name.
- Type com.javacodegeeks.example.ejb for the Package name.
- Select Stateless.
- Click Finish.
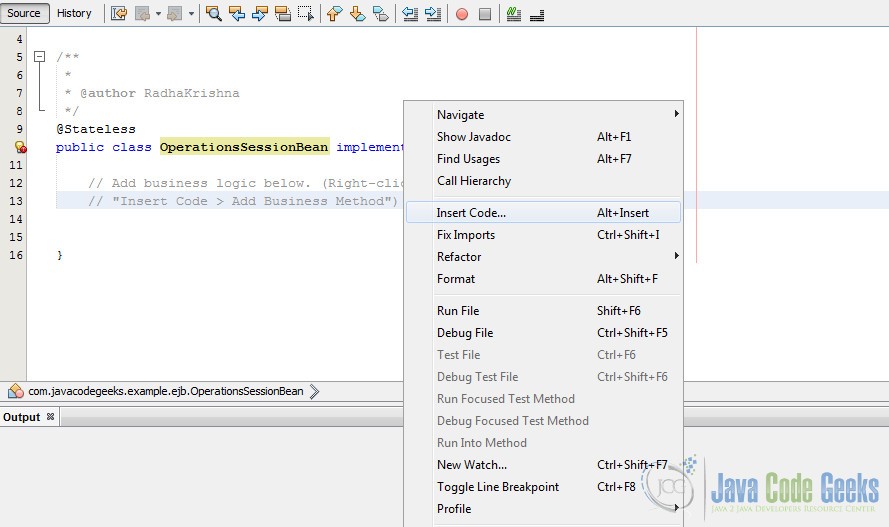
5.1 Adding a Business Method
In this exercise you will create a simple business method in the session bean that returns a string.
- Right-click in the editor of OperationsSessionBean and choose Insert Code

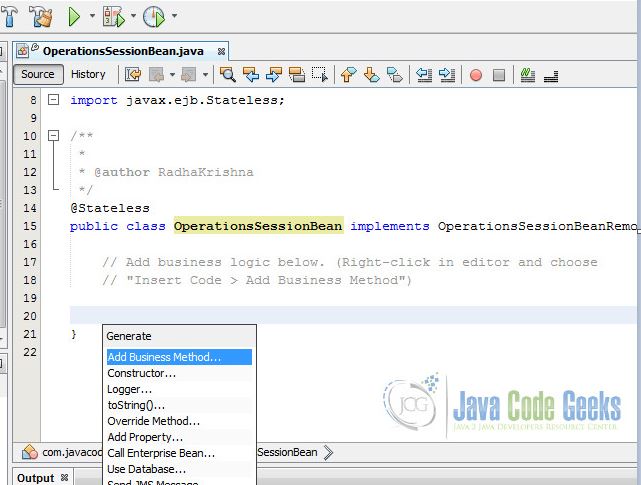
Select Insert Code - Select Add Business Method.

Add Business Method - Type add in Method Name and float as return type and x, y as parameter names

Enter business method details - Similarly, create subtract method as shown in below figure
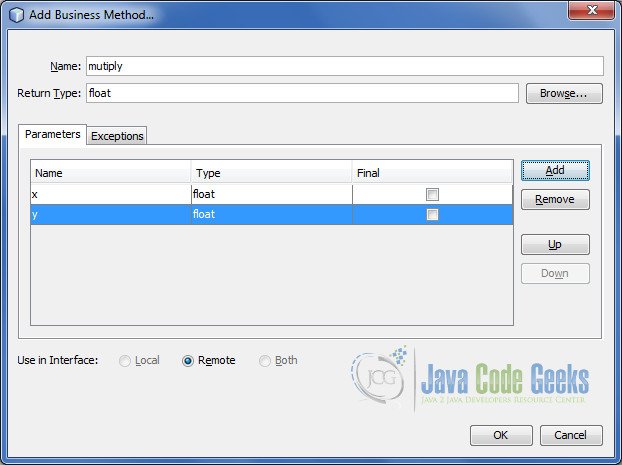
Add business method - Create multiply business method
Add business method - Create divide business method
Add business method


OperationsSessionBean.java
package com.javacodegeeks.example.ejb;

import javax.ejb.Stateless;

/**
 *
 * @author RadhaKrishna
 */
@Stateless
public class OperationsSessionBean implements OperationsSessionBeanRemote {

    // Add business logic below. (Right-click in editor and choose
    // "Insert Code > Add Business Method")

    @Override
    public float add(float x, float y) {
        return x + y;
    }

    @Override
    public float subtract(float x, float y) {
        return x - y;
    }

   @Override
    public float mutliply(float x, float y) {
        return x * y;
    }

    @Override
    public float divide(float x, float y) {
        return x / y;
    }
}
6. Deploy the EJB Module
You can now build and deploy the EJB module. Right-click the BasicOperationsEJBModule module and choose Deploy. When you click Deploy, the IDE builds the ejb module and deploys the JAR archive to the server.
In the Services window, if you expand the Applications node of GlassFish Server you can see that BasicOperationsEJBModule was deployed.
7. Create a new Web Module to test EJB
Choose File > New Project.
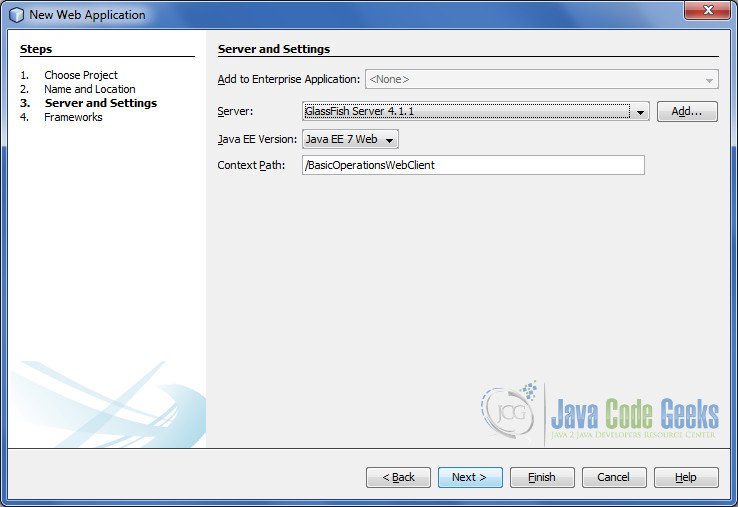
In the New Project wizard, expand the Java Web category and select Web Application as shown in the figure below. Then click Next.
You have to specify the Project Name and the Project Location in the appropriate text fields and then click Next.

In the next window, add the J2EE Server and select the J2EE version and click Finish.
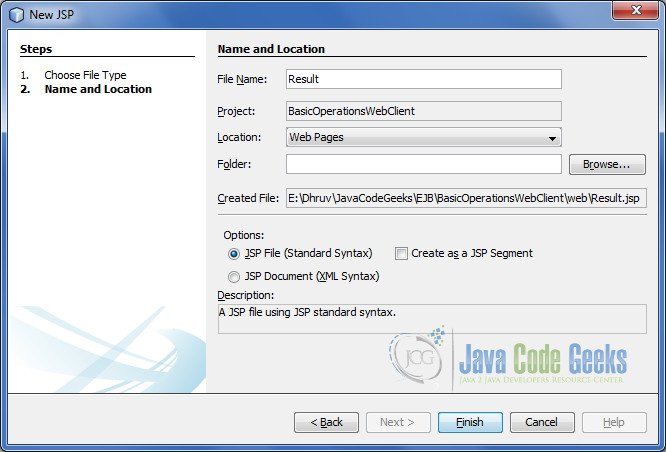
8. Create JSP Files to test EJB
In this exercise you will create a JSP to test user operations and obtain result.
- Right-click the Web module and choose File > New File wizard.
- In the New File wizard, expand the Web category and select JSP as shown in the figure below.
- Then click Next.
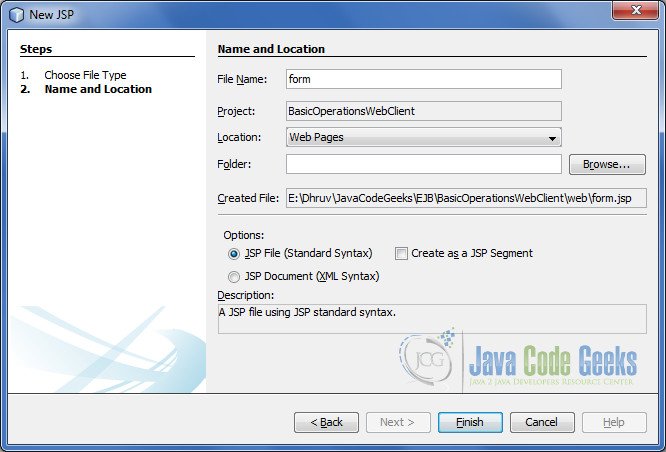
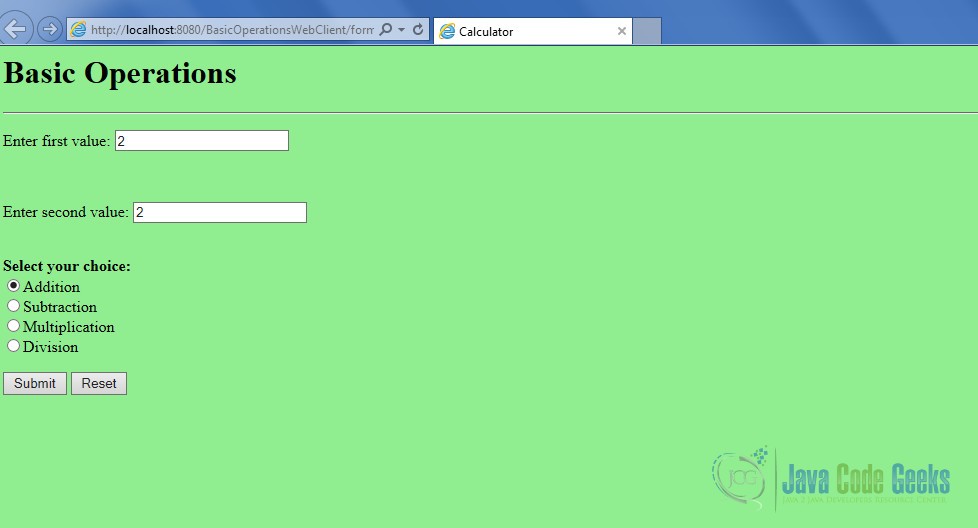
form.jsp
<html>
    <head>
        <title>Calculator</title>
    </head>

    <body bgcolor="lightgreen">
        <h1>Basic Operations</h1>
        <hr>

        <form action="Result.jsp" method="POST">
            <p>Enter first value:
                <input type="text" name="num1" size="25"></p>
            <br>
            <p>Enter second value:
                <input type="text" name="num2" size="25"></p>
            <br>

            <b>Select your choice:</b><br>
            <input type="radio" name="group1" value ="add">Addition<br>
            <input type="radio" name="group1" value ="sub">Subtraction<br>
            <input type="radio" name="group1" value ="multi">Multiplication<br>
            <input type="radio" name="group1" value ="div">Division<br>
            <p>
                <input type="submit" value="Submit">
                <input type="reset" value="Reset">
           </p>
        </form>
    </body>
</html>
</form>
The result will be displayed in Result.jsp. Create jsp as per below.
- Right-click the Web module and choose File > New File wizard.
- In the New File wizard, expand the Web category and select JSP as shown in the figure below.
- Then click Next.
Result.jsp
<%@ page contentType="text/html; charset=UTF-8" %>
<%@ page import="com.javacodegeeks.example.ejb.*, javax.naming.*"%>

<%!
    private OperationsSessionBeanRemote ops = null;
    float result = 0;

    public void jspInit() {
        try {

            InitialContext ic = new InitialContext();
            ops = (OperationsSessionBeanRemote)ic.lookup(OperationsSessionBeanRemote.class.getName());


            System.out.println("Loaded Calculator Bean");


        } catch (Exception ex) {
            System.out.println("Error:"
                    + ex.getMessage());
        }
    }

    public void jspDestroy() {
        ops = null;
    }
%>


<%

    try {
        String s1 = request.getParameter("num1");
        String s2 = request.getParameter("num2");
        String s3 = request.getParameter("group1");

        System.out.println(s3);

        if (s1 != null && s2 != null) {
            Float num1 = new Float(s1);
            Float num2 = new Float(s2);

            if (s3.equals("add")) {
                result = ops.add(num1.floatValue(), num2.floatValue());
            } else if (s3.equals("sub")) {
                result = ops.subtract(num1.floatValue(), num2.floatValue());
            } else if (s3.equals("multi")) {
                result = ops.mutliply(num1.floatValue(), num2.floatValue());
            } else {
                result = ops.divide(num1.floatValue(), num2.floatValue());
            }

%>
<p>
    <b>The result is:</b> <%= result%>
<p>

    <%
            }
        }// end of try
        catch (Exception e) {
            e.printStackTrace();
            //result = "Not valid";
        }
    %>
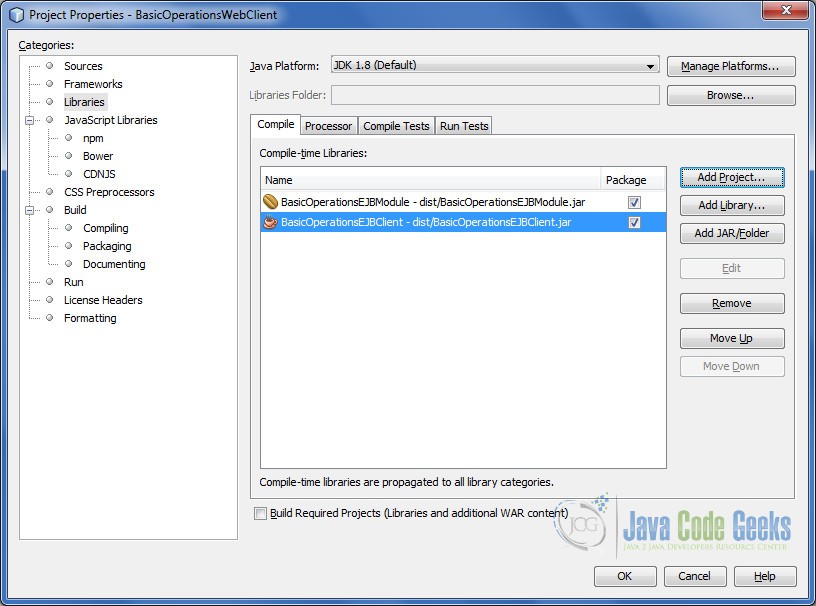
- Right click
BasicOperationsWebClientproject and select Properties - In the menu select Libraries and click Add Project and add
BasicOperationsEJBModuleandBasicOperationsEJBClientprojects - Click OK.
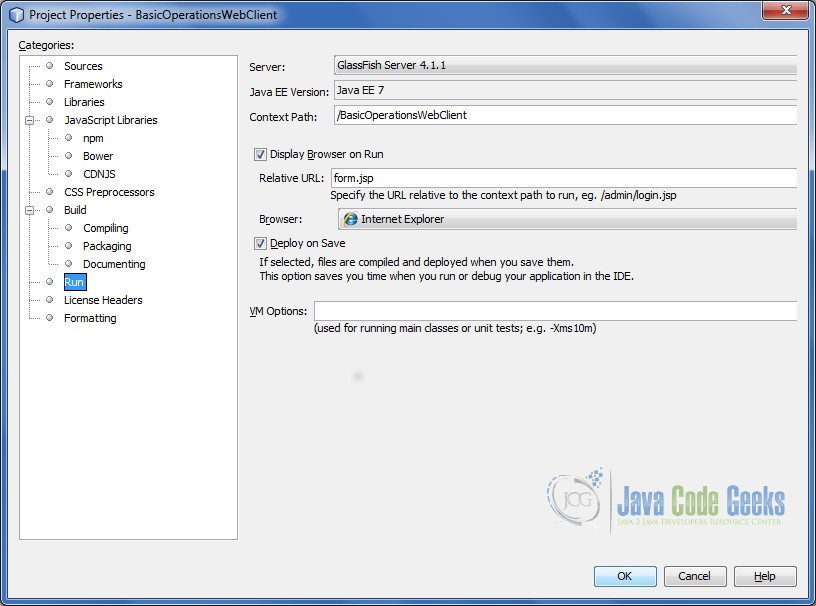
9. Run the Project
You can now run the project. When you run the project, you want the browser to open to the page with the form.jsp. You do this by specifying the URL in the Properties dialog box for the web application. The URL is relative to the context path for the application. After you enter the relative URL, you can build, deploy and run the application from the Projects window.
To set the relative URL and run the application, do the following:
- In the Projects window, right-click the BasicOperationsWebClient application node
- Select Properties in the pop-up menu.
- Select Run in the Categories pane.
- In the Relative URL textfield, type /form.jsp.
- Click OK.
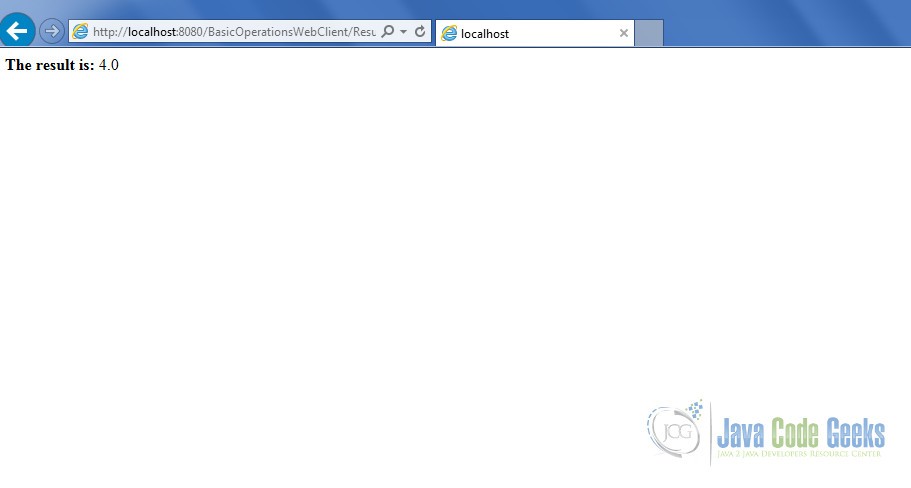
When you submit the request Result.jsp is called to display the result
10. Download the NetBeans Project
This was an example of Session bean in EJB.
You can download the full source code of this example here: EJBTutorialExample.zip

hi sir
u got this problm :
Exception while invoking class org.glassfish.ejb.startup.EjbDeployer load method
how can i solve it please