In this example, we are going to take a look at how to use the Java MySQL Connector in two different cases, the first one being a standard Java application and the second one being a web application using Tomcat. Then we will see how to download MySQL connector and how to make a Java connection to MySQL.
MySQL Connector is a jar file (a library essentially), which allows interoperability between a MySQL database and a Java application. That way you can query and update your database, something essential for most of the applications created today. Let’s take a look then! Our configuration for this example consists of:

- Java 7
- Tomcat 7
- MySQL 5.6
- Eclipse Luna
1. Installing/using MySQL Connector in Eclipse
Let’s start by showing how to make a Java connection to MySQL in a standard Java application. The process is fairly simple, as it requires just to add the connector to your list of jars that are used for your application. We will explain the whole process for finding, downloading, and installing MySQL connector using Eclipse as your IDE.
1.1 Download MySQL Connector:
You can easily download MySQL Connector and make a Java connection to MySQL from the official MySQL website, which provides it. Select the Platform Independent option, and download the zip file which contains, among others, the MySQL Connector jar file which will be added in the build path. Right now, the official version which will be downloaded will contain the MySQL-connector-java-5.1.31-bin file (which is the file that should be added to the project).

1.2 Install MySQL Connector to your Java application:
You need to create a new Java application/Eclipse project in order to install and make a Java connection to MySQL. Open Eclipse and create a new project (it does not really matter what kind, as long as you need to use a database). You can add the connector to the build path, by right-clicking on the project -> Build Path -> Add External Archives, as shown in the image below:

You can see that the jar is added in the build path under the Referenced Libraries section, in the project structure. That was it, you are now ready to start using MySQL in your application!
2. Install MySQL connector using Tomcat
In order to integrate Tomcat and JDBC we are going to follow a different process from before. In this case, we still have to use the connector jar file (in a specific folder), as well as make some xml configuration changes. Let’s take a look on what needs to be done.
2.1 Download MySQL Connector and put it in the right folder
As seen before, we need to download the MySQL Connector from the official MySQL website, and use the mysql-connector-java-5.1.31-bin file. In this case however, we need to put the jar file in out Tomcat installation directory, specifically in the $CATALINA_HOME/lib sub-directory. For instance, since we are using Windows, the directory that we are using in this example is C:\tomcat7\lib. Just add the jar file in there (along the other jar files that tomcat uses) and you are done with this step.
2.2 Create a Dynamic Web Project application in Eclipse
In order to make use of the instructions that will follow, and see for yourself how to use JDBC with Tomcat, you need to create a new web project consisting of servlets and jsp pages, that will make use of Tomcat web server for deployment. Since this is out of the scope of this article we are going to give some general instructions on how to do it, and you can take a closer look at the code attached at the end of this example.
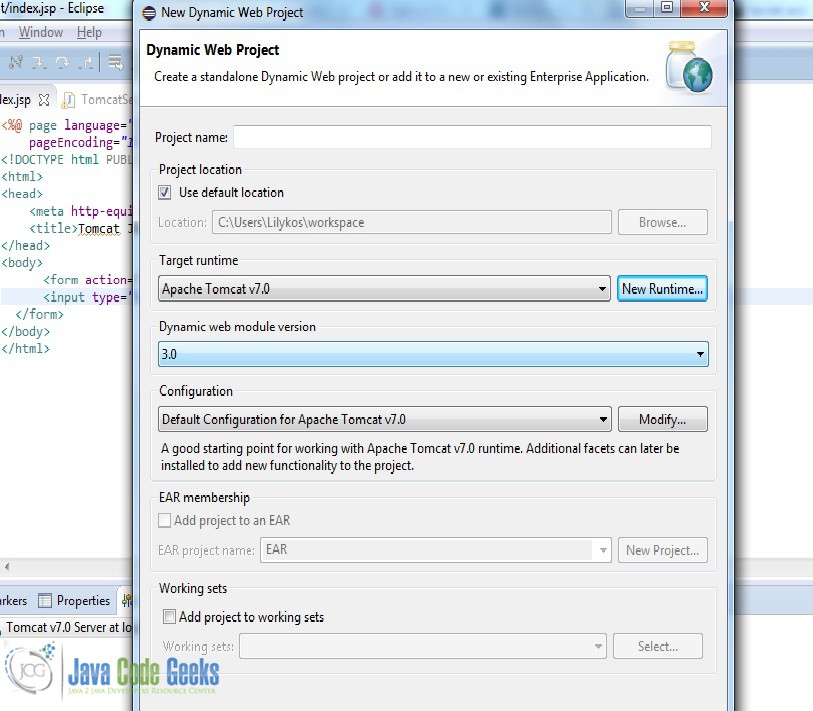
You can easily create a web project in Eclipse by following these steps: File -> New -> Dynamic Web Project. Select the runtime you want to use (in our case, Tomcat 7) and give a name to your project.
Afterwards, you can create the servlets that you are going to use (which are Java classes that interact with your frontend code) and your jsp pages (html pages that interact with your Java backend). We are going to use one servlet and one jsp page, just the bare necessities in order to have a functional web application.
2.3 How to use MySQL connector
Tomcat needs to be configured in order to use MySQL connector. The main point in this configuration is the context.xml file, which provides information for the application at hand. Although Tomcat has a context.xml file of its own, we are going to create an application specific context.xml which will provide the information needed for the Tomcat-JDBC integration. This file should be created inside the WebContent/META_INF folder of your application, and contain the following information:
context.xml
01 02 03 04 05 06 07 08 09 10 11 | <?xml version="1.0" encoding="UTF-8"?><Context> <Resource name="jdbc/albums" auth="Container" driverClassName="com.mysql.jdbc.Driver" type="javax.sql.DataSource" username="username" password="password" url="jdbc:mysql://localhost:3306/albums"/></Context> |
As you can see, this file provides configuration about the database that we are going to use, specifically:
jdbc/albums: The name of the database that we are going to use with JDBC.driverClassName: The driver class that we are going to use. In this example we are using MySQL, but it could easily be something else, e.g. Oracle.type: We are going to access the database using Tomcat, so the integration will use theDataSourceclass.username: Username credentials.password: Password credentials.url: The url endpoint of the datbase.
There is more information that can be added, for different cases and situations, but these are the necessary ones that will have your application up and running smoothly. Now we are ready to move on to the actual code! Let’s take a look at our files and explain what is the usefulness of each one.
index.jsp
01 02 03 04 05 06 07 08 09 10 11 12 13 14 15 | <%@ page language="java" contentType="text/html; charset=ISO-8859-1" pageEncoding="ISO-8859-1"%><!DOCTYPE html PUBLIC "-//W3C//DTD HTML 4.01 Transitional//EN" "http://www.w3.org/TR/html4/loose.dtd"><html><head> <meta http-equiv="Content-Type" content="text/html; charset=ISO-8859-1"> <<title>Tomcat JDBC Example</title></head><body> <form action="query" method="post"> <input type="submit" name="jdbc_query" value="Query DB" /> </form></body></html> |
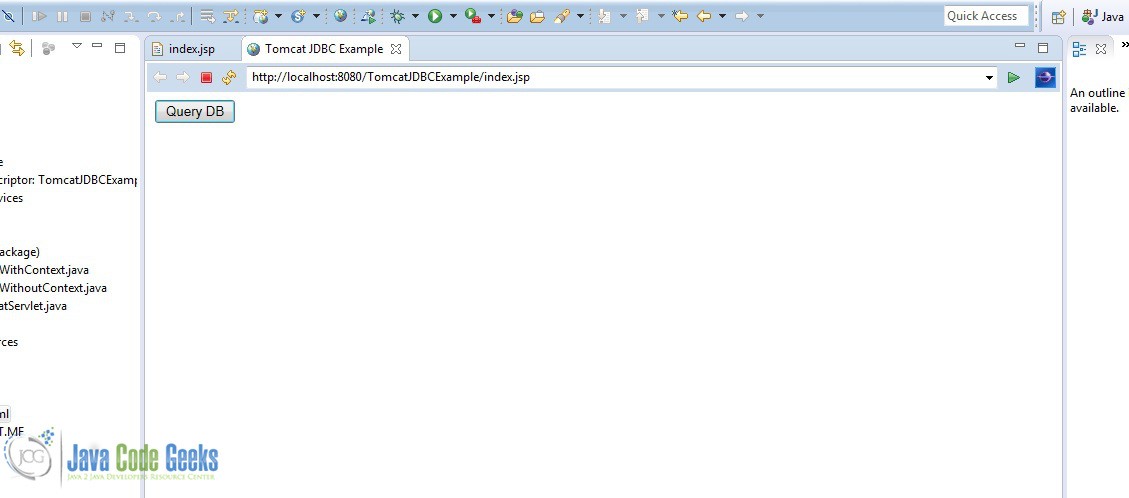
This is a very simple jsp file which contains only one button. As soon as we deploy the application, the file index.jsp will be loaded by default and we will be presented with this button. As soon as we press it, it will make an HTTP POST call to the server (our Java application, deployed by Tomcat, which will, in turn, do whatever it is supposed to do, in our case query the database.
TomcatServlet.java
01 02 03 04 05 06 07 08 09 10 11 12 13 14 15 16 17 18 19 20 21 22 23 24 25 26 27 28 29 30 31 32 33 34 | import java.io.IOException;import java.io.PrintWriter;import javax.naming.NamingException;import javax.servlet.ServletException;import javax.servlet.http.HttpServlet;import javax.servlet.http.HttpServletRequest;import javax.servlet.http.HttpServletResponse;@SuppressWarnings("serial")public class TomcatServlet extends HttpServlet { @Override public void doPost(HttpServletRequest request, HttpServletResponse response) throws ServletException, IOException { response.setContentType("text/html"); PrintWriter out = response.getWriter(); // If the button that we have in our jsp page made a POST // then the servlet is activated and does whatever we programmed // it to do. if (request.getParameter("jdbc_query") != null) { try { // Use this class if you have created the context.xml file. QueryWithContext.query(out); // Use this one without creating/using the context.xml file. QueryWithoutContext.query(out); } catch (NamingException e) { e.printStackTrace(); } } }} |
This is our servlet class. As soon as we make the POST request, the servlet will get it and execute the code that we have written. In our example, we call the methods of two similar classes, both of which make a query to the database. The fundamental difference between them is that the first class is using the context.xml file in order to create the integration, and the second one is using the MysqlDataSource class, and provides the information through the class’ methods. Let’s see the code and explore the differences.
QueryWithContext.java
01 02 03 04 05 06 07 08 09 10 11 12 13 14 15 16 17 18 19 20 21 22 23 24 25 26 27 28 29 30 31 32 33 34 35 36 37 38 39 40 41 42 43 44 45 46 47 48 49 | import java.io.PrintWriter;import java.sql.Connection;import java.sql.ResultSet;import java.sql.SQLException;import java.sql.Statement;import javax.naming.Context;import javax.naming.InitialContext;import javax.naming.NamingException;import javax.sql.DataSource;public final class QueryWithContext { public static void query(PrintWriter out) throws NamingException { Context context = null; DataSource datasource = null; Connection connect = null; Statement statement = null; try { // Get the context and create a connection context = new InitialContext(); datasource = (DataSource) context.lookup("java:/comp/env/jdbc/albums"); connect = datasource.getConnection(); // Create the statement to be used to get the results. statement = connect.createStatement(); String query = "SELECT * FROM the_classics"; // Execute the query and get the result set. ResultSet resultSet = statement.executeQuery(query); out.println("<strong>Printing result using context file...</strong><br>"); while (resultSet.next()) { String albumName = resultSet.getString("name"); String artist = resultSet.getString("artist"); int year = resultSet.getInt("year"); out.println("Album: " + albumName + ", by Artist: " + artist + ", released in: " + year + "<br>"); } } catch (SQLException e) { e.printStackTrace(out); } finally { // Close the connection and release the resources used. try { statement.close(); } catch (SQLException e) { e.printStackTrace(out); } try { connect.close(); } catch (SQLException e) { e.printStackTrace(out); } } }} |
As seen, this class gets the context from the context.xml file which handles all the connection information (username, password, url, etc).

QueryWithoutContext.java
01 02 03 04 05 06 07 08 09 10 11 12 13 14 15 16 17 18 19 20 21 22 23 24 25 26 27 28 29 30 31 32 33 34 35 36 37 38 39 40 41 42 43 44 45 46 47 48 49 50 51 52 | import java.io.PrintWriter;import java.sql.Connection;import java.sql.ResultSet;import java.sql.SQLException;import java.sql.Statement;import javax.naming.NamingException;import com.mysql.jdbc.jdbc2.optional.MysqlDataSource;public class QueryWithoutContext { public static void query(PrintWriter out) throws NamingException { MysqlDataSource ds = null; Connection connect = null; Statement statement = null; try { // Create a new DataSource (MySQL specifically) // and provide the relevant information to be used by Tomcat. ds = new MysqlDataSource(); ds.setUrl("jdbc:mysql://localhost:3306/albums"); ds.setUser("username"); ds.setPassword("password"); connect = ds.getConnection(); // Create the statement to be used to get the results. statement = connect.createStatement(); String query = "SELECT * FROM the_classics"; // Execute the query and get the result set. ResultSet resultSet = statement.executeQuery(query); out.println("<strong>Printing result using DataSource...</strong><br>"); while (resultSet.next()) { String albumName = resultSet.getString("name"); String artist = resultSet.getString("artist"); int year = resultSet.getInt("year"); out.println("Album: " + albumName + ", by Artist: " + artist + ", released in: " + year + "<br>"); } } catch (SQLException e) { e.printStackTrace(out); } finally { // Close the connection and release the resources used. try { statement.close(); } catch (SQLException e) { e.printStackTrace(out); } try { connect.close(); } catch (SQLException e) { e.printStackTrace(out); } } }} |
The class has the same functionality as before, but in this case we provide the information we need without using any extra file. We use the class MysqlDataSource (which needs the JDBC connector, currently in the /lib folder) and using its methods give the relevant information to the application (username, password, url).
web.xml
01 02 03 04 05 06 07 08 09 10 11 12 13 14 15 16 17 18 19 20 21 22 23 | <?xml version="1.0" encoding="UTF-8"?> xsi:schemaLocation="http://java.sun.com/xml/ns/javaee http://java.sun.com/xml/ns/javaee/web-app_3_0.xsd" id="WebApp_ID" version="3.0"> <display-name>TomcatJDBCExample</display-name> <resource-ref> <description>JDBC</description> <res-ref-name>jdbc/albums</res-ref-name> <res-type>javax.sql.DataSource</res-type> <res-auth>Container</res-auth> </resource-ref> <servlet> <servlet-name>TomcatJDBC</servlet-name> <servlet-class>TomcatServlet</servlet-class> </servlet> <servlet-mapping> <servlet-name>TomcatJDBC</servlet-name> <url-pattern>/</url-pattern> </servlet-mapping></web-app> |
The web.xml file is a perquisite for every Java web application, as it contains important configuration regarding many parts of the application itself. In our example, we can clearly see that the example contains the servlet configuration (how it will interact with the frontend of the application), as well as information about any additional data source that we may use, in this case the SQL connector.
Output
Let’s take a look at the results of our application. When we deploy the application, the file index.jsp will be loaded and will open in the handy internal browser that is bundled with eclipse.
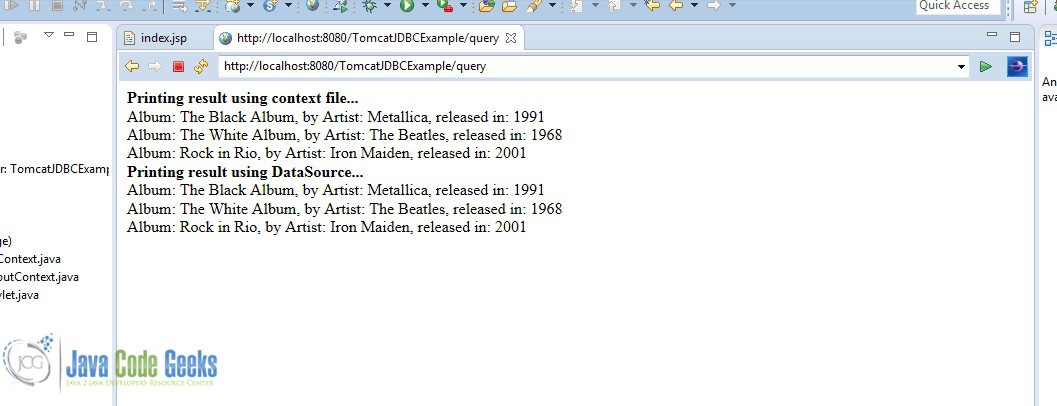
As you can see both methods worked just fine, and we queried the database successfully, producing the exact same results.
3. Download the Source Code
This was an example of MySQL connector installation, how to make a Java connection to MySQL and usage in Eclipse and Tomcat.
You can download the full source code of this example here: MySQL Connector for Java – How to install in Eclipse and Tomcat
Last updated on Jun. 18th, 2020
