In this post we’ll look at Gradle, its installation and configuration, and how to automate stages of development and release of software through its base concept, the Gradle tasks.
1. What is Gradle ?
Gradle is a build and automation tool, that can automate our building, testing, deploying tasks and many more. Gradle is the next generation build system for Java technologies that includes some advantages from older tools like ant or maven. Let’s have a look:
- Allows declarative and expressive domain-specific-language (DSL). This is a powerful concept because it allows us to write a custom language that is more friendly than Java.
- Is Groovy-based. This means that your configuration is made in Groovy statements instead of xml blocks, making it very easy to define the tasks to be performed.
- Supports legacy scripts in Ant or Maven, and has full support to Ivy repository infrastructure.
- It’s designed to take advantage of convention over configuration.
- Works on non-java projects too.
- Easily customizable and scalable.
2. Why Gradle ? I really need a build tool?
Today, we work on large projects that need automated release process to mitigate risks and failures; a building system as Gradle, permits you to structure a process from the compilation to the deployment in your application server. This approach has several advantages, like spending time on more important tasks for our project (like modeling and coding features) and delegating repetitive tasks to Gradle, or also the use of Groovy dynamic language scripts (DSL) instead of too long xml files.
If you want to do continuous delivery and make your release process automatic, Gradle is a nice tool to carry out these goals.
3. Downloading Gradle
- At time of this tutorial, Gradle is in your 2.3 version. You can download from here.
- We need a JDK 1.6 before installing Gradle, if you don’t have, you can download from here.
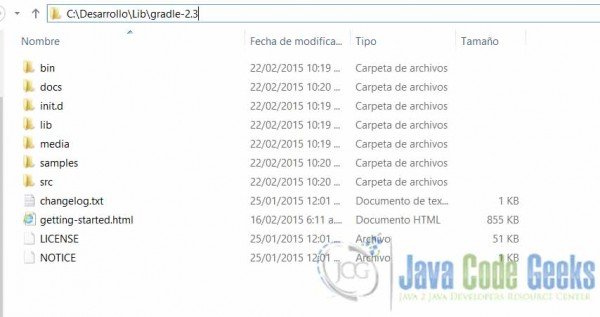
- So, unzip the file in any directory that you choose, in this example we set Gradle in C:/Desarrollo/Lib/gradle-2.3.
4. Setting environment variables
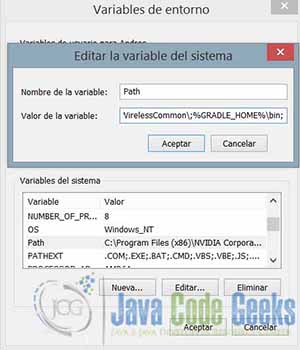
Then, we have to set enviroment variables to get a full access to Gradle, so create the GRADLE_HOME variable that point to the earlier directory that you set.
Note: The screenshots shown here are taken from Windows 8. Your version of Windows may vary.

Next, in the PATH variable add the bin directory of the Gradle installation with %GRADLE_HOME%\bin, with this we can run Gradle from any directory.
To verify that Gradle was successfully installed, go to the console (cmd shell) and run this command: gradle -v
C:\Users\Andres>gradle -v

------------------------------------------------------------
Gradle 2.3
------------------------------------------------------------

Build time:   2015-02-16 05:09:33 UTC
Build number: none
Revision:     586be72bf6e3df1ee7676d1f2a3afd9157341274

Groovy:       2.3.9
Ant:          Apache Ant(TM) version 1.9.3 compiled on December 23 2013
JVM:          1.7.0_67 (Oracle Corporation 24.65-b04)
OS:           Windows 8.1 6.3 amd64
5. Hello World! Gradle
The Gradle’s starting point is the build.gradle file. Any task or project starts with this script. With the default naming convention, this file is called, but we can define any name to our build gradle scripts.
In the example, the first task of gradle is called helloWorld, with using Groovy language we call the Java’s method System.out.println with the Groovy’s shorter equivalent println to print a short message in console.
build.gradle
task helloWorld << {
   println 'Welcome to JCG Gradle Tutorial'
}
To execute the build script, go to the directory where you saved the file and execute the task, running this command:
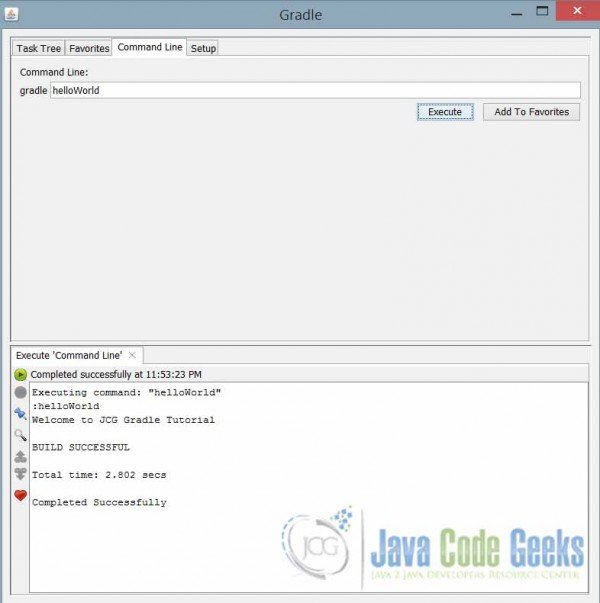
gradle helloWorld, this will be the output.
E:\JavaCodeGeeks JCG\Gradle Tutorial>gradle helloWorld
:helloWorld
Welcome to JCG Gradle Tutorial
BUILD SUCCESSFUL
Total time: 1.838 secs
6. Gradle JVM Options
As any Java based tool, Gradle can set JVM Options to manage the memory space and another stuff. We can use the environment variables GRADLE_OPTS or JAVA_OPTS, this configuration prevents an OutOfMemoryError setting stable values. For example, we can set the maximum memory allocation pool adding the value -Xmx512m in the GRADLE_OPTS variable.
7. Gradle Basic Concepts
In Gradle we have 2 top concepts, that are Projects and Tasks. Any Gradle script is made up of one or more projects, and every project is made up of one or more tasks.
- A Gradle project is any goal what we want to do with Gradle, assemble a JAR, compile a Java project, run Unit tests, deploy an application.
- A Gradle task is the minimum unit of work, represents an atomic piece of work. The main goal is define some tasks to accomplish a Project.
In our first basic task helloWorld we can see what happens:
- When you execute the Gradle helloWorld, Gradle will lookup a task with that name in the default build script build.gradle. If Gradle finds the task, it executes the code with the Groovy engine .
- Every line of code (LOC) between the braces composes the task
- The double << , is the shorthand to define a Gradle task, the longhand is thus:
task helloWorld {
	doLast {
		println 'Welcome to JCG Gradle Tutorial'
	}
}
Yes, the double << is the short form to define the doLast task’s block. We suggest you to use the shorthand way.
Gradle has basic commands that help us to write a more readable and clean code or scripts. Every command have to the shorthand and longhand way to run them.
- –help or -h : Prints out the helper messages.
- –info or -i : Set the logger level to INFO, this level prints a high level of information.
- –debug or -d : Set the Gradle logger level to DEBUG, this is useful for troubleshooting build problems.
- –quiet or -q : Only shows the error messages.
- tasks : Show all availables tasks in the current build script, also displayed the tasks defined by the plugin.
- –gui : Launches the Gradle GUI.
8. Working with Gradle Tasks
In this post we have only worked with the most basic concept tasks, but can we do more than just print some text on the screen?
If we execute the command Gradle tasks, we get the following output:
E:\JavaCodeGeeks JCG\Gradle Tutorial>gradle tasks -q

------------------------------------------------------------
All tasks runnable from root project
------------------------------------------------------------

Build Setup tasks
-----------------
init - Initializes a new Gradle build. [incubating]
wrapper - Generates Gradle wrapper files. [incubating]

Help tasks
----------
components - Displays the components produced by root project 'Gradle Tutorial'. [incubating]
dependencies - Displays all dependencies declared in root project 'Gradle Tutorial'.
dependencyInsight - Displays the insight into a specific dependency in root project 'Gradle Tutorial'.
help - Displays a help message.
projects - Displays the sub-projects of root project 'Gradle Tutorial'.
properties - Displays the properties of root project 'Gradle Tutorial'.
tasks - Displays the tasks runnable from root project 'Gradle Tutorial'.

Other tasks
-----------
helloWorld

To see all tasks and more detail, run gradle tasks --all

To see more detail about a task, run gradle help --task
Displays the list of tasks that we do, including default tasks and in other tasks that we define. So, Gradle is like an agent that perform tasks to carry out the projects that we model.
Default Tasks
Another important concept is the Default Tasks, which are the tasks that run if no task name indicated. Modify the build.gradle script like this:
defaultTasks 'beforHelloWorld'

task helloWorld << {
	println 'Welcome to JCG Gradle Tutorial'
}

task beforHelloWorld << {
	println 'Setting the previous configuration...'
}
If we run gradle in the console, it will execute the beforHelloWorld task.
E:\JavaCodeGeeks JCG\Gradle Tutorial>gradle
:beforHelloWorld
Setting the previous configuration...

BUILD SUCCESSFUL

Total time: 2.685 secs
Task Dependency
The biggest basic concept that we cover in this tutorial is task dependency. What does that mean? Gradle adds prevalence on execution of dependency-on task instead of the task that depends on it. Modify the build.gradle file as follows:
defaultTasks 'beforHelloWorld'

task helloWorld << {
	println 'Welcome to JCG Gradle Tutorial'
}

task beforHelloWorld (dependsOn:helloWorld) << {
	println 'Setting the previous configuration...'
}
If we run gradle -q The output will be:
E:\JavaCodeGeeks JCG\Gradle Tutorial>gradle -q
Welcome to JCG Gradle Tutorial
Setting the previous configuration...
Abbreviated Task Execution
The last basic and useful tip about Gradle tasks, is the abbreviated calling.
In Gradle, if our task’s name is so long, we don’t need to write the complete name to execute them, only specifying the initials in a camelCase format can execute the tasks.
If we run gradle -q hW The output will be:
E:\JavaCodeGeeks JCG\Gradle Tutorial>gradle -q hW
Welcome to JCG Gradle Tutorial
Gradle using regular expressions matches the name of task (helloWorld) and execute it.
9. Conclusions
- Gradle combining the capabilities of earlier build tools such as Ant and Maven allows you to create flexible and maintainable scripts that are interoperable with Java-based technologies.
- The most important concept are the tasks, they are the unit of work in Gradle.
- With predefined tasks we don’t need to make everything by hand.
- Gradle is a user-friendly framework, which can be adopted very quickly compared to its predecessors.
10. Download the Gradle Scripts
You can download the full source code of this example here: GradleHelloWorldTutorial
