In this example we are going to see how yo interact with an SQLite database with your Android Application. SQLite is an Open Source Database for structued data in relational databases. It is embeded in Android, to you don’t have to do anything special to set up or administer an SQLite server (e.g like in a Linux box). Android offers a really fast and conviniet API to work with SQLite databases from applications. It uses a wrapper class, SQLiteOpenHelper which offers three basic API methods to interact with the database:
onCreate(SQLiteDatabase db), called when the database is created for the first time.onOpen(SQLiteDatabase db), called when the database has been opened.onUpgrade(SQLiteDatabase db, int oldVersion, int newVersion), called when the database needs to be upgraded.
to name a few.
For this tutorial, we will use the following tools in a Windows 64-bit platform:
- JDK 1.7
- Eclipse 4.2 Juno
- Android SKD 4.2
1. Create a new Android Project
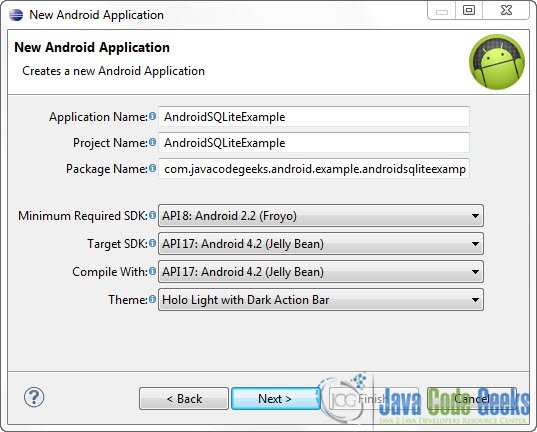
Open Eclipse IDE and go to File -> New -> Project -> Android -> Android Application Project. You have to specify the Application Name, the Project Name and the Package name in the appropriate text fields and then click Next.
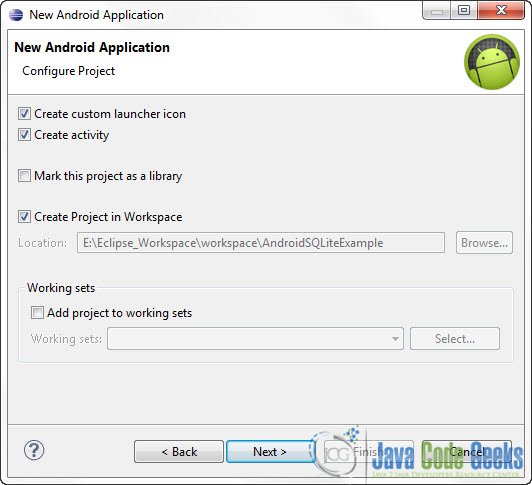
In the next window make sure the “Create activity” option is selected in order to create a new activity for your project, and click Next. This is optional as you can create a new activity after creating the project, but you can do it all in one step.
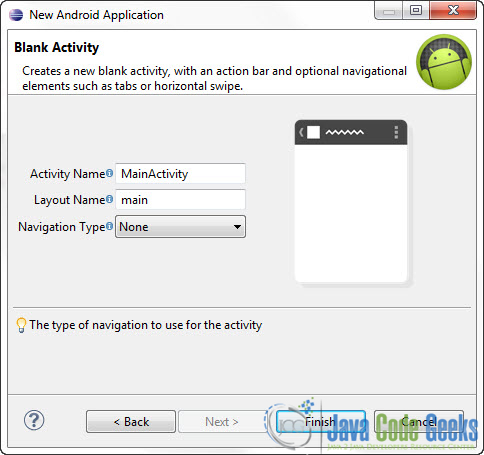
Select “BlankActivity” and click Next.

You will be asked to specify some information about the new activity. In the Layout Name text field you have to specify the name of the file that will contain the layout description of your app. In our case the file res/layout/main.xml will be created. Then, click Finish.
2. Create the main layout of the Application
Open res/layout/main.xml file :
And paste the following code :
main.xml:
<?xml version="1.0" encoding="utf-8"?>
<RelativeLayout xmlns:android="http://schemas.android.com/apk/res/android"
    android:layout_width="match_parent"
    android:layout_height="match_parent"
    android:orientation="vertical" >
    <EditText
        android:id="@+id/editText1"
        android:layout_width="wrap_content"
        android:layout_height="wrap_content"
        android:layout_alignParentLeft="true"
        android:layout_alignParentTop="true"
        android:ems="10" >

        <requestFocus />
    </EditText>

    <Button
        android:id="@+id/addBtn"
        android:layout_width="wrap_content"
        android:layout_height="wrap_content"
        android:layout_below="@+id/editText1"
        android:onClick="addUser"
        android:text="Add New" />

    <Button
        android:id="@+id/deleteBtn"
        android:layout_width="wrap_content"
        android:layout_height="wrap_content"
        android:layout_toRightOf="@+id/addBtn"
        android:layout_below="@+id/editText1"
        android:onClick="deleteFirstUser"
        android:text="Delete First" />

    <ListView
        android:id="@android:id/list"
        android:layout_width="match_parent"
        android:layout_height="wrap_content"
        android:layout_alignParentLeft="true"
        android:layout_below="@+id/deleteBtn" >
    </ListView>

</RelativeLayout>
3. Create a custom SQLiteOpenHelper
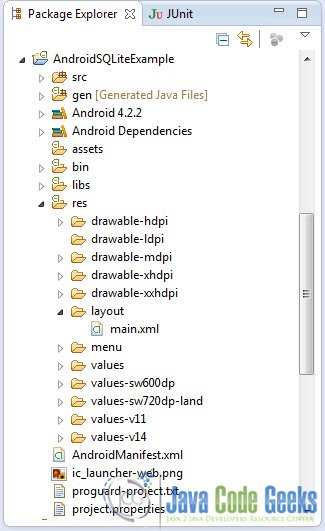
Now we have to write the code of the application. First we have to create a custom SQLiteOpenHelper. We have to create a new class for that. Use the Package Explorer to navigate to the Package of the source files:

Right click on the package com.javacodegeeks.android.androidsqliteexample and go to New -> Class, fill out the form as in the picture below and press Finish:

Open the source file and paste the following code:
DataBaseWrapper.java:
package com.javacodegeeks.android.example.androidsqliteexample;

import android.content.Context;
import android.database.sqlite.SQLiteDatabase;
import android.database.sqlite.SQLiteOpenHelper;

public class DataBaseWrapper extends SQLiteOpenHelper {

	public static final String STUDENTS = "Students";
	public static final String STUDENT_ID = "_id";
	public static final String STUDENT_NAME = "_name";

	private static final String DATABASE_NAME = "Students.db";
	private static final int DATABASE_VERSION = 1;

	// creation SQLite statement
	private static final String DATABASE_CREATE = "create table " + STUDENTS
			+ "(" + STUDENT_ID + " integer primary key autoincrement, "
			+ STUDENT_NAME + " text not null);";

	public DataBaseWrapper(Context context) {
		super(context, DATABASE_NAME, null, DATABASE_VERSION);
	}

	@Override
	public void onCreate(SQLiteDatabase db) {
		db.execSQL(DATABASE_CREATE);

	}

	@Override
	public void onUpgrade(SQLiteDatabase db, int oldVersion, int newVersion) {
		// you should do some logging in here
		// ..

		db.execSQL("DROP TABLE IF EXISTS " + STUDENTS);
		onCreate(db);
	}

}
4. Create a Student class.
So this class will represent a Student stored in a database:
Student.java
package com.javacodegeeks.android.example.androidsqliteexample;

public class Student {

	private int id;
	private String name;

	public long getId() {
		return id;
	}

	public void setId(int id) {
		this.id = id;
	}

	public String getName() {
		return this.name;
	}

	public void setName(String name) {
		this.name = name;
	}

	@Override
	public String toString() {
		return name;
	}
}
5. Create a StudentOperations class.
Basically this wrapper will describe and implement the specific database operations (e.g. add, delete) on a Student object.
StudentOperations.java:
package com.javacodegeeks.android.example.androidsqliteexample;

import java.util.ArrayList;
import java.util.List;

import android.content.ContentValues;
import android.content.Context;
import android.database.Cursor;
import android.database.SQLException;
import android.database.sqlite.SQLiteDatabase;

public class StudentOperations {

	// Database fields
	private DataBaseWrapper dbHelper;
	private String[] STUDENT_TABLE_COLUMNS = { DataBaseWrapper.STUDENT_ID, DataBaseWrapper.STUDENT_NAME };
	private SQLiteDatabase database;

	public StudentOperations(Context context) {
		dbHelper = new DataBaseWrapper(context);
	}

	public void open() throws SQLException {
		database = dbHelper.getWritableDatabase();
	}

	public void close() {
		dbHelper.close();
	}

	public Student addStudent(String name) {

		ContentValues values = new ContentValues();

		values.put(DataBaseWrapper.STUDENT_NAME, name);

		long studId = database.insert(DataBaseWrapper.STUDENTS, null, values);

		// now that the student is created return it ...
		Cursor cursor = database.query(DataBaseWrapper.STUDENTS,
				STUDENT_TABLE_COLUMNS, DataBaseWrapper.STUDENT_ID + " = "
						+ studId, null, null, null, null);

		cursor.moveToFirst();

		Student newComment = parseStudent(cursor);
		cursor.close();
		return newComment;
	}

	public void deleteStudent(Student comment) {
		long id = comment.getId();
		System.out.println("Comment deleted with id: " + id);
		database.delete(DataBaseWrapper.STUDENTS, DataBaseWrapper.STUDENT_ID
				+ " = " + id, null);
	}

	public List getAllStudents() {
		List students = new ArrayList();

		Cursor cursor = database.query(DataBaseWrapper.STUDENTS,
				STUDENT_TABLE_COLUMNS, null, null, null, null, null);

		cursor.moveToFirst();
		while (!cursor.isAfterLast()) {
			Student student = parseStudent(cursor);
			students.add(student);
			cursor.moveToNext();
		}

		cursor.close();
		return students;
	}

	private Student parseStudent(Cursor cursor) {
		Student student = new Student();
		student.setId((cursor.getInt(0)));
		student.setName(cursor.getString(1));
		return student;
	}
}
6. Code the MainActivity
Open the source file of the main Activity and paste the following code:
MainActivity.java:
package com.javacodegeeks.android.example.androidsqliteexample;

import java.util.List;

import android.app.ListActivity;
import android.os.Bundle;
import android.view.View;
import android.widget.ArrayAdapter;
import android.widget.EditText;

public class MainActivity extends ListActivity {

	private StudentOperations studentDBoperation;

	@Override
	public void onCreate(Bundle savedInstanceState) {
		super.onCreate(savedInstanceState);
		setContentView(R.layout.main);

		studentDBoperation = new StudentOperations(this);
		studentDBoperation.open();

		List values = studentDBoperation.getAllStudents();

		// Use the SimpleCursorAdapter to show the
		// elements in a ListView
		ArrayAdapter adapter = new ArrayAdapter(this,
				android.R.layout.simple_list_item_1, values);
		setListAdapter(adapter);
	}

	public void addUser(View view) {

		ArrayAdapter adapter = (ArrayAdapter) getListAdapter();

		EditText text = (EditText) findViewById(R.id.editText1);
		Student stud = studentDBoperation.addStudent(text.getText().toString());

		adapter.add(stud);

	}

	public void deleteFirstUser(View view) {

		ArrayAdapter adapter = (ArrayAdapter) getListAdapter();
		Student stud = null;

		if (getListAdapter().getCount() > 0) {
			stud = (Student) getListAdapter().getItem(0);
			studentDBoperation.deleteStudent(stud);
			adapter.remove(stud);
		}

	}

	@Override
	protected void onResume() {
		studentDBoperation.open();
		super.onResume();
	}

	@Override
	protected void onPause() {
		studentDBoperation.close();
		super.onPause();
	}

}
7. Run the Application
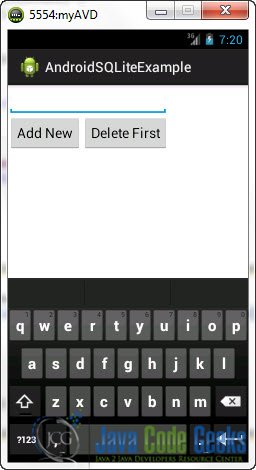
This is the main screen of our Application:
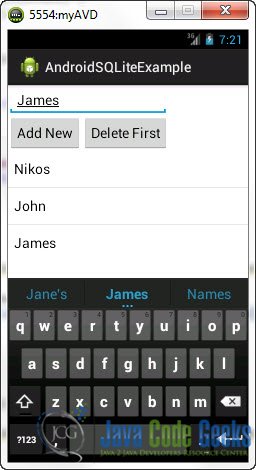
Now, when you want to add some Students:
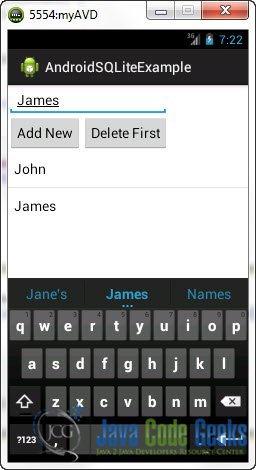
And if you click Delete First:
Download Eclipse Project
This was an Android ExpandableListview Example. Download the Eclipse Project of this tutorial: AndroidExpandableListeView.zip

link not working bro